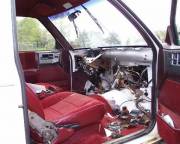
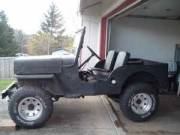
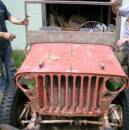
This is a detailed list of the products, purchases, and decisions I’ve made. I’ve added links to posts which contain pictures or more information regarding the part. It will continue to be updated over time.
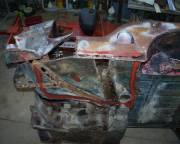
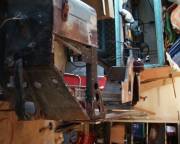
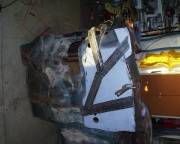
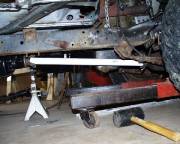
Frame: I’m using a 1973 CJ-5 Frame that was part of a running CJ-5 I purchased. I stripped and sold most of the parts, retaining mostly just the axles, frame, gas tank, and misc pieces. I stripped the frame of everything, including the shackles, cleaned it, then painted it. During the process I added permanent front and rear bumpers, a new front cross member, and a new engine mount system. The frame is plenty beefy for the V6, so I didn’t do any additional boxing in except for the area from the new cross member to the new front bumper. Here’s an overview of the changes to the front of the frame as well as images of the backend. Here’s the painted frame.
Front Axle: This is a stock Dana 30 from a 1973 CJ-5. Except for changing the spring pads, this is a stock Dana 30. I chose this because I had it. It is stronger than the Dana 27 and 25 and was easier for me to obtain than the Dana 44 for the front. The gears and seals were in good enough condition that I did not rebuild the pumpkin. I have not installed a locker or posi because I did not have one installed in my last jeep and never felt like I missed having it. So, for the time being it will remain open.
Front Brakes: I’m using the standard 1973 drum brakes, which are rebuilt.
Rear Brakes: I’m using the 11″ drum brakes from the ’73 CJ-5 I dismembered.
Power Brakes: I’m using the Power Brakes from a early 1990ish Cherokee. Along with that, I’m using the combonation valve from the same cherokee. Thus far, between the drums and the power braking system, the brakes have rocked.
Swing Pedal (brake): These swinging pedals came from a junked 1990ish cherokee. The nice thing about this setup is that I have both the clutch/brake setup and a wide brake (automatic tranny) setup. Therefore, swapping to a clutch, if necessary, will be simplified.
Rear Axle: This is a stock Dana 44 from a 1973 CJ-5. I purchased a locker off of craigslist. While installing the locker, I discovered the R&P was bad (broken teeth), so I found another R&P for cheap off of Craigslist and installed it and the locker. The rebuild kit for the rear-end was purchased off of Craigslist. Here’s a post discussing disassembly. Here I put it back together.
Front Springs: The front springs are 2 1/2 inch springs from the rear of a Wrangler that I purchased as part of another jeep. I Added an additional leaf from another left over spring set to beef them up slightly. I also redrilled the center hole on the main spring leaf, repositioning forward about 3 inches. I used stock wrangler springs so that I could easily update them with aftermarket wrangler springs in the future. The shackles are reversed. The front spring holder is homemade. The rear spring holder was purchased and welded to the bottom of the frame. The shackles are aftermarket that modified MB I purchased. I’ve used stock cherokee u-bolts and u-bolt plates. Here’s some pics. And, more pics.
Front Shocks and Shock Mounts: The shocks came from Bucks, a local 4 wheel drive store. The mounts I made myself. They ended up bigger than I would like, but they’ll do for now.
Rear Springs: The rear springs are 2 1/2 inch springs from a late 80s cherokee out of a junk yard. I redrilled the center hole of these springs. Again, I chose these as they’d be easy and inexpensive to replace. I purchased the rear shackles from summit, but they were too long (I misunderstood the description) and had to cut them down (the good news was that I could cute them to the exact length I wanted them). Here’s some pics.And, more pics.
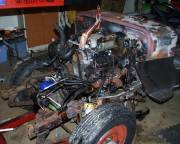
Engine: The engine core is a 1980 buick V6 231. The block has not been bored. It has 9.1 Compression, Hypereutectic Pistons, 288 Duration Cam, unported heads, Aluminum Edelbrock Performer Intake 4 Barrel, Holley Aluminum Valve Covers, High Volume Oil Pump with an additional hardened steel plate and .015″ of extra gasket spacing, dual external oil filter, and chrome headers (well the top part is still chrome). The former engine owner believe this engine would likely put out 250hp given the updates, however I can’t verify that. Here are the engine mounts. I take apart the engine and discover a bad crankshaft. I found a good deal on a V6 that has a good crankshaft. Here, I find Cracks in the heads.
Remote Dual Oil Filters: I’ve got a dual remote oil filter system that came with the engine I purchased, so I decided to give it a try. I figured it would also act as a cooling system.
Oil Pump: I read enough information that I was strongly encouraged NOT to use a high volume pressure oil spring with my 1980 Buick V6. Here’s a little about the oil pump. The oil pressure runs about 60 PSI with the normal spring.
Carburetor: This is an old Carter Competition Series 500 CFM that I got as part of a engine trade. I tried bidding on a rebuild kit off of ebay, but after an unsuccessful bid offer, I turned to Summit (CRT-902317A) for the kit.
Transmission: I decided to go with a TH-350 transmission. It’s one of the shorter auto trannys, it’s cheap to maintain, parts are plentiful and it’s a strong tranny. I struggled mightly with the tranny decision, as I’ve always preferred a clutch. However, after extensive reading, I decided I’d give the automatic a try, as it would give me an excuse to learn more about them, as well as compare and contrast the differences. While TH-350s are pretty common in junkyards and on craigslist, finding a short shaft with the TH-350 adapter for a Dana 18/20 transfercase is much more difficult (the adapter alone is $500 new). After much searching and waiting, I finally located a tranny that had been rebuilt several years ago and only used a few times before the owner wrecked his jeep. I chose not to rebuild the tranny at this time; I’m gonna see how it runs and then make a decision on whether I can tolerate the auto in the jeep before I dump any money into a rebuild of it. I’m using a B&M shift assembly I obtained as part of my engine purchase. Here’s a discussion of the changes to the transmission shifting unit.
Tranny Cooler: I pulled one from the local junkyard.
Transfer Case: Because of the center pumpkin of the ’73 Dana 44 rear end, I went with a Dana 20 transfercase. As I’ve chronicled in the video below, I improved the Dana 20 gearing by using Dana 18 gears and obtaining a Rear sliding gear originally used in the early Bronco Dana 20 transfercases that I purchased from the Bronco Graveyard. Here’s a transfercase post, an overview of how the gears work, and a look out how I set up the dual shifte
Paint: I purchased the paint from an ebay power seller. I was supposed to receive the color Aqua Pearl, unfortunately, though I received a can labelled aqua pearl, it was actually a darker color (likely Teal Green). I didn’t realize how much darker until I started spraying it onto the body. This is one product I won’t purchase over the net anymore.
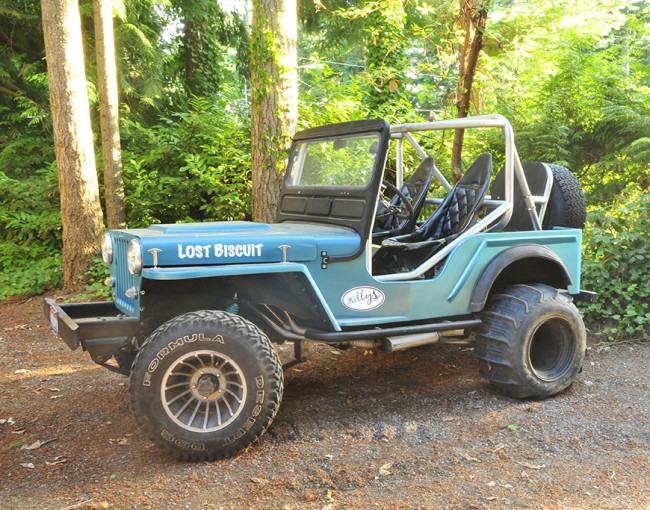
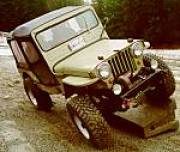
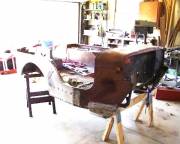
Body: I obtained a fiberglass body that was in horrible shape. I’ve nursed it back to health through a steady diet of fiberglass and resin. I believe I’ve got an older bobcat body, but I couldn’t say for sure. I prefer the body style with the look of its wider lip that encircles the interior of the body. While fiberglass bodies can be a little or a lot lighter (depending on the body style), they aren’t quite as tough as a metal body. Fiberglass bodies can still be found from time to time on craigslist. I will do my best to build a description of as many of them as I can. Here’s a number of pics of rebuilding the body. Here, I’m painting the body and part 2 of painting.
Fenders: Through craigslist I found a never used bobcat racing body that included fenders and a grille. I bought the entire package then resold everything but the fenders. I chose these fenders over new fenders because 1) they were cheaper and 2) the newer fiberglass fenders from places like JC-Whitney’s came with an extra lip in the front that I didn’t like. Once purchased, I had to cut and extend them, and then create the sections that wrapped around the headers. Here I start the extension process. Here I complete the process.
Grille: The grille is the only original part of the jeep left. My experience was that the fiberglass grilles just weren’t strong enough to hold up to daily wear and tear. So, I took the original 1949 grille and stripped it down pretty bare. Then, because I wanted to use the 5 1/2 inch rather than 7 inch headlights, I had to fiberglass down the headlight holes. I chronicle the grille here.
Headlights: I got my headlight housings from a local junkyard that has a huge inventory of cars from the 40s, 50s and 60s. The housings allow the use of a 5 1/2 inch rather than the standard 7 inch headlights, creating a different look. The housings are from an Oldsmobile Dynamic 88, which actually used two sets of these on each side. I discuss them here.
Hood: I created the hood out of fiberglass using a homemade mold. Due to the height of the intake manifold, I was later forced to add a scoop. I hope to redo the hood and make some minor improvements next time.
Radiator: The radiator was purchased through Doug Herbert High Performance Parts. Aluminum Radiator (GRI1-25241-X) was $179.99, the best price I found anywhere. The fit was perfect, 27 1/2″ x 15 3/8″ x 3″.
Fan: I found the fan through ebay seller North Coast Performance, a ProComp Dual 10″ combo with a thermostat switch. It was $60 plus shipping. It covers nearly all the radiator without sticking below the radiator. I chose to fiberglass the two fans together and then create an external mount to more firmly hold the fans in place. Between the two fans, each rated at 1250 CFM, and the aluminum radiator, I except to have no overheating problems. Here’s a little about my decision process regarding fans.
Wiring: I used a product called KICKZ, a product I won through an ebay bid of $143, which was one of the best prices I’ve come across. I was pleased with the ease of installation and organization of the wiring. The wire gauge was heavy and the wiring had some thick insulation. Nothing about the harness felt cheap to me. Here’s some posts about the wiring.. getting the wiring, installing it 1, installing it 2, installing it 3, installing it 4.
Gauges: I purchased brand new Equus gauges from schucks. Here’s what I did to install a transmission temp gauge (actually just an engine temp gauge) into the tranny line.
Wheels: I’ve purchased two sets of Aluminum Hurricane Rims, which are far rarer than I realized. You can view the first set here and the second set here.
Tires: I’ve got 7 old desert dogs which I will use for racing. I haven’t decided on what type of new tires I’ll purchase.
Roll Cage: The roll cage is 2″ diameter .12 thick CREW Tubing that is connected to the frame in six places. The tubing is mounted in 6 places. The front plates use 4 3/8″ grade 8 bolts at each plate. The middle plates use 4 1/2″ grade 5 bolts at each plate. The rear bolts use 2 3/8″ grade 8 bolts at each connection. The plates are 1/4″ thick plate. Here’s an overview of the final build and research related to my cage.
I built a bender to bending my tubing using plans from http://www.gottrikes.com.
Here’s an early mockup of the cage.
Seats: I used older fiberglass seats that I had to patch. I used these same seats in my last build and really liked them. I discuss the rebuild seats here. I show how they connect to the frame here. The seat covers are home made using about 2.5 yards of black leather-like vinyl.
Gas Tank: This is a stock CJ-5 gas tank from the 1973 CJ-5.
Gas Pedal: This is a custom pedal made out of a piece of aluminum and covered with some skateboard sand-paper-like covering. On the back, I’ve used a couple rollers so that the pedal rolls down gas pedal lever. I found this worked exceptionally well while racing and jeeping, as it kept the pedal from moving due to bumps.
Power Steering: I used a common saginaw hydraulic steering mechanism. I borrowed an idea from a friend to neatly connect the tubing from the pump to the steering unit. You can view what I’ve done to develop the idea and then what it looks like when it’s finished. Here’s a video on fixing a shaft leak on the powersteering housing.
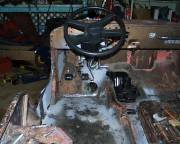
Steering Column: The steering column came out of a late 80s cherokee. It seems to be a GM-type column to me, as all the wiring matches the GM columns. At first, I cut the steering housing down a couple inches, but then discovered I needed to the extra length (oops), so I welded back the extra length. I created a custom attachment to bold the column onto the fiberglass dashboard, connecting it to the brake housing to improve the strength.
Turn Signal Indicators: These are M-38 dash lights I re-purposed for indicators. You can see how I did this here.

