Features Research Archives

To Top

Builds: More pics from Paul

• CATEGORIES: Builds, Features • TAGS: This site contains affiliate links for which I may be compensated.

If you didn’t see the first round of pics, go here.  These are a second round of pics that Paul generously provided. Thanks again Paul and great work!

No stories with these pics, just eye candy 🙂

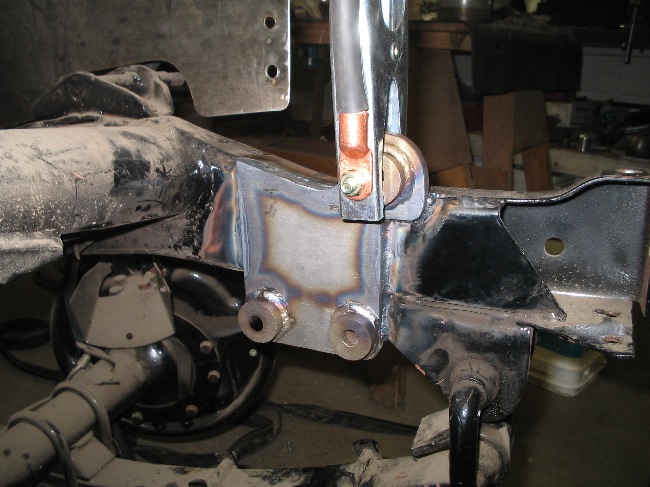
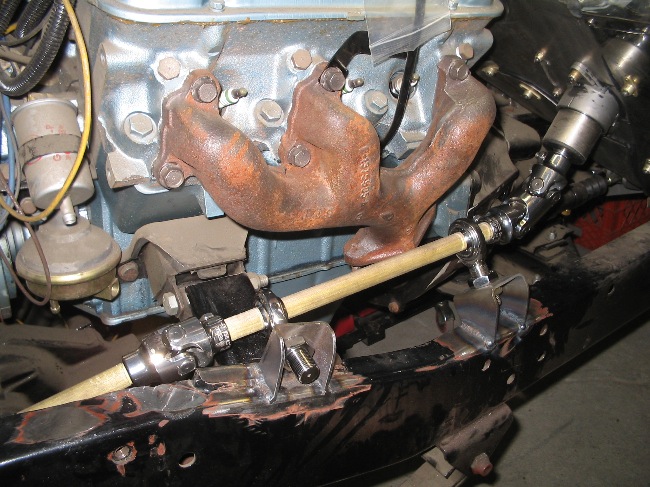
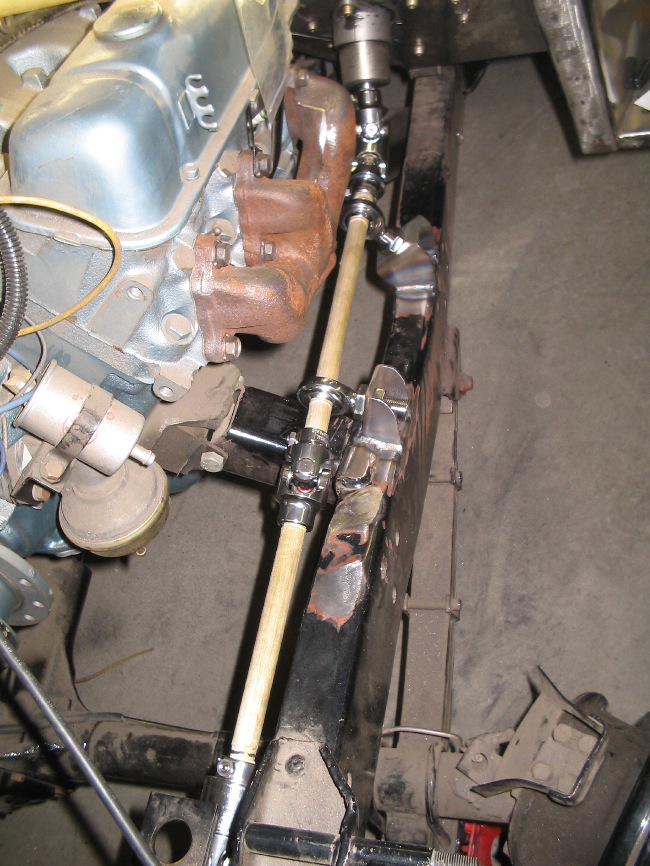
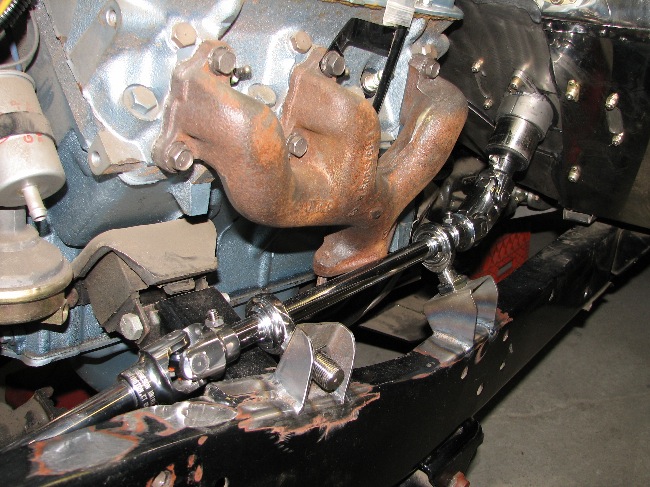
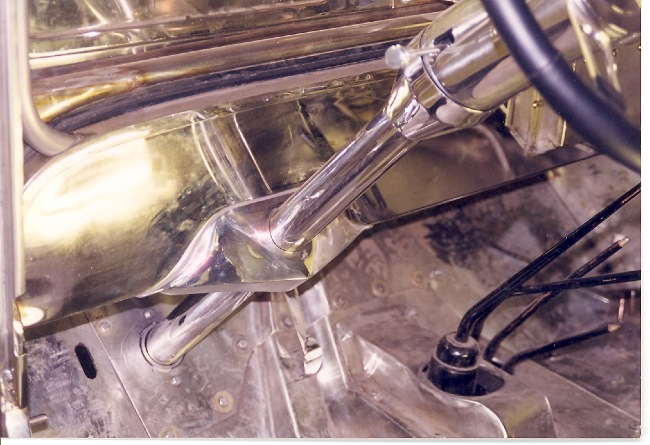
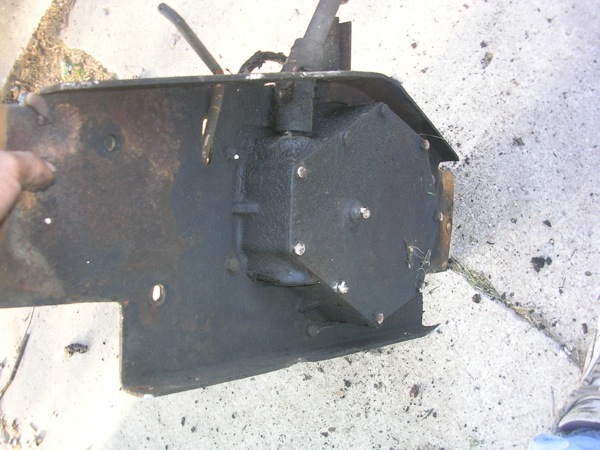
Here’s the steering:

steering_plate

steering

steering2

steering3

steering_column

steering_column2

steering_column3

Click on the link below to see more pics …..

Continue reading

 
To Top

Reader Builds: Paul’s Stainless M-38 Project

• CATEGORIES: Builds, Features • TAGS: This site contains affiliate links for which I may be compensated.

highway_signUPDATE: See the second round of pics here

A reader named Paul contacted me today.  He mentioned he was working on a stainless jeep.  Would I like to see some pictures?

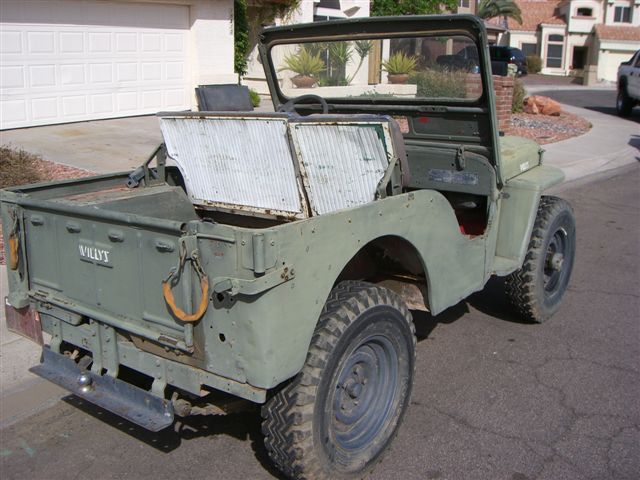
By now you know my response … of course I would!  Well,  was I in for a treat.  Paul has got that unique combination of patience, welding talents, and ingenuity (check out his shifter knobs made from $5 stainless cups from a chinese restaurant).  He also seems to be a victim of the dreaded Willys sickness, which seems to coincide and peak with the dark Alaskan Winters.  So, for the last 23 years, Paul has been treating his Willys sickness by following the beat of his own drum as he rebuilds his (and his father’s) 1952 M-38.  Here’s his story and pics (Thanks for sharing Paul!):

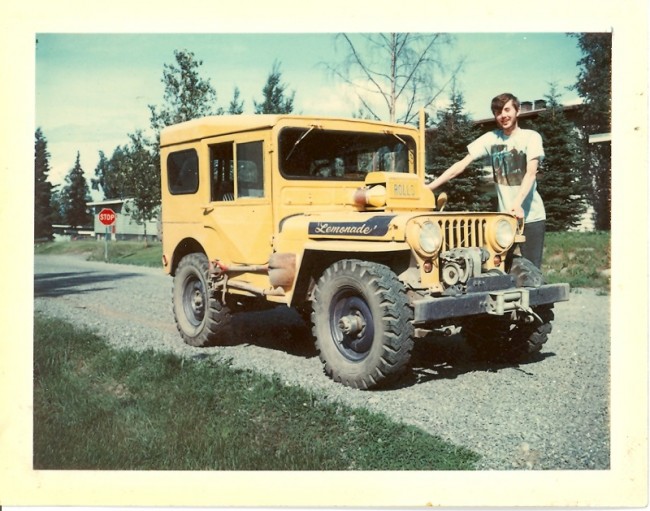
lemonade

My father bought an all original 1952 Willys M 38 in 1964 from a local guy here in Anchorage who purchased three Jeeps as military surplus.  The M 38 my father bought came with a full aluminum top and doors (commonly but incorrectly called an Arctic Top), a 20,000 btu Southwind heater with all the heating ducts, a built in gas fired engine and battery heater, and a 24 volt waterproof electrical system all coated with numerous layers of olive drab paint.  This was my dads everyday driver for eight years until it was finally replaced by a new pickup truck in 1972 and the Willys passed into my ownership for the sum of ONE dollar.  I got screwed on this deal, here it is 37 years later and I’m still dumping money into this never ending project.  Boy, if you want to really mess with a kid give him a Jeep and he’ll be twisted for the rest of his life!

frame

I drove the Jeep off and on (it broke alot and money was tight) until fall of 1985 when just about everything broke, quit working or caught fire but it did get me home one last time.  It was decision time, should I scrap it or perform a rebuild to end all rebuilds?   January 1st, 1986 was the day I decided to rebuild the Willys and make some much needed modifications so I could keep up with traffic and even have brakes that worked.  Geeze, this thing was so slow (5.38 axle gears and an anemic flathead engine) bus loads of Nuns were giving me the finger.  Everywhere I went it looked like I was leading a parade and I couldn’t take back roads because there aren’t any.  We’re lucky to have the limited road system right now and there are no extra roads planned in the future.

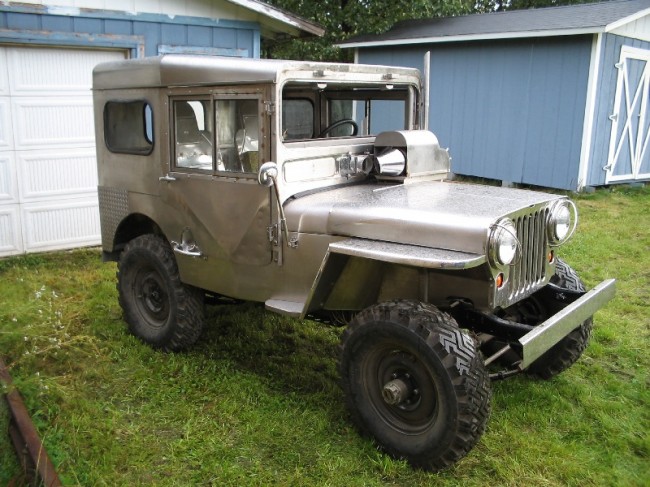
I’d been drooling over Acme Truck Parts advertisements showing Stainless Steel Jeep bodies (I still have the magazine) so I ordered the complete body (tub, windshield, front fenders, grille, tailgate and floorboards) for the gigantic sum of $5,000 dollars paid upfront.  Lots of delays, problems and denials later the body finally arrived along with a new steel frame for $500 bucks plus shipping.  To condense this story down I spent the first five years rebuilding the body so the parts would fit before I modified the windshield to a vertical mount to match the original aluminum top.

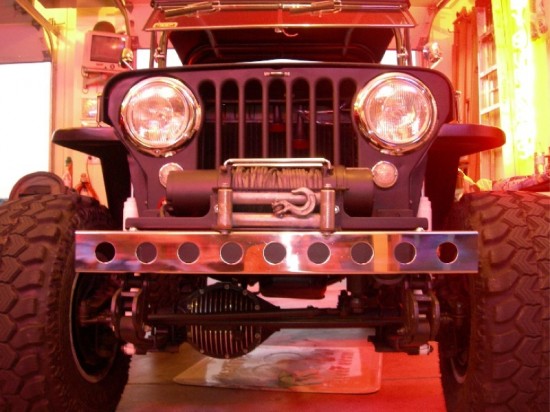
The more I inspected the top the more hidden damage I found so I cut the top apart and duplicated each 50 thousandth thick aluminum piece in 50 thousandth thick stainless steel keeping the outside appearance original but modifying the interior so I’d fit in it better.  Since I’d duplicated the top it made sense for me to duplicate the doors, window sliders, hinges and door handles from stainless also.  I’d purchased stainless seats but I made my own fuel tanks and I put one under the passenger side instead of the original storage compartment.  That’s why the Willys has a recessed fuel filler on each side.  I know, the original M38 had huge fuel caps but the only stainless caps I could find were normal sized ones so the filler neck is much smaller in diameter and the recessed fillers were built accordingly.

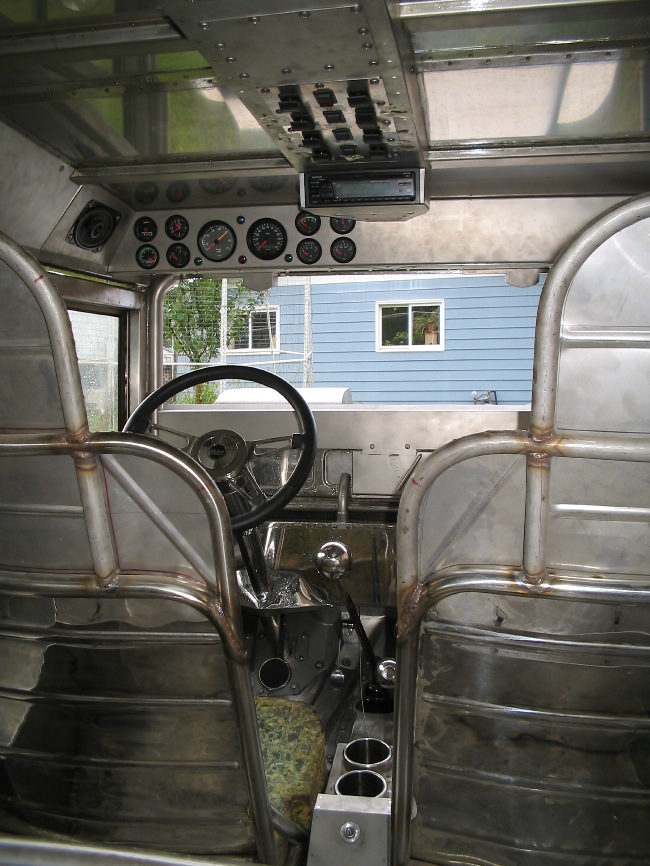
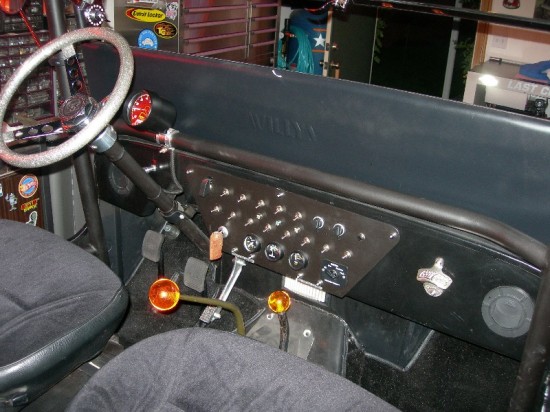
When I sit in the Jeep the top of the dash is below my knees so I moved the instrument panel above the windshield and fabricated an overhead center console filled with a CD player and lots of switches.  Between the seats is a pair of stainless cup holders (1/4″ thick so I don’t worry about them getting damaged), the ignition switch and a bunch of shift levers.  The normal three speed, Warn overdrive, four wheel drive and high/low range … I call it a four on the floor!  The engine was replaced with a Buick 225 odd fire V 6, 11 inch drum brakes with hanging clutch and brake pedals, a hydraulic clutch slave and master cylinder and of course a five position stainless steel tilt steering column complete with a leather wrapped stainless steering wheel custom made by Ididit in Michigan.  The steering column alone has a heck of a story about it but that will wait for another time.  I’m just trying to give you a brief overview covering the last 23 years.

I’m not done, I’m getting closer but there’s still lots of items left on my to do and to buy list but at least I’m closer to being done than I was 23 years ago!  Normally I don’t like to say anything bad about my mom but I have to admit it appears she raised an idiot.

passenger_side

back

inside

inside2

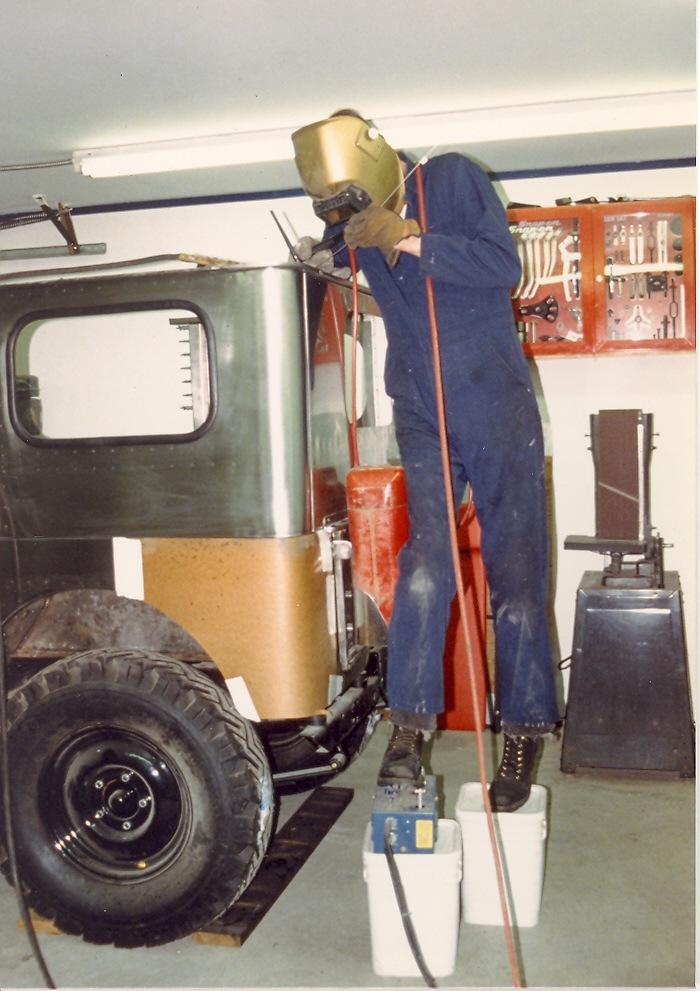
welding_on_buckets

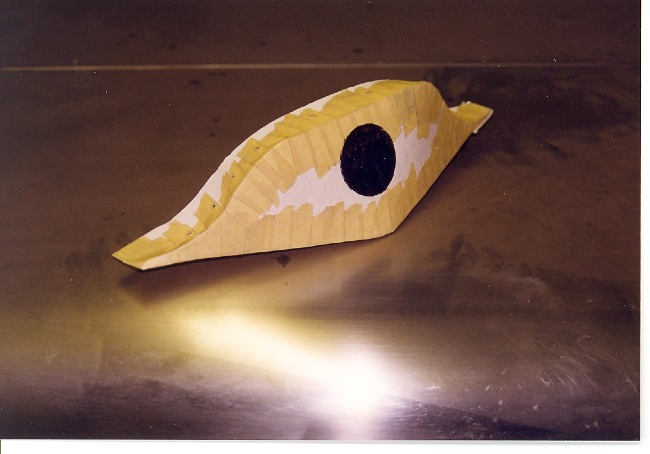
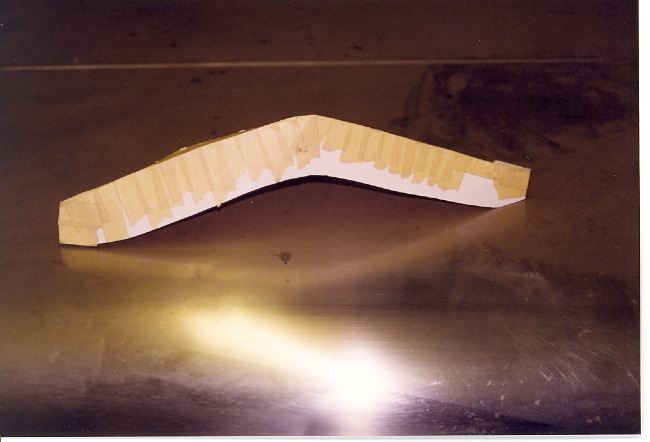
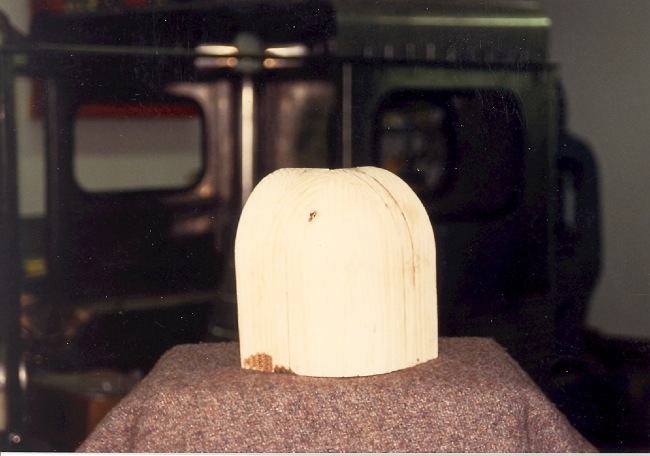
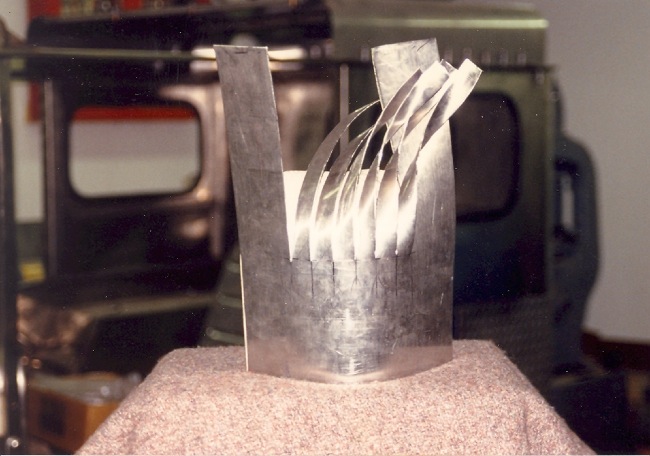
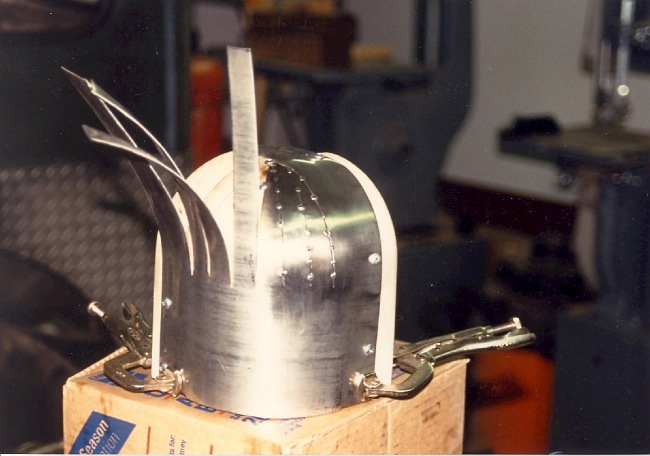
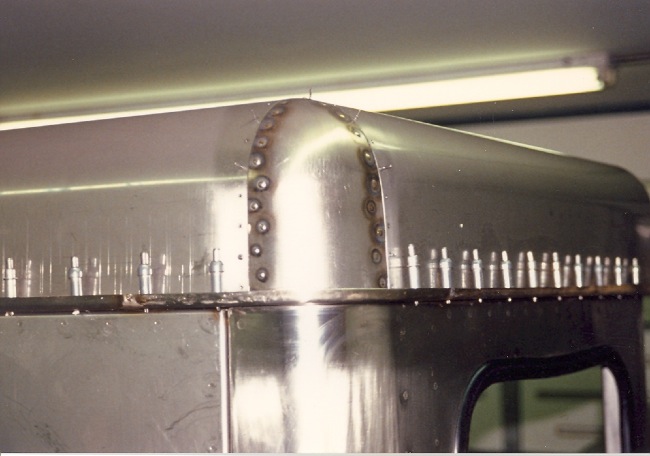
[Editor’s Note:  Paul comments on the roof corners. The next four pics show the creation of a corner]   It took me four tries to make the first successful rear corner on the Willys top, the initial three attempts just irritated the metal and burned my fingers.  By the time I finally stumbled on the magic formula for making compound corners in stainless each successful corner took twenty hours to build.  The left rear corner (drivers side) is corner number four and the right rear corner (pass. side) is corner number five.  Naturally I had stupid people visit to see the progress on the Jeep, look at the corners and ask “What else have you done?”   I’m pretty sure it’s ok to kill the really stupid folks among us, don’t dumb people cause global warming or something?

corner1

corner2

corner3

corner4

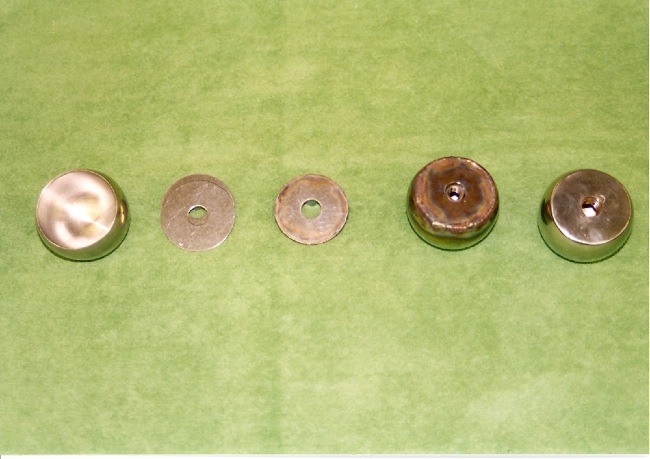
[Editor’s Note:  Below is the stainless cup transformed into a shifter knob]

The Goddess (that’s my girlfriend, her name is Deborah but many years ago she told me to call her the Goddess so I do and she’s still here) wanted to go out for oriental food since she didn’t feel like cooking so we went to an All You Can Eat and Keep Down Chinese buffet.  Naturally she wanted tea but I had a Coke which I just about blew out my nose when I saw the waitress setting down double wall stainless steel tea cups on the table.  Not only were these tea cups the perfect size for gearshift knobs, the bottom of the cup had an embossed ring slightly larger than a nickel.  With a stainless nut welded to a stainless fender washer and this assembly welded to the teacup, the welds ground down and buffed, the new shift knob installed on the lever I finished this installation by attaching a Buffalo nickel in the embossed ring.  I really did buy these teacups from the buffet folks, it’s kind of difficult to steal four cups from a table with only two people sitting there but I only had to give them five bucks each!  What a deal !  The big knob on the transmission lever was some kind of float for a pump operating in caustic chemicals which another friend found and gave to me.

transfercase_knobs

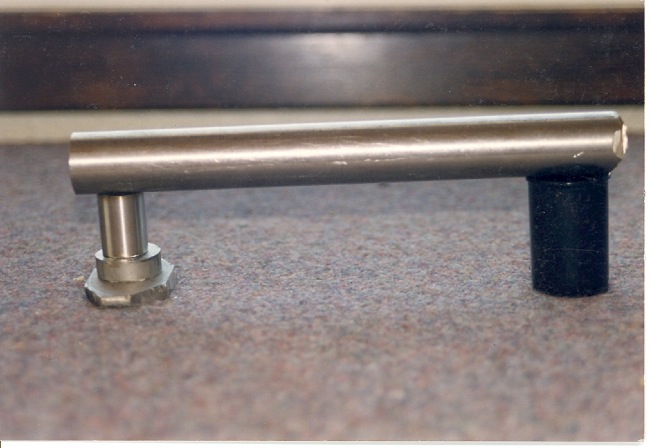
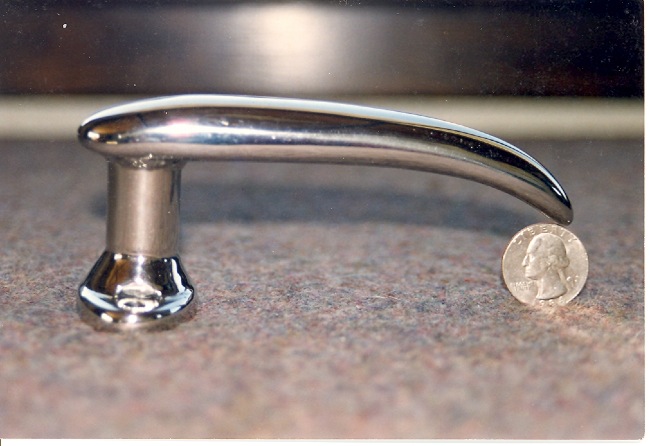
[Paul didn’t explain these, but this shows the transformation from stainless pieces into a door handle]

door_handle1

door_handle2

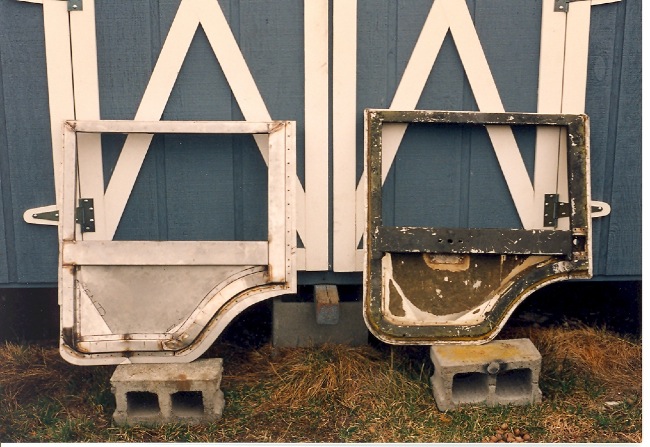
[Editor’s Note:  You can see the old aluminum doors (right) and new stainless doors (left)]
doors

 
To Top

Ebro Trucks from a Jeep Pickups website

• CATEGORIES: Features, Fire/Police/Industry Vehicles, International, Unusual This site contains affiliate links for which I may be compensated.

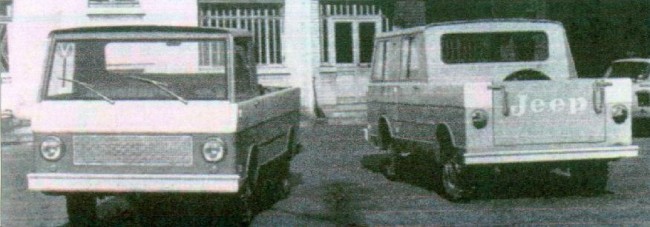
Here’s some a couple great pics of an early Ebro Cameador.  You can view more images at http://www.angelfire.com/nb2/jeeppickups/Ebro.html.

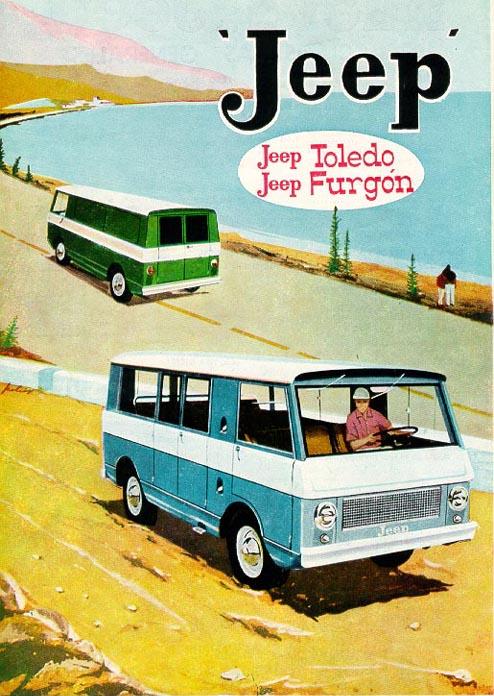
Jeeps first started being assembled in Spain in 1952 by a company called VIASA, which means Vehículos Industriales y Agrícolas, S.A in spanish. I am not sure if VIASA ever made pickups, as I cannot find any records of them being produced. However, in the late 1970’s VIASA was absorbed into EBRO, another spanish company. The only pickup that I know of produced by EBRO was called the Campeador. It was a forward control pickup available in either single or double cab version, which was called the Duplex, as well as a van, called the Toledo/Furgon. At some time, Hotchkiss in France also produced these vehicles, but I can’t find any pictures of them. Production of these vehicles was from 1971-1985 in France.  The Ebro name was discontinued in 1980.

ebro_jeeps

brochure_ebro_van

 
To Top

Wooden Jeep Sonora, CA **SOLD**

• CATEGORIES: Features, Models, Unusual, Wood bodies This site contains affiliate links for which I may be compensated.

UPDATE: **SOLD** Was $600.

It runs and drives.

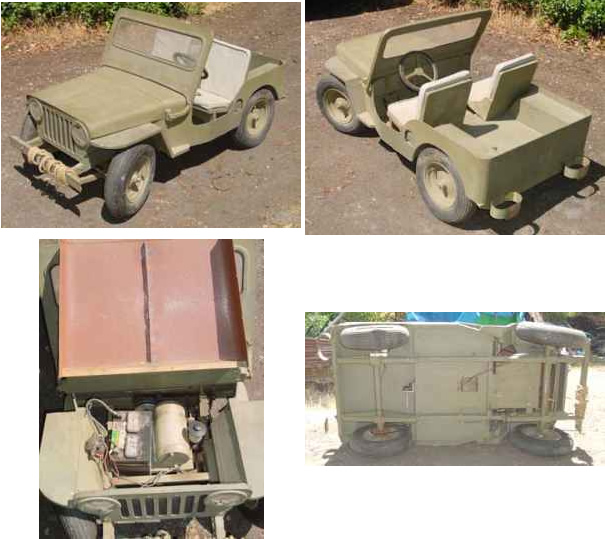
“This is a custom built 1/4 scale Willys Jeep with a wood and metal body using an electric motor from a walk along golf cart. It has a single disk brake and chain drive. The wheels are from a wheelbarrow. A real craftsman made this and he had lots of time on his hands!”

wooden_jeep_mini_sonora

 
To Top

The CJ-3B Page Interviews Jim & shows off his past 3Bs

• CATEGORIES: Features, News This site contains affiliate links for which I may be compensated.

Jim’s become a good friend.  He is full of stories, jeeps and life (and apparently cooks some mean brisket, too).  Derek Redmond gave him a call the other day and asked him to do a story for the CJ-3B Page.  It’s a great story and a nice synopsis of a good niche he’s carved for himself.  You might also remember that Jim builds seat covers that have been selling very well — buyers around the world are enjoying the covers.  Congrats Jim!  Below is one of his before and after projects (go here to see more pics of this):

Before:

After:

 
To Top

Stainless Steel Flattie Winston, OR **SOLD**

• CATEGORIES: CJ-3A, Features, stainless/jewels, Unusual • TAGS: This site contains affiliate links for which I may be compensated.

stainless_flattie_winstonUPDATE: **SOLD** Was $8000

(08/21/09) It appears the suspension is customized as well.

“Stainless Steel Body (Body cost 6000.00) 350/350hp 4 bolt with 350 trans with extra clutches. Assembled with Advanced Adapters parts. Less than 1000 miles on engine and trans. Aluminum custom built radiator. Over 17,000.00 invested.”


To Top

The “Jeep Coat” aka The Mackinaw Jacket

• CATEGORIES: Features This site contains affiliate links for which I may be compensated.

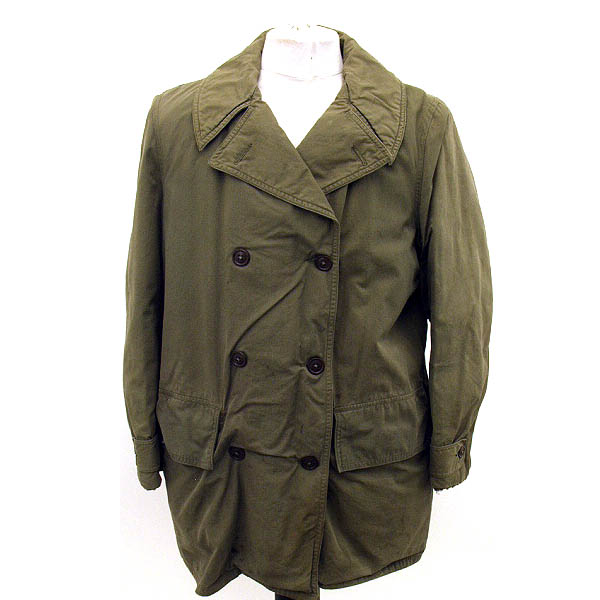
While doing some research, I wandered through Vintagetrends.com and happened upon a “jeep coat”. Having never heard of one of these, I did a quick search and landed on the olive-drab.com site.  The Olive-drab reports “the heavy ‘Coat, Mackinaw, OD’ was issued initially in 1938, intended for cold weather use by troops who did not engage in much movement, such as drivers.”  You can learn more about the different versions of coat at the olive drab website.

The coat at Vintagetrends.com is for sale, priced at $135.  The description of the coat, issued in 1944, is as follows:  This is final pattern Mackinaw field jacket commonly called a jeep coat. Jacket is in overall used condition and is stained to back and front, sleeves. Lightly frayed at cuffs, but there is no overall holes are damages. Perfect for the reinactor. All buttons present to front. We could not locate spec tag, but size tag states size 38 to collar.
jeep_coat

 
To Top

Don’t Be a Joe Dope …

• CATEGORIES: Features, News • TAGS: , This site contains affiliate links for which I may be compensated.

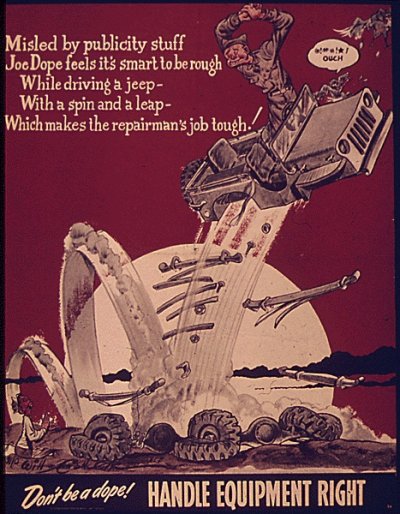
Here’s a Joe Dope poster advocating for soldiers to take it easy on the jeeps.

 
To Top

More Great Willys from Colombia

• CATEGORIES: Features This site contains affiliate links for which I may be compensated.

The eWillys Bogota-Col0mbia/Butler-Pennsylvania reporting bureau has contributed another great batch of pictures from Colombia.   When’s the last time you were out with so many nearly stock flatties? Clearly, Colombia will have to be a must-stop location on my trip around the world. Thanks for sharing Sebastian!

Sebastian writes:  I was able to put together some pictures of Willys near Bogota. As you can see, these pictures are very different from those that I shared with eWillys readers previously. Most of the Willys in Colombia are located near the coffee plantations, which is lower in elevation compared to Bogota (4500′ msl vs. 7500′ msl). In Bogota you don’t really see highly loaded jeeps; plus, since it is colder and rains constantly, every one has a soft top. These pictures are from a Willys ride last month. My father took my CJ-3B at the end of August for a nice ride with the “Willys Country Club” of Colombia. This is the club that we belong down there; Dad usually rides with them on his CJ-3A [editor’s note:  that’s the pic in the upper right].

The “Willys Country Club” of Colombia is a remarkable group (established in 1995). As you can see below, their Willys are in excellent shape. Even though I have ridden with them on many occasions, my 3B is not officially one of the club jeeps since they only allow low hoods. That is the reason why my father usually takes his CJ-3A.

I am attaching a map that hopefully will help you to understand Colombia better.

WillysColombiaMap

wccc1

wccc2

wccc3

wccc4

wccc5

wccc6

 
To Top

Website: The Find

• CATEGORIES: Features, Website This site contains affiliate links for which I may be compensated.

I did a search on a “CJ-5 gas tank” and stumbled across a website called “The Find“. It had search results from Tellico, zaib4x4, 4 wheel parts, and a variety of others. So, I did a few more searches.  It looks like a great way to compare online prices.  They have an iphone app as well.

thefind

 
To Top

A YIPAO and Willys from Colombia

• CATEGORIES: Features, Website This site contains affiliate links for which I may be compensated.

Sebastian, whom I mentioned in this post (a couple posts down), taught me a couple things about Willys in Colombia today.

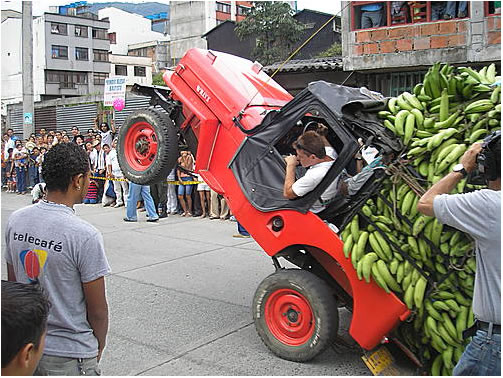
1) Willys are very popular in Colombia.  They started arriving during the 50’s and immediately became a sensation. They are still used regularly in the coffee plantations.  He assures us that every single coffee beam that we enjoy in a Colombian Coffee has been transported at some point in a Willys (most probably a CJ-3B).  There are cities and towns where you can see Willys everywhere, being used as work vehicles. For somebody from this country it would be like going back on time. They are also used as taxis, carrying people by the dozen. [Editor’s note:  Nice work Sebastian; I am sold on a trip to Colombia :-)]

2) There are many Jeep festivals in Colombia.  Most of them occur between September and October; they are called “Yipaos”.  The festivals were started in 1988.  The vehicles are driven through the main streets of a city and the Jeeps with the largest amount of objects carried with the most harmonious arrangements earn prizes. In fact, in February 2006, a Guinness World Records was established for the “Longest Jeep Parade” in Calarca, with a caravan of over 370 Jeep Willys vehicles.  It seem to me that we need to break that record back! Here’s an article about it on the CJ-3B page.

Sebastian also sent me a powerpoint with some nice big pictures of one festival. You just gotta see it to believe.  Check out the mud flaps … I’ve been looking for some older looking mud flaps!

yipao_cj3b

 
To Top

Flat Fender Club of Butler Pennsylvania

• CATEGORIES: Features, Website This site contains affiliate links for which I may be compensated.

flatfenderclubofbutlerAs I mention in the post below, Sebastian wrote me yesterday and told me a little about the Flat Fender Club of Butler.  As I understand it, Sebastian launched the club website last year. It sounds like it’s kind of an ‘open source’ club.

Sebastian writes, “The Flat Fender Club of Butler is a very nice group. I am doing my best to help out.   A friend of mine from Colombia helped me with the logo and the t-shirt design and I started the blog at the beginning of the summer. The club is very informal, with no dues and no officers, only the president and founder Dave Zibrat (great guy!).  Butler is the place where the “Bantam” factory was located (the building is still there), and therefore it is the place where everything related to Jeep started.

It appears several of the club members are readers of ewillys and I look forward interacting with more.

 
To Top

Sebastian in the U.S., CJ-3B in Colombia

• CATEGORIES: Builds, Features This site contains affiliate links for which I may be compensated.

Yesterday (and today) I have enjoyed some correspondence from Sebastian, who hails from Colombia and currently resides in Pittsburgh, Pennsylvania.

In 1994, Sebastian and his father (who owns a blue CJ-3A), rebuilt a red 1954 CJ-3B, which can be seen to the right and viewed at the CJ-3B Page (sixth down from the top).

He writes, “My Willys is still in Colombia, so I only ride a couple times a year.  Last May I went there for a week and put more than 250 miles on the jeep in less than five days. A couple years ago I became aware, and joined, the “Flat Fender Club of Butler” which is close to Pittsburgh. Butler is the place where the “Bantam” factory was located (the building is still there) and, therefore, it is the place where everything related to the Jeep started. The club is formed by a very nice group of people who are crazy about old willys.  You can see some of the recent events and history of the club at: http://flatfenderclubofbutler.wordpress.com/ This blog also shows some pictures of the owners and our new T-shirts and Caps!”

 
To Top

Builds: Brian creates a new sending unit

• CATEGORIES: Builds, Features This site contains affiliate links for which I may be compensated.

For all the customizations I’ve done, I have to say I was still surprised, delightfully so, to receive this update from Brian about his metamorphasis of a GM sending unit into a Willys tank.  Maybe it is just me, but it simply never occurred to me to try something like this.  Moreover, as I turned Brian’s work into a post, I learned a great deal about gas tank sending units.  Thanks Brian!

A quick note. After doing some research, I discovered one of the most common reasons for the older gas gauges to stop working correctly is a bad ground.  So, if you are having problems with your old gas gauge, check the ground at the gauge and/or sending unit.

Take it away Brian:

I have tackled a variety of planned tasks on my CJ-3B, but as with any project, I’ve run across some unexpected issues as well.  My gas tank sending unit is a perfect example.

*** DISCLAIMER:  Before I begin, please be advised that when doing modifications to a gas tank it would be prudent (understatement) to drain and dry the gas tank.  I hear gasoline is very explosive!!! ***

Prior to installing my gas tank, I decided to use an ohmmeter to test my sending unit to make sure it was in good condition.  Unfortunately, I connected my ohmmeter and discovered my unit was dead.  So, I thought this was a perfect chance to install a modern sending unit.

Btw, you can visit the 1945gpw website to get a nice overview about how to use an ohm meter to trouble shoot your old Willys sending units.

The stock unit on my CJ-3B is 40-0 ohm’s (which means the ohm meter would read 40 ohms when full and 0 ohms when empty).  As I am upgrading my gauges to auto meter gauges, I had to make sure I selected a gauge that would work.  There were four different gauges to choose from:  90-0, 30-0, 8-73, and 33-240 ohms.  Note that the last two gauges are backwards for our purposes — the gauges would have read full when empty, and empty when full (if they worked at all). Also with my new gauge, I felt I would run into a problem with the ground, so I decided to replace the sending unit and make it work right.
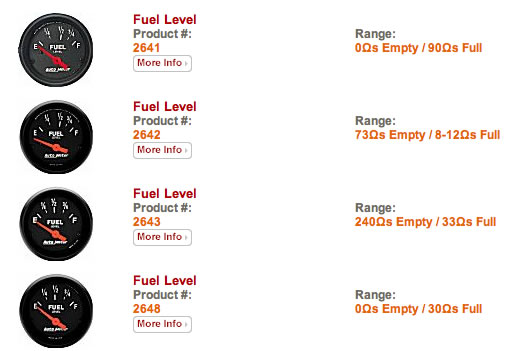
brian_gas_gauges

I had replaced a GM in-tank pump and sending unit on a friend’s truck and found a GM sending unit would fit though the tank opening of a Willys.  So, with that in mind, I started by disassembling the old Willys unit. First, I removed the sending unit and the sending unit base from the gas tank.  Next, I separated the sending unit from the base as I will be reusing this base (with some modifications) using my drill press.
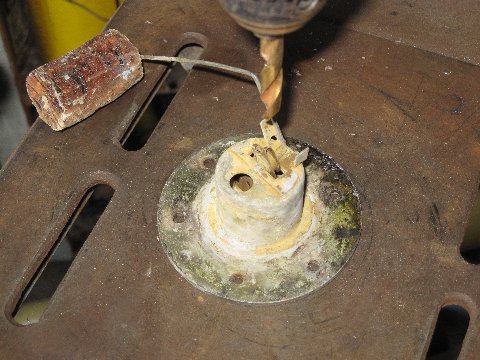
brian_sendingunit1

With that apart, I turned my attention to the GM Assembly. I removed the sending unit off the GM assembly by cutting the tube up high. I went over to Mick C. and we machined a plug for the old unit (a machinist is a good friend to have!). This GM unit is 90-0 ohms, a perfect match to the Auto Meter 105-2641 gage. It is also internally grounded, note the two wires.
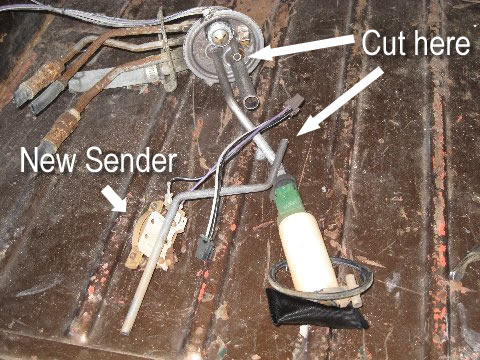
brian_sendingunit2
Here is the unit assembled. The new plug had a hole in the center so I could run the new gas line through it.  Also, the plug had a hole for the wires as well.   I drilled three holes around the radius of the sending unit base and welded the plug in place. You can see the welds in the image below.
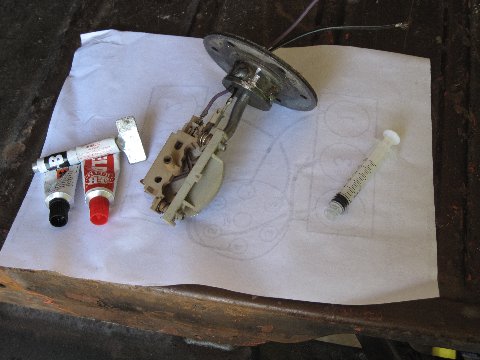
brian_sendingunit4
Note the J-B Weld. There is about 1/8″-3/16″ between the top of the plug and top of the unit. I used J-B Weld to pot and seal the unit. J-B weld (http://www.jbweld.net/products/jbweld.php) claims to be resistant to gas (from the website:  “It’s strong as steel and impervious to water, gasoline, chemicals, and acids.”). DO NOT USE SILICONE!!!

[Editor’s note:  Mitch mentioned months ago that he had a problem using J-B Weld to seal an old gas tank.  Given the claims by J-B, maybe Mitch’s problem was more an adherence to the old tank rather than J-B itself?  Any thoughts Mitch?  This should be a good test of J-B and gasoline. ]

Now, I had to adjust the float to work correctly with the new unit.  I cut the arm at the first bend from the float then turned it 90 degrees. I also cut the float down an inch.
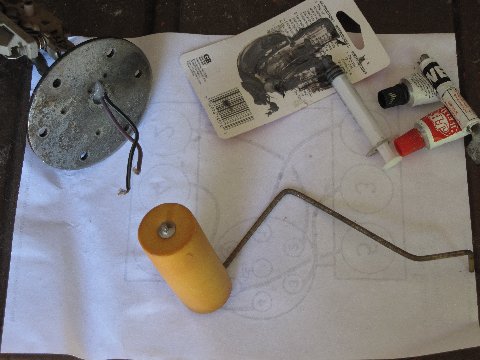
brian_sendingunit5

Note: there is a pattern to the bolt circle on the old unit. Index the sending unit on assembly so the float will clear the internal wall in the tank. The wall runs across side-to-side; the float will have to do the same.
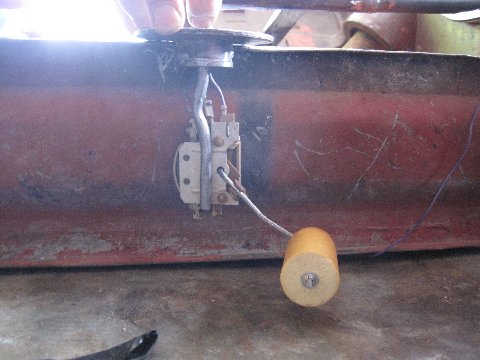
brian_sendingunit6
Adjusting the float was easy.  I just held it to the top of the tank and bent the arm as needed.

One good thing about this modern sending unit is the rheostat can be replaced by removing two screws. You would have to get another one from a junk yard but can easily be rebuilt.
This works really well …  I love these types of projects.

Brian

 
To Top

A Budget Friendly E-Brake

• CATEGORIES: Features, Parts This site contains affiliate links for which I may be compensated.

A reader named Robert noted my interest in an alternative emergency brake.  He purchased the one to the right and says it looks pretty good, though he still needs to install it.  While this isn’t exactly what I’m seeking, it is a great price at $4.95.

“Can be made to fit many applications. Originally designed as brake cables on Military trailers and Jeeps Unused/Unissued. Handle style and color may vary.”

View the brake at Coleman’s Military Surplus

 
To Top

Reader Question: The size of CJ-2A blocks

• CATEGORIES: CJ-2A, Features This site contains affiliate links for which I may be compensated.

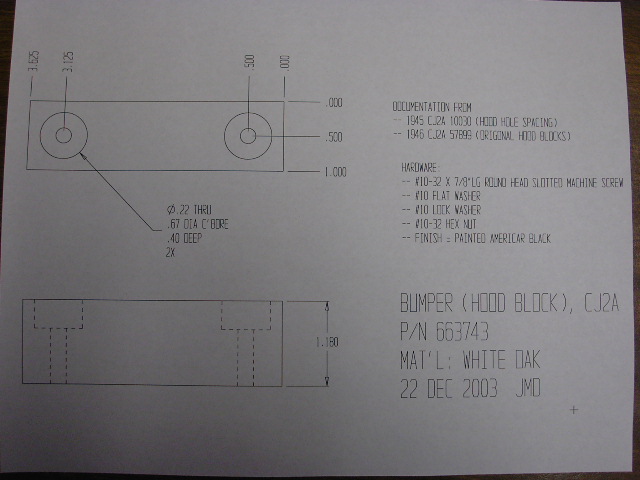
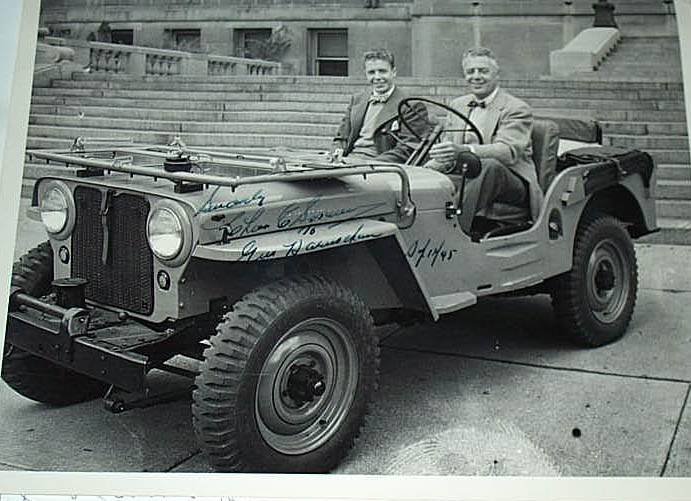
A reader asked about the original size of CJ-2A hood blocks.  A quick search revealed this was a forum topic on the CJ-2A PagePlease visit the forum to learn more.  I tried to create a quick link to the picture in the forum, but the forum won’t let me, so here’s a copy of the drawing submitted and a great pic of a 1945 CJ-2A which shows the blocks really well.  There’s also a CAD drawing that you can find in the forum as well that should help with the blocks.

The photo was posted to the CJ-2A page forum by the forum moderator Sean and the drawing was done by Joe DeYoung.

KIF_0011.JPG

And here’s the pic and caption of the ’45 willys submitted to the CJ-2A forum by the forum moderator Sean  [This is a 1945 photo of a new 1945 CJ2A (photo courtesy Bill Oakes)]:

oakespict

 
To Top

Reader Builds: A reader tows home a part’s jeep

• CATEGORIES: Builds, Features This site contains affiliate links for which I may be compensated.

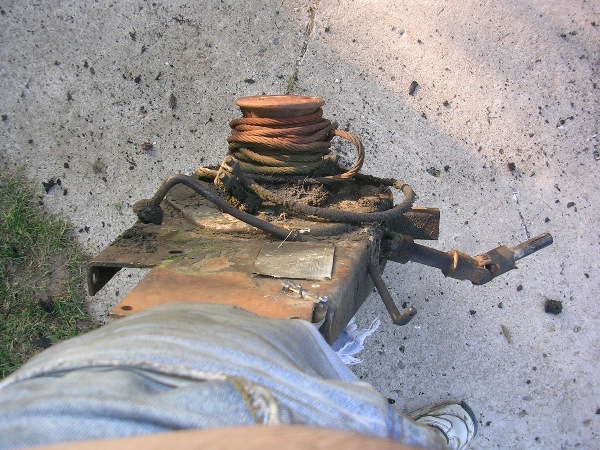
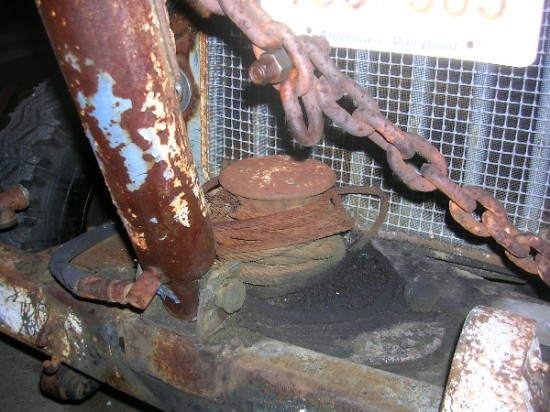
UPDATE:  There was some interest in the Capstan winch from David’ part’s jeep that I featured the other day.  Here’s some additional views of it.

You can still find parts for Capstan winches here, though they are out of the Capstan kits (which cost $2,650).  Brian also runs a ‘Capstan’s for sale’ page, but appears all sold out at the moment.   And here’s a little nautical history of the Capstan winch from wikipedia.  And here’s some info from the CJ-3B page on the Ramsey Capstan Winch, including some pics of the brochure.
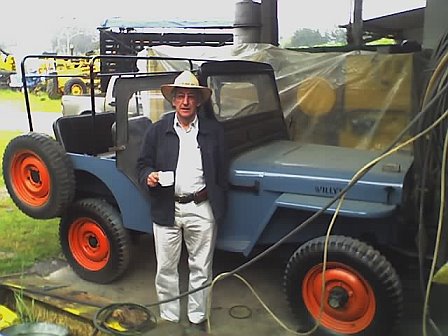
david_johnston_jeep1

david_johnston_jeep2

david_johnston_jeep3

david_johnston_oldjeep5

david_johnston_oldjeep4

Continue reading

 
To Top

Lug Nuts

• CATEGORIES: Features, Vendors, Website This site contains affiliate links for which I may be compensated.

A reader asked about finding chromed lug nuts that had right and left hand threaded types.

I responded with this information:

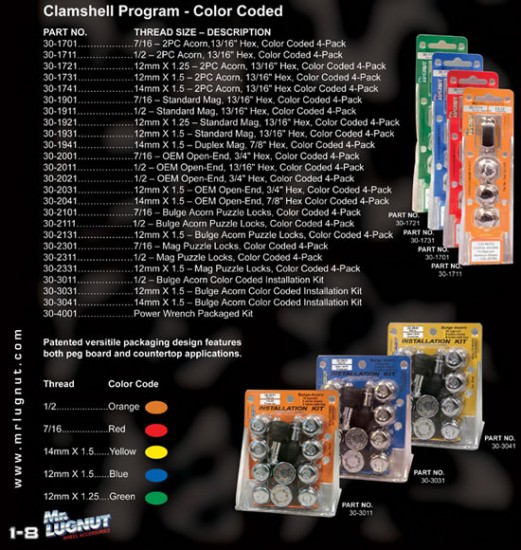
I got my lug nuts from my local schucks store.  They carry the Mr Lugnut brand.  I needed to get some special ones due to the thickness of my cast aluminum rims.  However, I only needed right handed threads and not lefty’s. http://www.mr-lugnut.com/

Here’s a page that might be helpful too http://www.discountjeepparts.com/index.php/cPath/1714_302 It appears they have both right and left hand threaded chrome bolts that will cover the whole stud. Another thought (which doesn’t sound like much fun) is to knock out the left hand threaded studs and just go with right handed ones all around?”

lug_nut_website

 
To Top

Pictures: A handcrank heater and M37

• CATEGORIES: Features, News This site contains affiliate links for which I may be compensated.

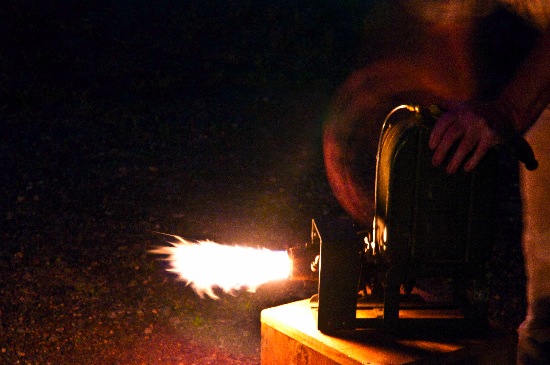
If my addition is correct, readers have located 6 rare Stewart handcrank heaters in the US & UK.  They are rare enough that the antique Road Show people couldn’t get any information about them from their buyers (see the 2nd to last post on this page).

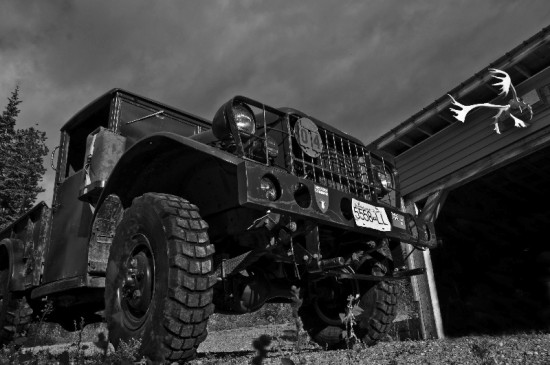
Dennis, who’s heater is featured here, decided to fire up his heater at night, creating this cool picture.  He also sent an unrelated artsy pic of an M37 he thought he’d share.  Thanks!

heater1_dennis

m37_dennis

 
To Top

Drag Racing: Tyler runs the drag strip

• CATEGORIES: Features, Racing • TAGS: This site contains affiliate links for which I may be compensated.

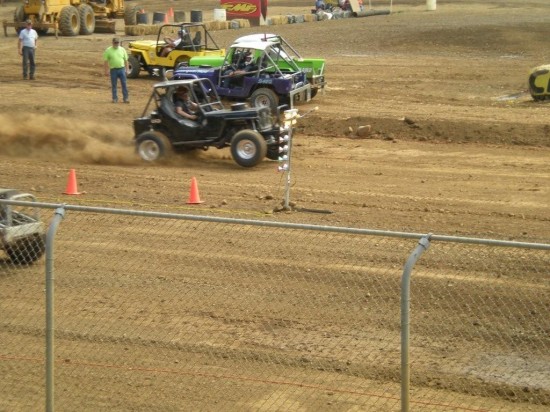
Troy forwarded me this great pic of his son Tyler dragging at the PNW Summer Convention.  Tyler is 18 now and Troy writes, “I HAVEN’T HAD TO RIDE WITH HIM AT THE RACES SINCE HE TURNED 16…. I MADE A BIG MISTAKE THIS YEAR AND RODE WITH HIM ON THE X-CROUNTRY…..THE KIDS GOT IT, BUT @#!%&##@ HE SCARES THE HELL OUT ME…LOL.”   You can see both the race jeep and troy’s other jeep here.  Looks fun!

troys_son_drag_racing

 
To Top

Builds — mystery build

• CATEGORIES: CJ-2A, CJ-3A, Features This site contains affiliate links for which I may be compensated.

I didn’t get many specifics on this build, other than it is a barn find that was carefully rebuilt and is located in or near deer park, washington. There are lots of great details on it.  Thanks for the pics Michelle!

flattie1

flattie2

flattie4

flattie1

 
To Top

A Jeep Poem

• CATEGORIES: Features, Reader Stories, Women & Jeeps This site contains affiliate links for which I may be compensated.

Here’s a poem quickly penned earlier this decade by the girlfriend of a jeep.

Whether at war time
or at peace
Its wonders never cease
It will conquer anything
standing still
That’s a mountain
To a Jeep it’s just a hill
That’s a river
Just a puddle I see
That’s a ditch
Just a pot hole to me
Lockers and tires-37 inch
If that don’t work, use the winch
There’s no stopping this machine
Persistence like this you’ve never seen
So when you think an incline too steep
You might consider owning a Jeep

– jeepfreak’s girlfriend

 
To Top

Attaching a Brodie Knob

• CATEGORIES: Biscuit, Features, Website This site contains affiliate links for which I may be compensated.

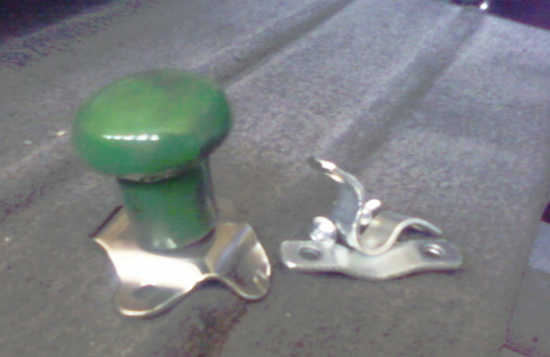
brodie_knobOne of the positives about living in Idaho is that there are lots of tractors and tractor stores nearby.  I stopped by one today and picked up one item I hadn’t yet purchased: a steering knob for my steering wheel for only $6.99 — the best price I’ve seen anywhere (I got it at D&B, a local farm/garden store).  Now, these aren’t legal in every state, but they are sure handy for jeeping and racing.

I brought it home ready to mount it, but realized I couldn’t remember exactly how to mount it, so I jumped on the internet.  The first thing I learned that a steering knob was actually called a Brodie Knob, which is where the term “doing a Brodie” comes from.

From Wikipedia, “Brodie Knobs were widely popularized, especially on the west coast of the U.S., during the 1950s. Their intention was to be used primarily as addition to a Hot Rod. The knob was used to spin the steering wheel, rapidly in one direction or the other, while accelerating, to cause the tire(s) to spin while rapidly whipping the car 180 degrees or half of a “doughnut”. Hence, comes the term “lay a brodie”. In the 1950s and 60’s a person could go into any local “Pep Boys” and choose from a large variety of brodie knobs, with every conceivable theme, from “Candy Apple colored”, “Product Logos”, to “nude women,” and everything in between, some automobile dealerships even used them for advertisements. They were very useful during a period of auto manufacturing, when power steering was truly a luxury…. ”

thehotrodgirl_2064_125192I also discovered that there’s a wide variety of knobs that I didn’t know exist.  For those growing up in the world of hotrods, they probably aren’t surprised, but the knobs I have seen are generally all tractor related. Other names for the Brodie include the Suicide Knob, Granny Knob, and Steering Wheel Spinner

Check out the different kinds of knobs offered through thehotrodgirl.com.

 
To Top

Crystal River Jeep Tours

• CATEGORIES: Features, News, Website • TAGS: This site contains affiliate links for which I may be compensated.

Once again, wandering the internet today looking for information on mounting my steering wheel know resulted in several interesting posts.

This post is about a jeep tour business out of Marble, Colorado called Crystal River Jeep Tours.  You can visit the website or learn more about it from this 2008 trip with some video and this post with videos as well.

Here’s a little bit about the tours, ” Crystal River Jeep Tours is located in Marble, Colorado, where the pavement ends and the beauty begins.  CRJT was established in 1951 and ranks among the oldest adventure tour operations in the state. Take one of our guided tours to historic Crystal City and the Crystal Mill, experience the breathtaking views and wild flowers along the Lead King Basin road or the valley panorama from the top of Sheep Mountain. Overlook the Yule Marble Quarry from Treasure Mountain, or experience the Devils Punch Bowl at the foot of Schofield Pass.  Our guided tours are an experience found nowhere else in the world, which skirt the edge of the Maroon Bells-Snowmass wilderness area in the White River National Forest.”

crystal_river_jeep_tours

 
To Top

Video: Yakima Ridge Runners 1950s Video Part 2

• CATEGORIES: Features, videos • TAGS: , , This site contains affiliate links for which I may be compensated.

This is the second of two videos made by Universal International News. Much of this footage seems very similar to the shots taken by Life Magazine of the Ridge Runners, when they did ran a story about the Jeep Club.