Features Research Archives

To Top

When Good Engines Go Bad

• CATEGORIES: Features, videos This site contains affiliate links for which I may be compensated.

HOG forward this video and link to Bang Shift of an engine exploding in the Netherlands.  In the comments section, a commenter had some additional explosions.  So, here are a few of the videos from youtube (there are others).

2 explosions to the same tractor in 2008 and 2009

 
To Top

Roberts Armory Traveling Museum Rochelle, Il

• CATEGORIES: Features, Museums • TAGS: This site contains affiliate links for which I may be compensated.

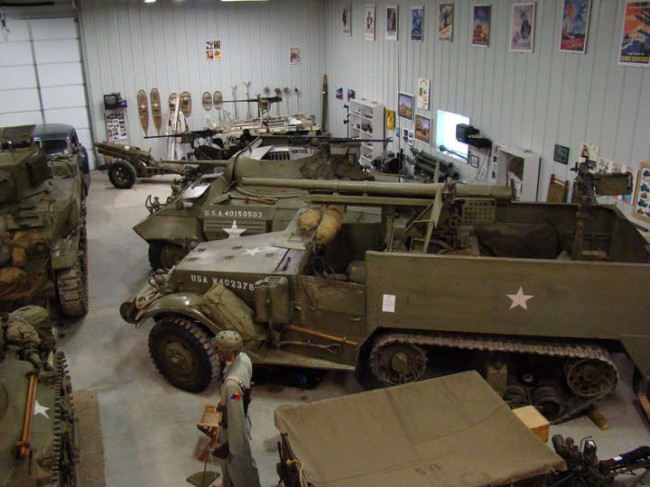
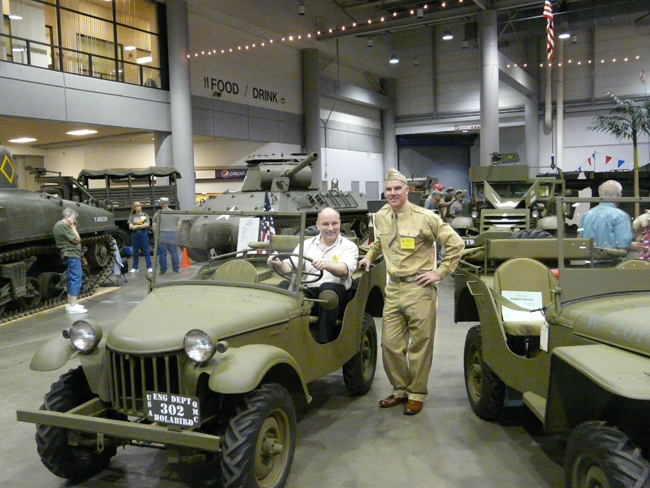
Roberts Armory is a traveling museum located in Rochelle, Illinois.

According to their website, the museum “specializes in the acquisition and display of light armored vehicles and artillery used by the U.S. Army in World War II. During World War II reenactments the museum usually portrays the 70th Tank Battalion. The museum participates in WWII related displays, parades, motion pictures and reenactments throughout the United States.”

Roberts Armory has also been asked to participate in movies and shows.  Though Roberts appears to have a facility, unlike traditional museums, Roberts is only open for visitation on special days or by special appointment.

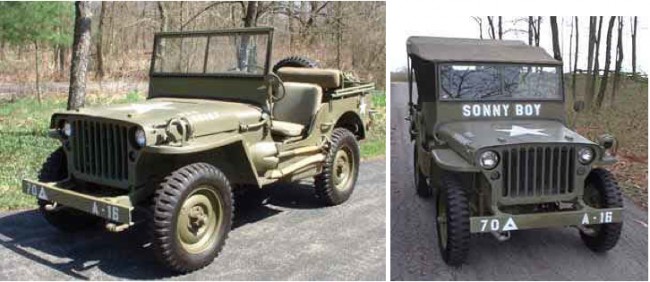
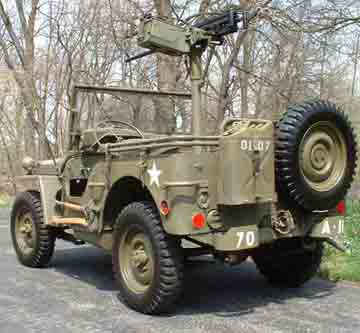
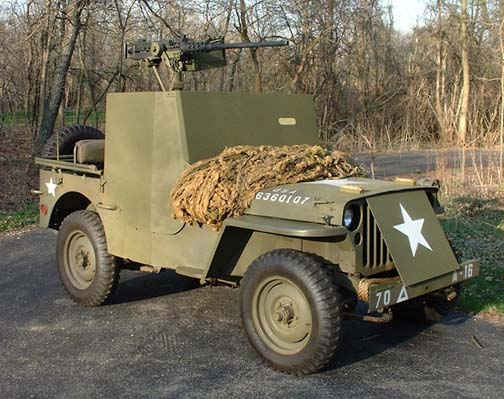
While Roberts only appears to have one 1945 MB, they do have a few different outfits for it.

1. Here it is with and without a top.

2.  Here it is with the 50 Cal gun mounted.

3.  Here it is in full armor.

 
To Top

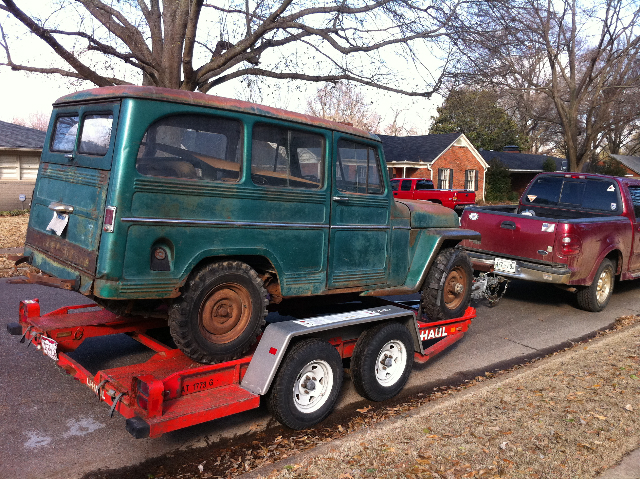
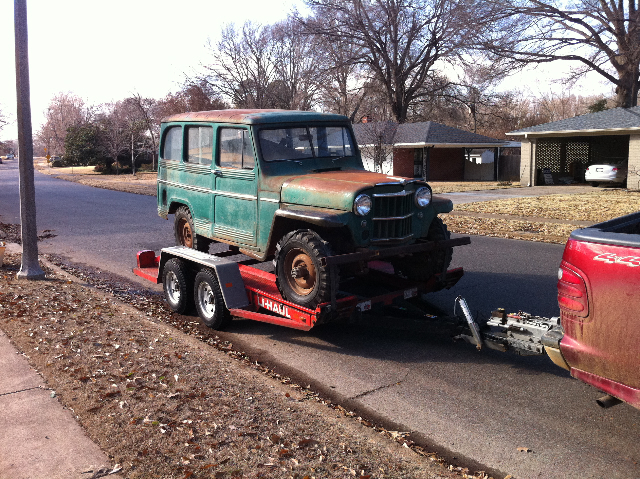
1941? Oddity Captain Cook, Hi **STATUS UNKNOWN**

• CATEGORIES: Features, Unusual • TAGS: This site contains affiliate links for which I may be compensated.

UPDATE:  This was for sale for $1000.  Status currently unknown.

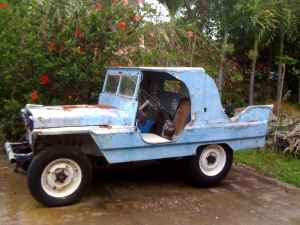
This is precious … More pics, I want more pics!  These two were listed the next day (& just down the road from Captain Cook, Hi, too).

“4 Wheel Drive; All Original; Haul Away; Complete Classic”

 
To Top

Multiple Older Jeeps for sale Minnetonka, Mn

• CATEGORIES: CJ-6, Features, M-38, Willys Trucks, Willys Wagons • TAGS: , This site contains affiliate links for which I may be compensated.

UPDATE:  These are nice and have been available for a while.

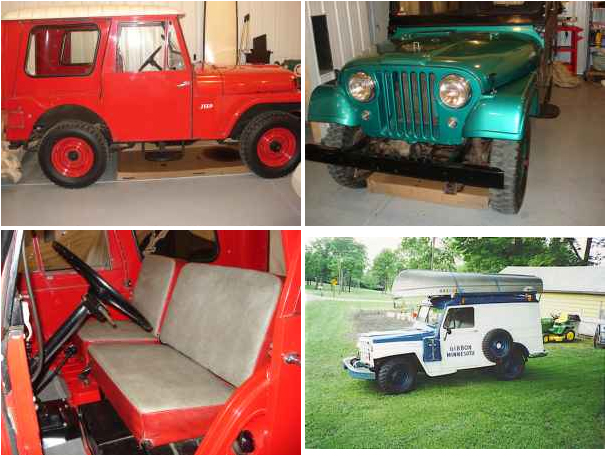
I admit a little confusion.  On the one hand there are many available, but on the other hand he is selling only one or two?

“1956 panel van,1959 CJ6,1960CJ5 all are originals,low miles,paint,interiors,motors, ect. Call for more details or find them listed craigslist minneapolis. Phone calls only Paul 952-472-1046 Please leave message if no answer,let ring at least 8 times”

http://houston.craigslist.org/cto/2210326268.html

 
To Top

Drag Jeeps

• CATEGORIES: Features, Racing • TAGS: This site contains affiliate links for which I may be compensated.

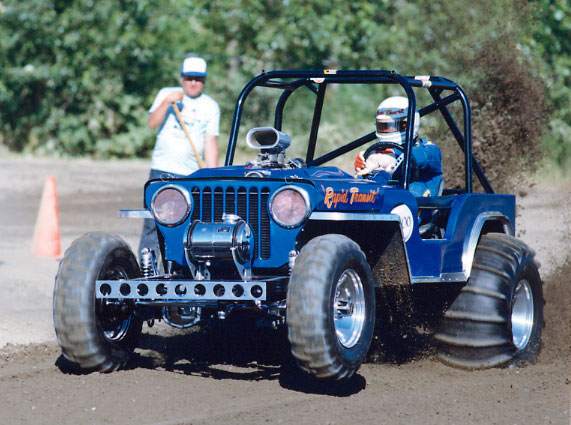
UPDATE: An update on Rapid Transit

Jeff and I were exchanging emails about drag jeeps the other day.  We were both sharing our memories about Roger Monson’s drag jeep, Rapid Transit. As Jeff notes, it certainly had its own sound!

Jeff wrote “it had an actual belt driven blown 4cyl pontiac motor in it.  A small 471 blower, insane RPMs and crazy loud! If ya didn’t cover your ears when it came by it HURT.  I saw it run @ the old firemountain drag strip @ washougal in the mid 1980s”

I’ve included a pic of it below.  Wes has collected a variety of old school Sand Drag vehicles at offroadracecanada.  Check it out!

 
To Top

Builds: David’s ‘New’ Wagon

• CATEGORIES: Builds, Features This site contains affiliate links for which I may be compensated.

David wrote to me today to tell me about his first wagon project.  He got a great deal on it, especially for an eastern wagon, and has a restoration plan in place.

He writes, “My rough plan is sort of a rolling resto on a budget at first. Specifically, get motor running first…then brakes. Next will be things that need to be done for safe driving (signals, lights, windows fixed, emergency brake etc.).

After that I’d like to sand/blast to metal the worst of the unprotected areas (hood, roof paint pretty much gone) and epoxy paint and primer them, then gradually work on other issues. But first things first, have to get running and driveable cuz the wife is not gonna be very tolerant of it taking space in the garage if I can’t move it easily, lol.

On down the road I’d like to do a frame off. I’m not one of those chop em up and put a v-8 in it kinda guys, but not opposed to some mods like a brake upgrade or electric wipers to improve driveability. My overall goal of restoration will be to keep it as original as possible but I plan to use and drive it, not restore to mint or show condition (but who knows what the future will hold? I don’t plan to change anything that couldn’t be changed back to 100% original easily)”

Best of luck David!

 
To Top

Hubert’s Must-See Jeep Family Site

• CATEGORIES: Artists/Drawings, Features, Website This site contains affiliate links for which I may be compensated.

Craig dropped me a note today about an old friend of his.

Craig writes, “I was doing a little web surfing and found an old lost friend, Hubert Cossard.  I had been in contact with Hubert some 9 years ago about some awesome drawings he had made of Forward Control Jeeps.  There were definite communication barriers back then as I am a little behind on foreign languages (even known to destroy my own language a bit!) [ed note: you aren’t alone!] but was in total awe of Hubert’s detailed drawings.  Like many internet sites, there one day and gone the next,  Hubert’s site disappeared.

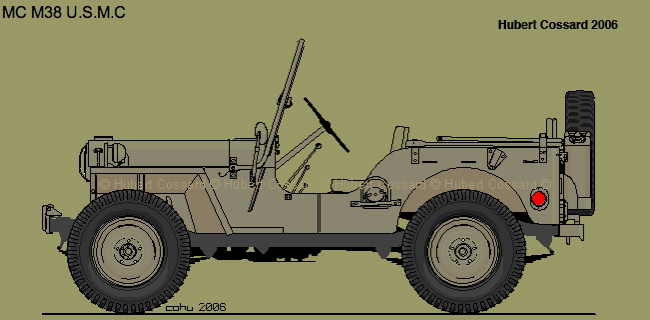
Though I lost contact with Hubert years ago, by accident I just found his new, greatly expanded site.  On the Jeep Family link there are drawings of just about every Jeep ever built or thought of.  It’s a gotta-check-out-site!”

One quick trip to the site and I can only second Craigs description of the drawings.  I couldn’t say for sure if they are scale-exact drawings, but they sure have the detail of someone who knows their jeeps.  The site is in French, so if you need to translate anything, you might try Google Translate.

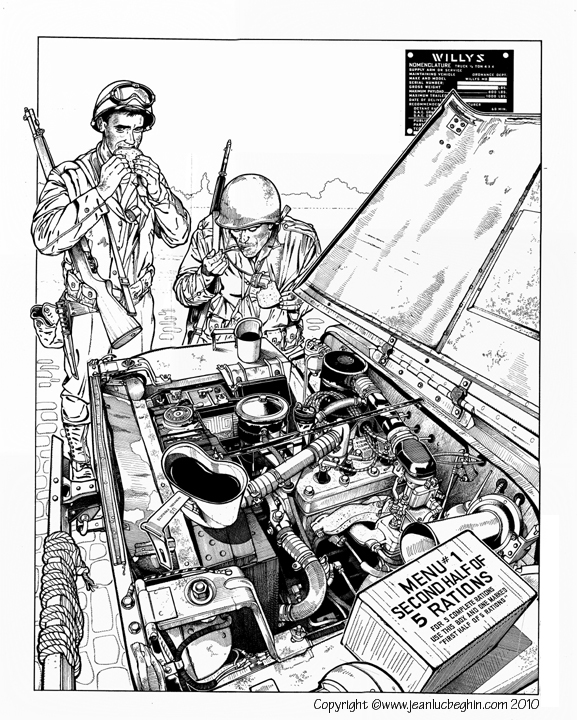
Here is an example of Hubert’s work below.  Check out all of them here.

 
To Top

Devon’s Power Steering Setup

• CATEGORIES: Features, How To This site contains affiliate links for which I may be compensated.

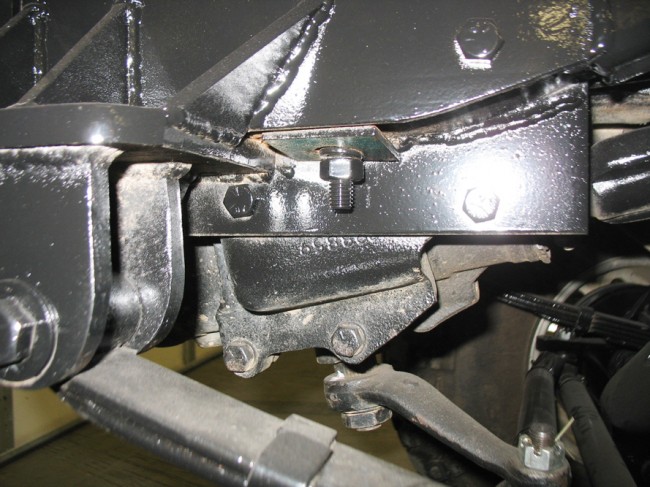
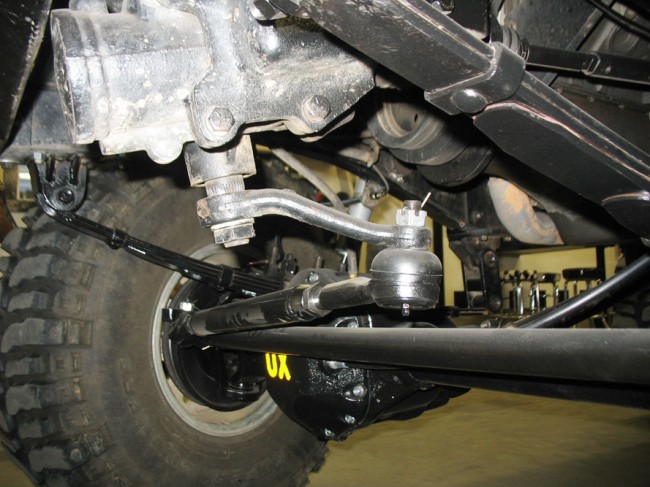
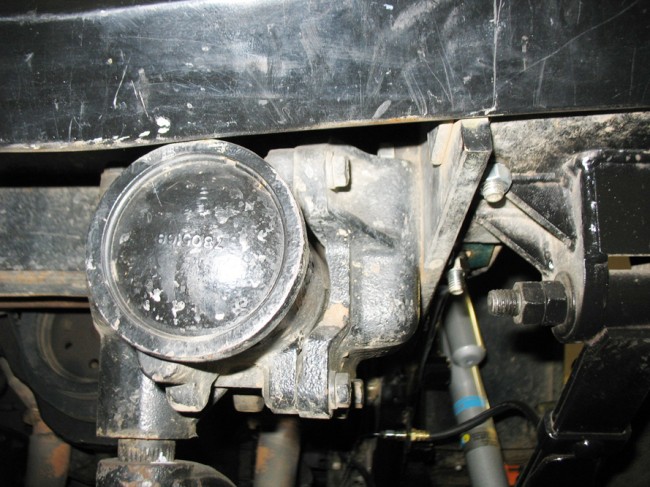
Greg asked for a few pics of the Steering combination on the Eller’s Jeeps, so Randy climbed under Devon’s Jeep to snap a few for us. Thanks Randy!

Here is Randy’s description, ”

I took a few pictures of the Saginaw steering setup in Devon’s MB but they were mostly taken from below because of his winch plate covering the top.  It is a little unclear just how it all works without the top view.

Dusty will be bringing his CJ2A back up here in a few weeks and I think it will be easier to get good pictures from his Jeep.  It still has the stock column in it which is what Greg is interested in.  I might have a spare steering box mount to take pictures of as well.

Picture 1 was taken from the driver’s side tire.  The frame was plated on the inside with ½ inch steel and protrudes an inch or so below the frame rail.  The outside plate is 3/8 and is what the spring mounts are also welded onto (the Scout II axles require outboard spring mounts).  3 of the 4 steering box mount bolt heads are visible; the 4th bolt was welded inside the frame rail because I wasn’t certain if it would interfere with the spring mount if it passed all of the way through.  The 2 bottom bolts from the steering box mount to the steering box are also visible; the 3rd bolt is visible in picture 005 on the top-front of the steering box.

Picture 2 shows how the steering box mount lowers the steering gear and in conjunction with the drop pitman arm almost eliminates bump steer even though this Jeep has probably 7 or 8 inches of lift.

The long bolt that protrudes down through the frame rail is one of the winch plate bolts and the other one you can see in Picture 3 ties the bumper and spring mount together.  It is a pretty sturdy assembly with the plated frame rails, spring mounts, steering box mount, winch plate and bumper all tied together.  The frame horns had to be cut off to plate the frame rails; the passenger side frame rail was also plated inside and out.  This mount allows the steering arm to pass underneath the stock round crossmember and it works well with aftermarket motor mounts.”

 
To Top

The Story of the Bantam BRC … A Movie?

• CATEGORIES: Features This site contains affiliate links for which I may be compensated.

UPDATE: Paul Bruno (aka the History Czar) provided a nice response to this post about his movie effort.  Please check it out.

Some of you might remember the video I posted back in 2009 of the recreated, original BRC (if you haven’t, check it out here).  It seems that the Bantam and its owner, Duncan Rolls, have been touring a bit, landing in an interview with the History Czar in August of 2010 (both the History Czar, seated, and Duncan are pictured below from Nov 2010).

In December of 2010, the Czar blogs about “his and his wife’s 11 year odyssey, along with Max Freedman these past 5 years, to have a feature film made about the creation of the first Jeep, the Bantam Reconnaissance Car (BRC),  in Butler, PA USA during the summer of 1940.”  So, the Czar seems to have a real passion for the Jeep story.

You can go here to check out their facebook page and follow their journey to make a movie:  http://www.facebook.com/pages/manage/?act=39829251#!/pages/The-Jeep-An-American-Triumph/110738008090

Read more about the premise and synopsis here.

I read through the premise and synopsis.  Personally, I’d take a little different tack with the story.  I would place the true story of the original jeep as the background for telling another, fictional story about some type of relationship (love story like the Titanic, father/son, coming of age, etc).

I’ve thought a lot about this because I too have wondered about developing a jeep themed movie, though it would be about the heyday of jeeping/trail riding/clubs/racing of the 70s.

A good example of how such a story, like the Bantam story, doesn’t work as a stand-alone story line can be seen in the Tucker movie.  While I enjoyed the movie, because it was a story about the struggle to make a cool car, most people weren’t all that compelled to go see it, because of the same reason — it was only about the struggle to make this cool car.

That’s just my 2 cents, which might not even be worth that much.

 
To Top

Hard to Find NOS Willys Parts out of Alaska

• CATEGORIES: Features This site contains affiliate links for which I may be compensated.

Paul writes, “Many years ago I went thru the front and rear axles on my Willys, changed the ring and pinion gears from 5.38s to 4.27s, replaced all bearings, seals and races with new before repainting the housings and attaching new springs.  For some reason the steering knuckle seals came loose from the metal attach covers so today I went to the local military surplus yard (E. A. Patson Parts and Equipment 907 333-5682) in search of new replacement parts.  I was able to purchase new old stock knuckle seals, differential cover gaskets and the speedometer drive gear for what I felt was a very reasonable cost.

Both the buildings, land and the surplus parts are all for sale so this fantastic source of old Jeep parts is going to go away soon.  I just thought I’d mention that all these old military vehicle parts are for sale, they have lots of parts for some types and some parts for lots of other types.

So, if anyone out there reading EWILLYS is looking for a hard to find part they might want to give Rod a call.  He’s pretty sharp on the old stuff and he understands the idea of repair instead of replace.

I’ve attached a photo of the knuckle seal packaging (unopened) with the packing date from Willys Overland Motors.  I think it’s pretty neat.”

 
To Top

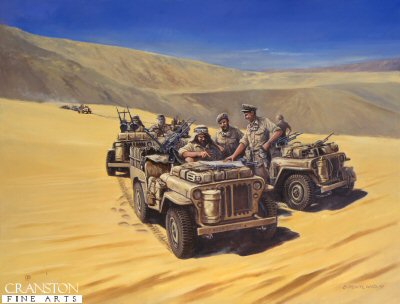
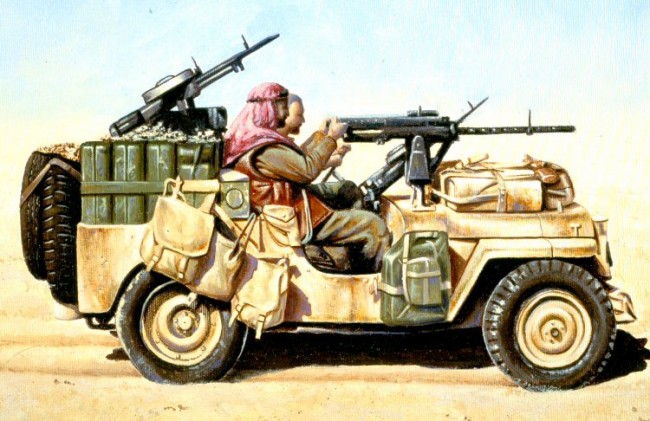
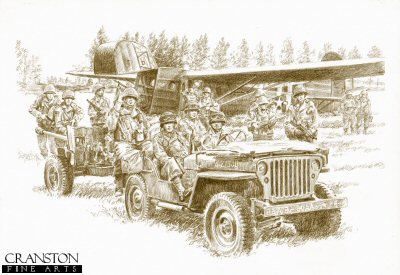
WWII Jeep Art from Cranston Fine Arts

• CATEGORIES: Artists/Drawings, Features • TAGS: This site contains affiliate links for which I may be compensated.

SAS artwork from Cranston Fine Arts in the UK. I’m unsure if any prints of the below works are still available.

 
To Top

Identifying A Strange Looking Engine Block

• CATEGORIES: Engine, Features, How To This site contains affiliate links for which I may be compensated.

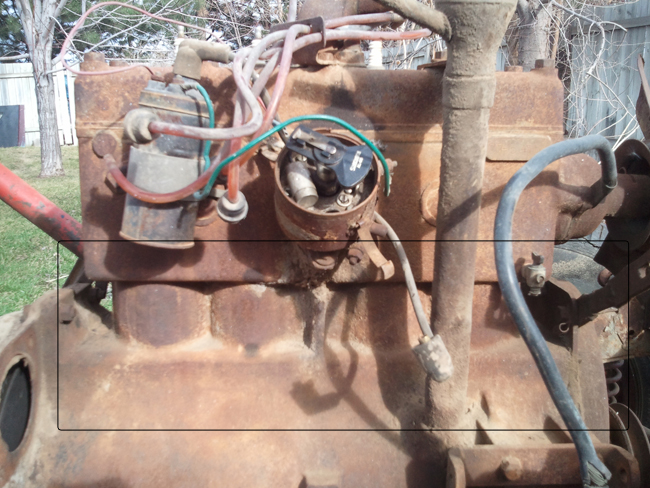
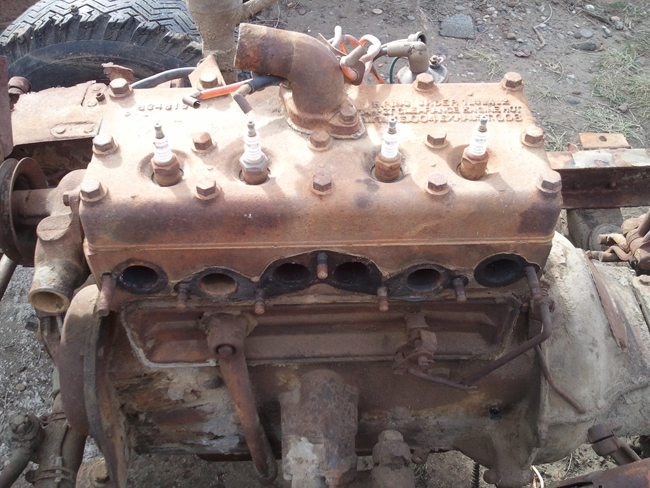
Brian wrote me asking if I knew what type of engine this was.  He pulled it out of a old WWII Jeep and didn’t recognize it.  He wrote that the Head cast was #634816 and the block casting#630282. In particular, he noted the exposed cylinder tubes.

I told him I didn’t know what it was, and confessed that I had never worked with any MB/GPW motors, but I would do my best to figure it out (I do enjoy a good internet hunt). After searching through various images I could see it was similar to a MB and GPW motor, but was also different.

For example, you can see examples of GPW heads here at Dino’s site and though it looks similar, it’s missing various features.  Here is an example of MB block.  In fact, if you go here, you can review all kinds of WWII engines.

After trying various keyword images searches, I tried typing in the casting numbers and that is when I discovered that the head was a pre war head from a Willys Model 37. So, then I looked at prewar Willys.  On this page http://clubs.hemmings.com/clubsites/wocv/willywilly/willywilly.htm on the fourth pic down, you can just make out, just below the distributor, similar indentations on a 1938 Willys.  Here is a better look at a prewar block.

 
To Top

Bill Shares a Great Old Pic

• CATEGORIES: Features, Old Images This site contains affiliate links for which I may be compensated.

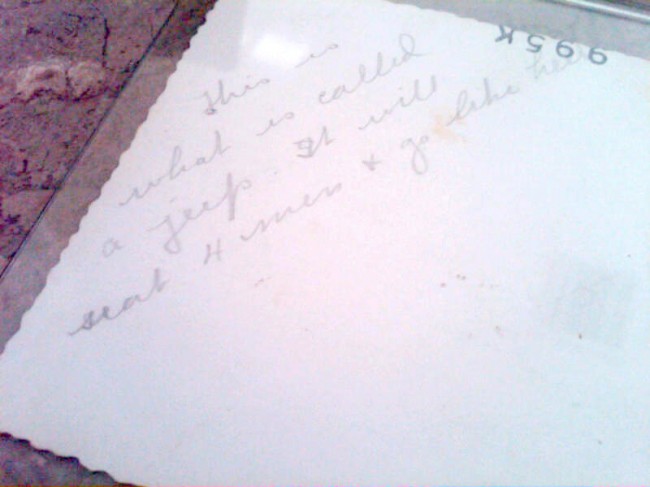
Bill bought this original photograph a decade or more ago.  It depicts what appears to be a Ford GP. I’m kind of wondering if this photo was of a civilian, as that looks like a license plate on the front?  Bill, can you make out that plate on the grille from the original photo?

Bill writes, “On the front (of the image) is a great pic of a soldier, obviously proud of a Jeep he is driving.   The best part is the note he wrote in pencil on the back of the photo to his family or friends back home….   it reads:   “This is what is called a jeep.   It will seat 4 men & go like hell

Thanks for sharing Bill!

 
To Top

Paul Re-plates His Plates

• CATEGORIES: Features, How To • TAGS: This site contains affiliate links for which I may be compensated.

Paul continues to make progress on his build, though he does have a habit of becoming side-tracked with wood projects (if I am a Foodie,  he is a Woodie).

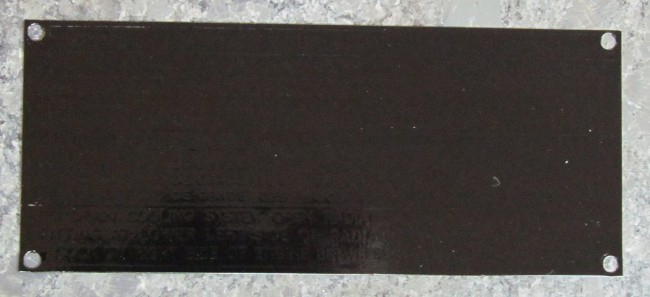
Paul writes, “The local exotic wood store has been letting me pick over the wood shipments right after they’re unloaded and this has caused some trouble with overheating my credit card.  While I’m still making progress on the never ending Willys project, money has been in short supply so many of these projects have to be low buck items.  One of the cheaper but necessary jobs was to repaint the brass data plates (a total of six plates) originally installed on the M 38.  While I really wasn’t looking forward to working on these plates ( lots of trouble for very little progress) I felt the appearance of the Willys would be improved by having bright and shiny data plates installed on the heater duct below the base of the windshield.

I use a really strong liquid paint stripper to remove the original black paint from the data plates. After the paint is gone I do a chemical wipe with lacquer thinner then gently rub the bare brass with a fine grade scotch pad before doing another chemical wipe followed by the spray can black. Cheap, easy, and quite time consuming but the finished plate looks pretty good.

While it isn’t difficult to redo these data plates it is real easy to screw up the paint (once the new paint is applied) while cleaning off the lettering and then have to start all over again.  I’m using rattle can glossy black spray paint to apply two light coats on each plate and I let them dry for one day after the second coat.  After the paint is dry I very carefully block sand the plate with 400 grit sandpaper with the plate supported on a thick, flat surface.  I’m using a 3/4 inch thick slab of granite (it’s flat and cheap) so if I didn’t damage the paint during the sanding process I spray a very light coat of clear over the data plate and let it dry for another day.  Don’t spray a heavy coat of clear, it lifts the black paint which results in more clean up time and then you have to start all over.  I figured this out the hard way so you wouldn’t have too.  Geeze, what a guy!

Anyway, if things went well you should have a new appearing data plate to attach to your Willys.  I’m still working on the remaining four plates because I got a little careless while sanding  but the first two plates look pretty good.  I’ve attached three pictures showing the stages of data plate repainting.

1. Cleaned Plates with paint removed.

2. After paint is applied.

3. After paint is lightly sanded off.

 
To Top

Jeep Rod Sacramento, CA **SCAM**

• CATEGORIES: Features, Jeep Rods • TAGS: This site contains affiliate links for which I may be compensated.

UPDATE 2:  This is a scam … one of the stranger scams I’ve seen.  I flagged the craigslist ad as spam.

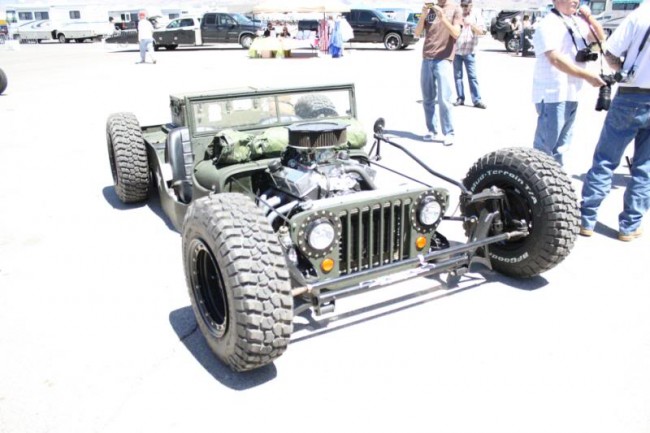
UPDATE:  I posted this in October of 2010 when Freestyle Magazine’s blog captured this unusual jeep rod.

“Rebuilt Chevy 327 V8
Lowered on Enkei Muscle Car Springs & Shocks
New Off-Road/Snow Tires
Chop Top
Documented Military History
Transmission Will Not Shift Past 2nd (C4 Corvette 4 Speed
Radiator Leaks
No Stereo, No AC, No Heater, NOTHING
Speedometer Doesnt Work, but not a problem because of the transmission.  will trade for a tuned import, bagged truck or another rat rod or pre-smog muscle car”

 
To Top

More SAS Photos

• CATEGORIES: Features, Old Images • TAGS: This site contains affiliate links for which I may be compensated.

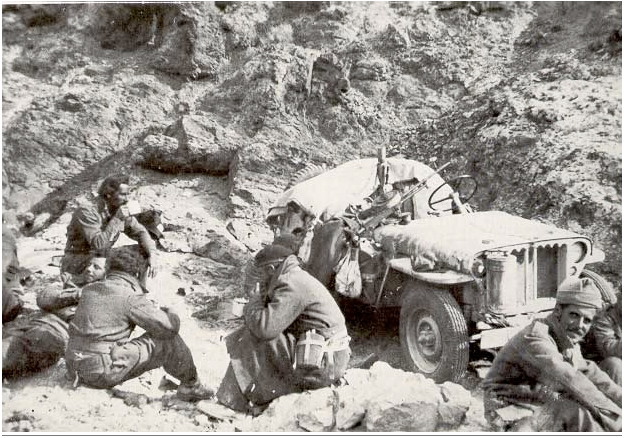
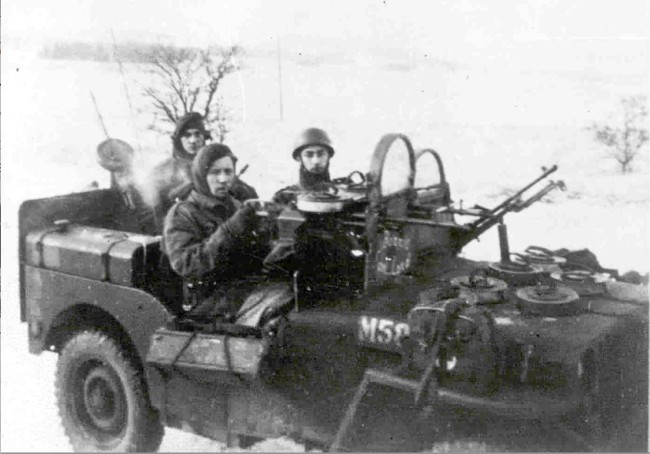
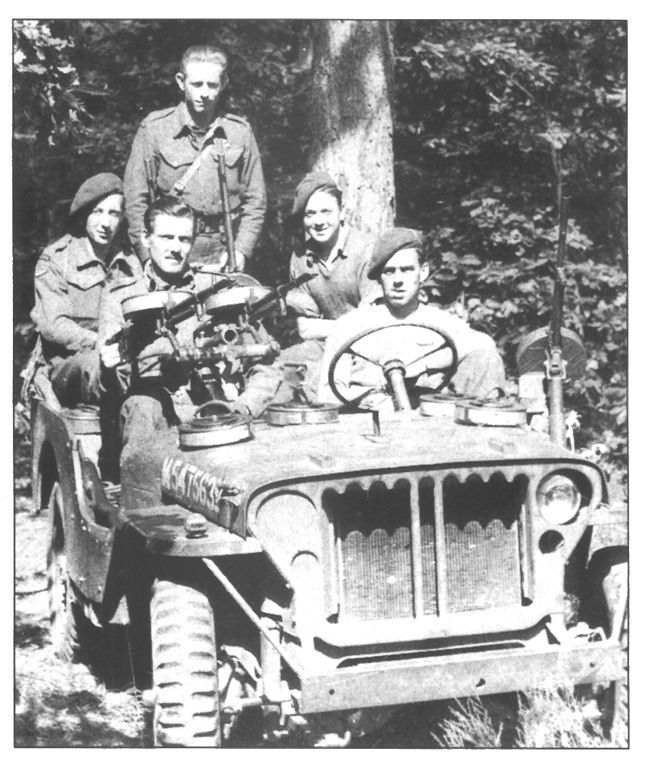
I found these SAS photos while searching for something else today.  You can see several SAS related posts here.

On these first two pics, note the strange louvres on the grilles.  I don’t remember these from other pics.  You can see the first photo at this site.

Here is a german website showing SAS Jeeps in Europe.  There are a few more photos there, too.

From another page at the same site comes these two photos. More photos here also.

From the WW2 Airsoft Website come these two photos.  There are a few more there, too.

And this image from Belgium comes from this site which has duplicates of images above and more.

 
To Top

Signed SAS Print

• CATEGORIES: Artists/Drawings, Features • TAGS: This site contains affiliate links for which I may be compensated.

I thought this was kind of cool, too.  The photo comes from a collectibles site. The people featured in the 8″x6″ print are Paddy Mayne and Ian Fenwick.

 
To Top

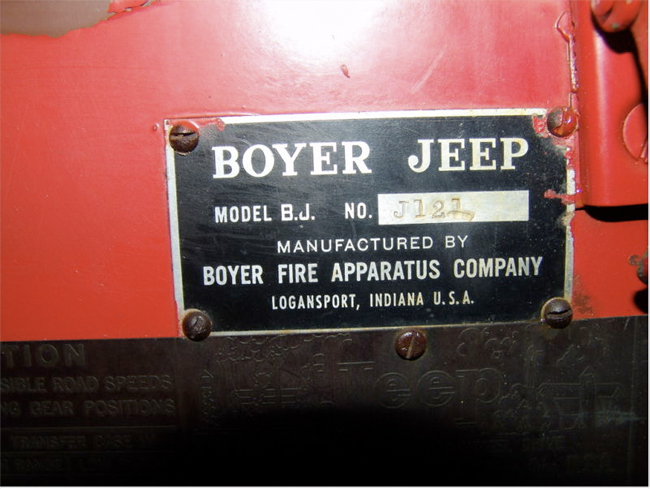
1946 CJ-2A Boyer Fire Jeep Oro Station, Ont, CA **SOLD**

• CATEGORIES: CJ-2A, Features, Fire/Police/Industry Vehicles • TAGS: , This site contains affiliate links for which I may be compensated.

UPDATE:  **SOLD** Was on eBay.

(01/29/2011) Starting bid is $12k.  It looks well maintained, but dusty.

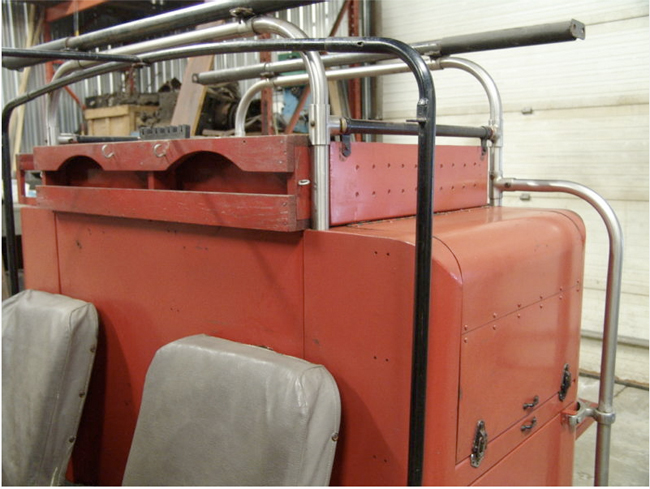
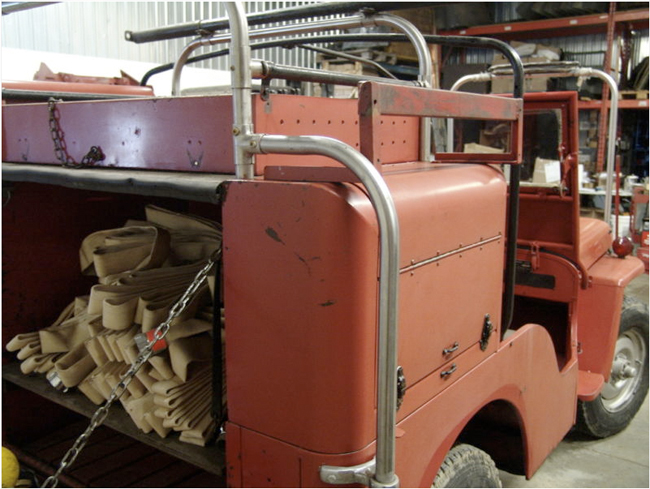
“Up for auction is an original WILLYS 1946 CJ2A BOYER FIRE JEEP.

It is extremely hard to find an original Boyer jeep with that many accessories still on the vehicle. To find out more about Boyer jeeps please go to http://cj3b.info/Fire/fireindex.html.

The jeep is in orginal condition. It appears it has been painted once. The engine runs nice and smooth, all driveline works. Engine has original governor. The mileage on the vehicle shows 2304 miles however the speedometer appears to be broken. Jeep has some rust issues: front floor especially under the tool box (rusted through), on back corner behind reflectors (both corners rusted through), otherwise the outside body, fenders, etc. are in excellent condition especially the windshield frame (have never seen one in that great shape for a 1946 vehicle!).

The jeep comes with all the accessories you see in the pictures. Unfortunately it didn’t come with the pump. It appears that the pump was removed many years ago. The jeep was stored inside for many years, we changed the fueltank and the exhaust system as we didn’t want to take a chance with the old one with old fuel in it. The old fuel tank is emptied and is included in the auction. It appears there were no leaks from the old fueltank. Most likely it will need to be boiled out.

The brakes need to be looked after as the brake pedal goes straight down to the floor however it moves freely.

We have a professional restoration facility for Willys Jeeps and in our opinion this would be a simple restoration because everything is there to do nice job. Fuellines, brakelines, wiring harness all original.

This vehicle comes without any warranties or guaranties. We have over 15 years of experience in shipping vehicles worldwide and will assist buyer with shipping/loading and paperwork.

Shipping, taxes and/or other fees (import, customs, etc.) are not included in the auction and are the buyers responsibility.”


To Top

Anyone Recognize This? **MYSTERY SOLVED**

• CATEGORIES: Features This site contains affiliate links for which I may be compensated.

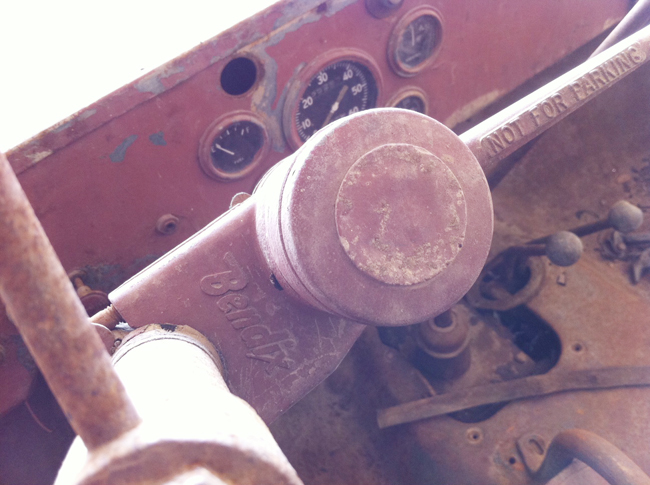
UPDATE: See Comments.  This is an old style parking assist for a trailer. See Comments.

Dexter found another MB deal, but this item was installed on the steering column.  Anyone know what it is?  It looks to be a hydraulic unit, but not sure why it says “not for parking”?

 
To Top

Agent CJ-3B

• CATEGORIES: Features, videos This site contains affiliate links for which I may be compensated.

Now that Chet has finished his CJ-3B restoration, it seems he now has time to launch his movie career!  He hadn’t planned on creating an ‘agent theme’, that emerged during editing.

Chet writes, “I made a “hokey” you tube clip last week and used the term “biscuit fender” that I learned about 10 years ago on the 3B forum…. Also in the intro I used the term “Horse Face”, as this is an affectionate way the people of Brazil refer to their 3B’s.”

 
To Top

Builds: Randy, His Boys, and Their Flatties

• CATEGORIES: Builds, Features, Reader Stories This site contains affiliate links for which I may be compensated.

If you’ve never really looked at a map of Idaho, pull one out (or, I suppose you could use Google Maps).  Between where I live in Boise and Coeur D’ Alene in the North is one significant route — US 95.  Look to the East of US 95 and you’ll see National Forest after National Forest.  Then look about halfway between in central Idaho and, if you look close, you’ll see the town of Kamiah. That’s where a reader named Randy and his boys, Devon and Dusty, call home. And, at their doorstep are endless National Forests they can explore with their friends. It is a regular jeeptopia.

Before you get to Randy’s story, keep in mind, that each of these jeeps started as basket cases, so there is still hope for your project!  Also, a big thanks to Randy for taking the time to put together detailed descriptions of their rigs.  Finally, check out the last pic … I think Biscuit would fit in just fine there :-).
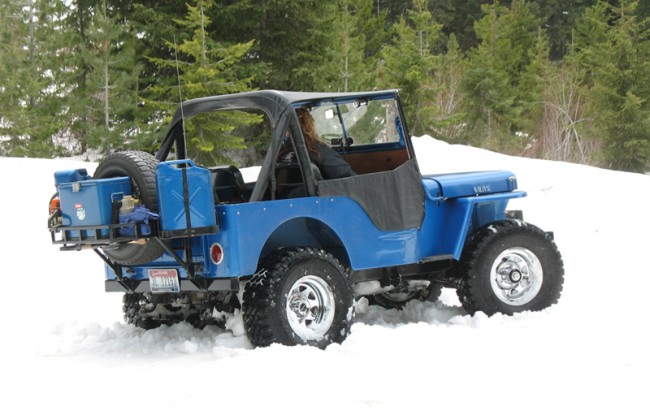
Randy’s Blue 1946 CJ2A: This Jeep was purchased new by my wife’s grandfather in 1946 and was used for decades on the family farm.  After her grandparents passed away we were able to purchase it from the estate for $200 in 1993; it was about $199 to much considering the shape it was in.

We completely rebuilt it from the ground up with a new steel tub and repaired fenders, grill and windshield. The tub is for an M38 but was all that we could locate at the time.  I did most of the body work and my brother in law painted it in our garage.  The motor, transmission and transfer case were all rebuilt and 11” brakes were installed, we also installed a rollbar, stereo, CB and a back seat.

I built a spare tire/gas can carrier/cooler rack on the back and we also have both a bikini and full soft top.  I run 32×11.50 tires in the summer and fall; 33×12.50 tires in the spring when running in the snow for better flotation.  The low range 2 wheel drive pill has been taken out of the transfer case and lock rights have been installed in both axles.  A Warn M8000 winch was installed a few years ago.
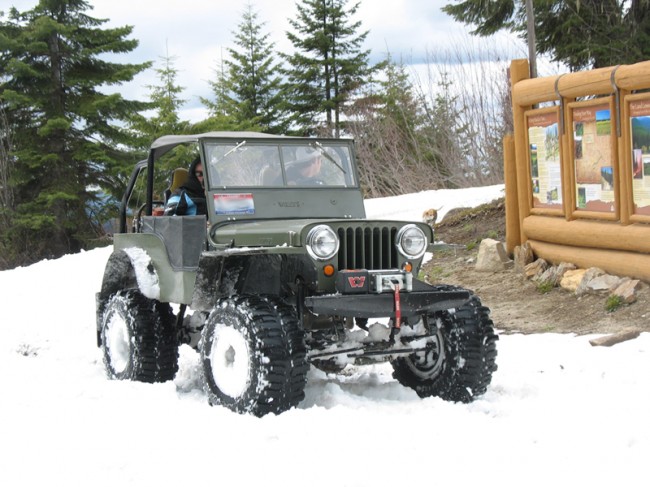
Dusty’s Green 1946 CJ2A: I (Randy) purchased this Jeep for spare parts around the year 2000.  It was a total basket case with a rusted up headless motor and most of the back of the tub missing.

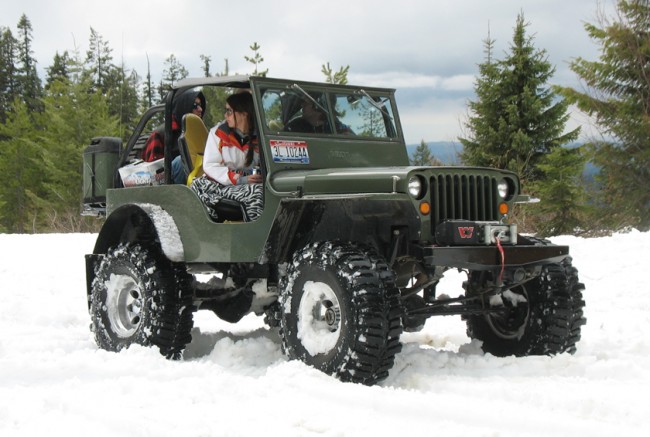
We decided to rebuild and modify it for my two sons to share; at the time Dusty was a sophomore in high school and Devon was in junior high.  We started the project in November of 2004 and completed it for its first run on Memorial Day weekend of 2005.  The 4 banger was removed and a Buick 231 V6 was put in its place, the T90, Dana 18 and stock axles were all refurbished and reinstalled as were 11” brakes.

New front and rear floorboards along with new wheel wells were welded in and we decided to take out what was left of the tailgate area and welded a flat back MB style back panel in its place.  The lift is all from a spring over and we installed Saginaw power steering up front.  Racing seats and harnesses along with a full rollcage were installed for safety and a rear seat was put in for passengers.  A console contains a stereo and a CB is mounted to the front of it.
The tires and wheels are 35×14.50×15 TSL Boggers mounted on 15×12 Mickey Thompson wheels.  I did all of the body work myself and my brother in law painted it Olive drab in our garage, a star was put on the hood just for fun.  A Warn M8000 winch along with a winch mount and bumpers that we built ourselves were installed as well.  The Jeep stayed pretty much this way for 5 years until after we found another Jeep for Devon that had bigger and better components than were in this one.

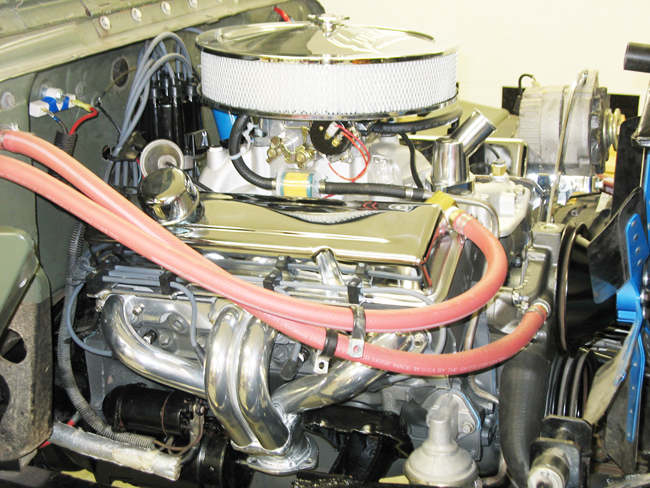
Once it became Dusty’s Jeep alone, he decide to box the frame and install a warmed up 350 Chevy with an sm465 transmission, Dana 20 transfer case that has been twin sticked and axles from 1975 CJ5.  The axles are Dana 44 in the rear and Dana 30 in the front 3.73 gear ratios.  New gears and ARB air lockers have also been installed in both ends in the past year.  He currently has a set of wider Dana 44 axles to be installed some time in the future.  Dusty did the entire drive train swap himself with only minor advice from me.  He has since built a spare tire/gas can carrier/cooler rack for the back and plans on putting on a set of 40 inch tires after some fender trimming behind the back tires is done.
Devon’s Green 1942 MB: I purchased this Jeep off of E-bay for too much money but it already had the running gear that I was looking for which included a small block Chevy (283 not a 327 as advertised), sm420 transmission (no ceramic clutch as advertised), a twin sticked Dana 20 transfer case and Scout II axles; Dana 44 rear, Dana 30 front with 4.27 ratios.

The body was pretty rough and it had a thin skin of sheet metal installed all of the way around the tub that hid lots of holes and rust.  A home built gas tank was in the back where a seat normally goes and a heavy spare tire carrier/cooler rack was mounted on the back.  We started rebuilding this one on November of 2007 and had it mostly finished by Memorial Day weekend of 2008.

A warmed up 350 Chevy built to the same exact specs as Dusty’s was installed along with the refurbished running gear that came in the Jeep.  All new spring hangers and reversed shackle mounts were built and welded on the outside of the frame in the front because of the wider Scout II axles, a new mount for the Saginaw power steering unit was installed and the frame rails were boxed.
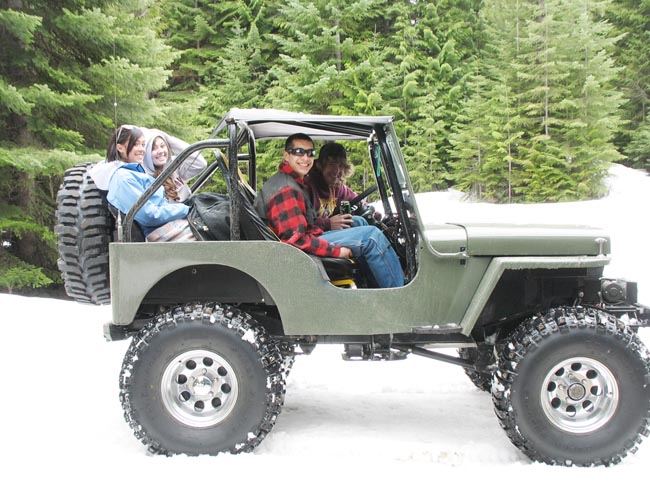
The rollbar was cut apart and welded back together then installed in the correct place.  The floor boards front and back were all replaced and the area between the rear fenders was increased by using narrower rear inner fender wells, as a result we were able to put in some comfortable small bucket seats.  The rear fenders were opened up 2 inches and the rear axle was moved back an inch to make room for bigger tires.

Racing seats and harnesses were also installed in the front along with a stereo and CB radio.  I had injured my shoulder during the winter and was dreading the thought of all of the sanding that would need to be done getting the body ready for paint when a friend of ours that owns a body shop (Orofino Body Shop) volunteered to do all of the body work and paint the Jeep as a graduation present for Devon; what a fantastic gift.  We also had a star put on the hood and Devon built a rear bumper with a spare tire/gas can/cooler rack mounted on it.

A Warn M8000 winch was mounted on a winch plate and front bumper that Devon built as well.  This winter he upgraded the axles to newer Scout II Dana 44’s in both ends with disc brakes in the front.  We turned the front knuckles 15 degrees which gave it 6 degrees of caster and turned the back of the pumpkin up 9 degrees for a better drive line angle, new perches were welded on to get the angles correct.  The axles now have 4.10 ratios with OX cable actuated lockers.  He built a center console that houses the locker shifters and cutting brake handles for each rear brake.  New shock mounts were welded on the axles and he built new shock hoops for the front, he added Bilstein 5150 shocks on both ends and a heavy duty tie rod and drag link set that is designed for Dana 60 axles was also installed, the tubing is 1.5 inch OD with .250 wall thickness and huge tie rod ends.

The tires and wheels are 13.50x37x15 TSL Boggers on Mickey Thompson wheels; 40 inch tires will be coming in the next year or two.  All most all of the work done recently has been done by Devon, I helped him with turning the knuckles and installing the lockers but he did everything else himself.

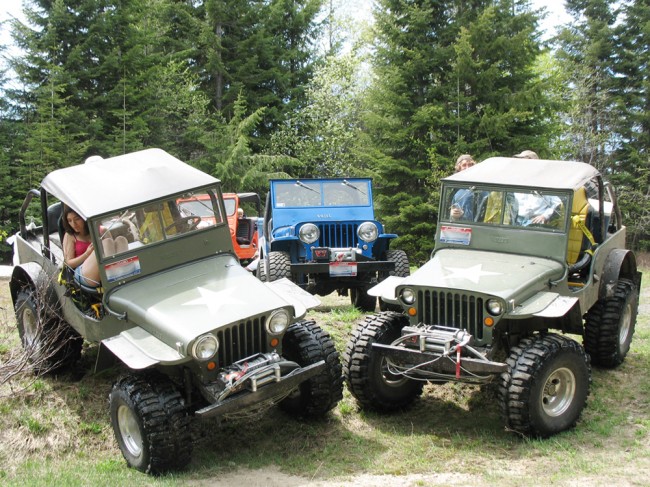
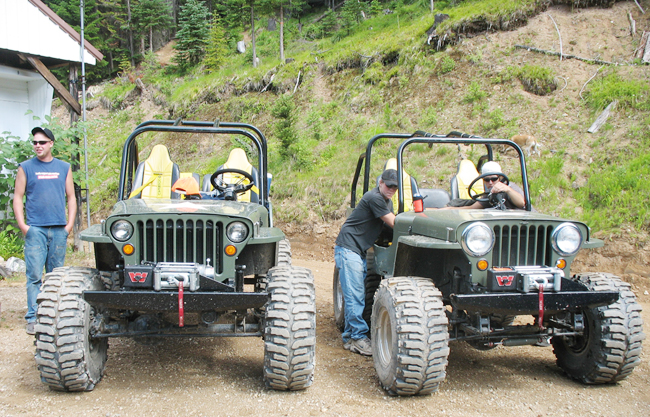
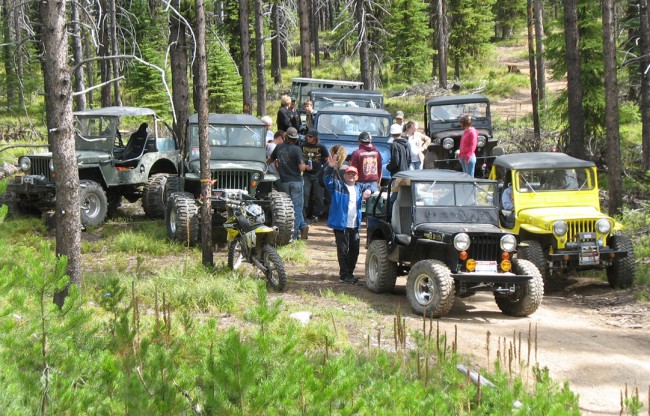
Here are the boys Jeeps at the inlaws cabin in OroGrande which is near Elk City and Dixie as well.  Every time the boys take their windshields off it rains, we got caught in a nice shower on this trip.
And, finally, this is a Jeep run with friends of ours that have cabins in the old mining town of Dixie (near Elk City) about 100 miles from Kamiah.
 
To Top

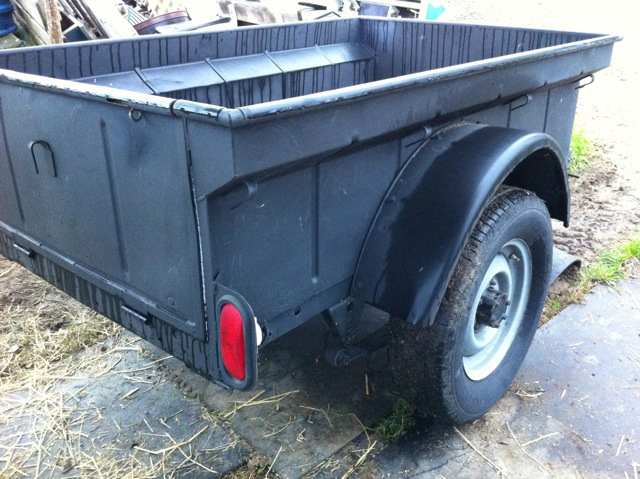
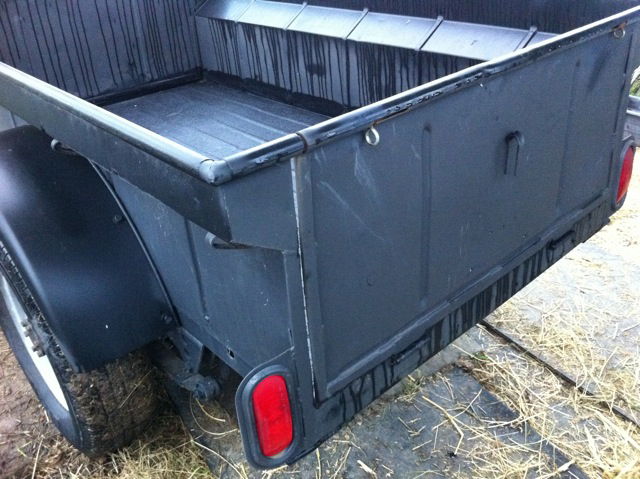
Dexter’s 1943 MBT Trailer’s Custom Tailgate

• CATEGORIES: Features, trailer This site contains affiliate links for which I may be compensated.
Last week Dexter bought a MBT with an unusual tailgate modification that’s real practical for standard uses.  So, he took some pics for us and here they are.

 
To Top

Builds: Chet’s 1965 CJ-3B Restoration

• CATEGORIES: Builds, Features • TAGS: This site contains affiliate links for which I may be compensated.

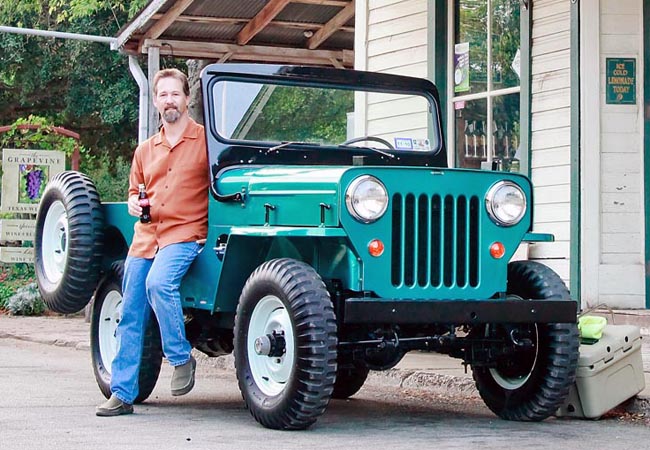
Chet contacted me today, telling me about the restoration he recently completed on his 1965 CJ-3B that was once owned by his Grandfather. He clearly suffers from the Willy’s sickness, as he’s got the restoration bug again and is thinking Surrey this time (but don’t tell his wife just yet).  His CJ-3B is evidence that any project he tackles will benefit from his good work.  You can read all about his restoration at the CJ-3B Page. (Make sure to read about the bottle opener.)

 
To Top

Wolfgang’s Travel Trailer & M-38

• CATEGORIES: Features, International, M-38 This site contains affiliate links for which I may be compensated.

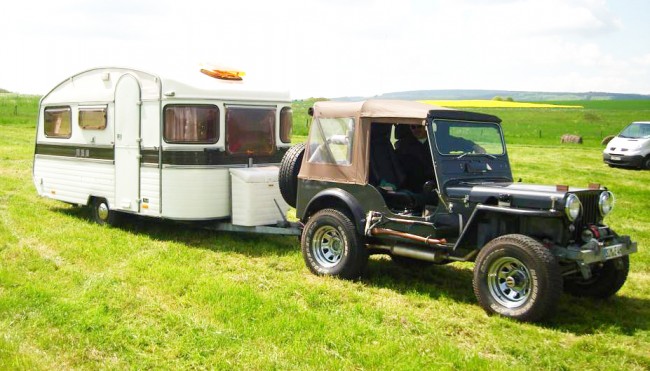
Wolfgang lives in Germany and has a great looking M-38.  But, I think that travel trailer is equally cool.  It was built in Belgium in 1977 and the model is a Coral T3.

BTW Wolfgang is looking for a Bell Crank.  Anyone have an extra one?  Just email me at d@ewillys.com.

Here’s the shot of the trailer:

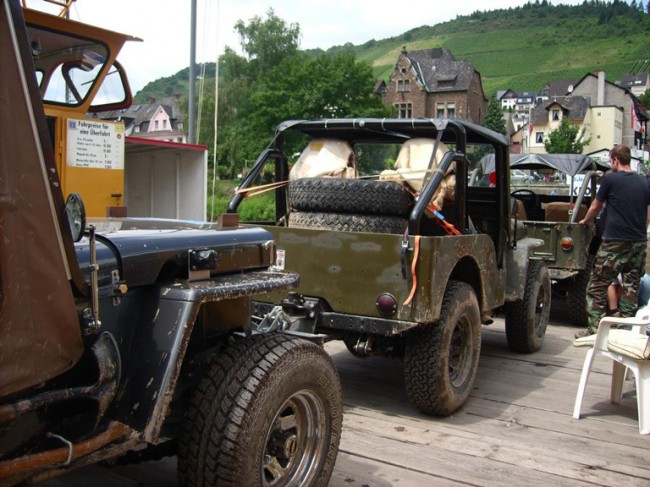
Wolfgang and some friends were out jeeping recently.  As you can see, he’s not afraid to get it dirty, either.

I thought this was a really cool shot.  They are crossing a river on a small ferry.  The town in the background looks so picturesque!

 
To Top

Parkette(?) Flat Fender Fiberglass Molds

• CATEGORIES: CJ-3A, CJ-3B, Features, Unusual • TAGS: , This site contains affiliate links for which I may be compensated.

UPDATE:   Steve and I believe these are the Parkette Molds.  They appear to have sold.

You don’t see these appear for sale often. The CJ-3B Molds are especially unusual.

“Old set of molds to build Willys fiberglass bodies
One floor pan mold in good shappe.
One High hood body mold, needs to be reworked, wooden supports rotted and broken
One high hood grille mold
One low hood grille mold
One high hood hood mold
One low hood hood mold
One tailgate mold
Couple other misc. molds”