Features Research Archives

To Top

FC Tour Jeep: Steering Progress

• CATEGORIES: Features • TAGS: This site contains affiliate links for which I may be compensated.

I haven’t had much time for jeep play, as the property, cows and gardens have required and will require a great deal of my attention over the next week. Next weekend we will be welcoming two additional 1000lb steerings that get slaughtered in August or Sept (hopefully), while our three young heifers need to be moved to the neighbor’s pasture where they will spend the summer bulking up for slaughter (or sale) next fall. And, so much more!

So, there will be limited, if any, updates for the upcoming week. I’d say I’m taking a vacation week, but it won’t be much of a vacation!

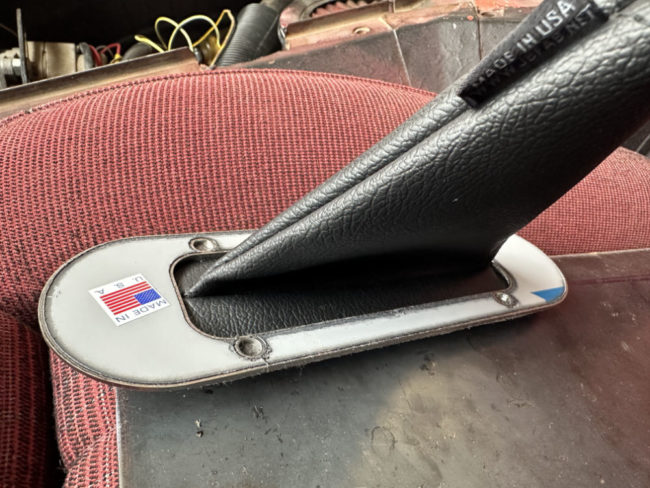
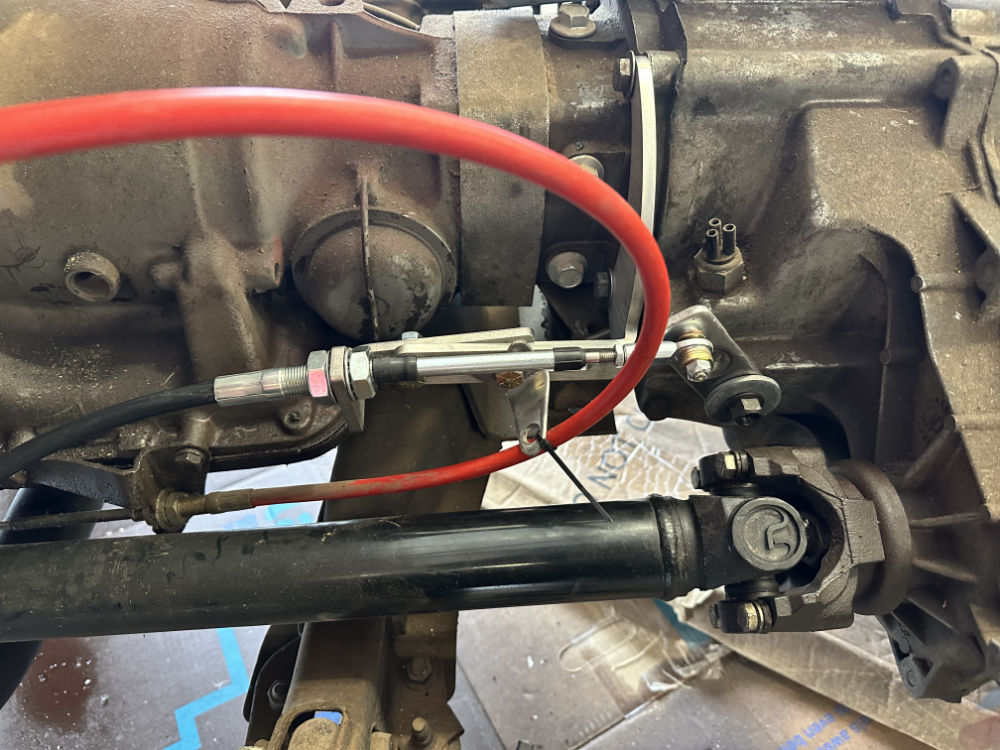
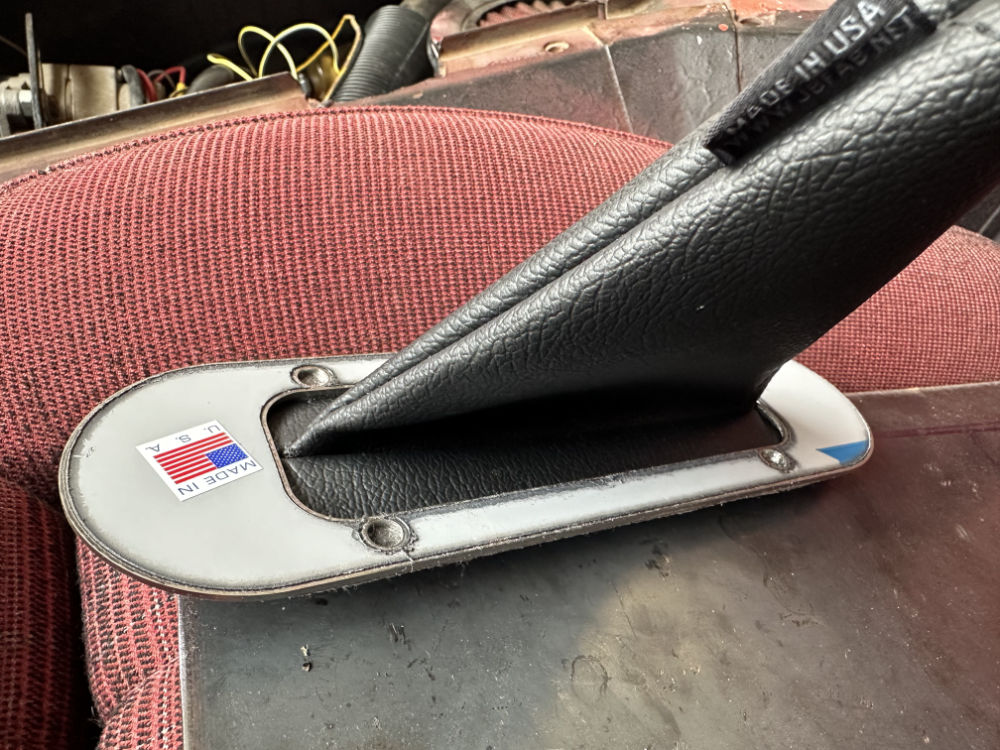
As for the steering, I welded the floor notch into the floor cover and welded a shelf to the frame for the heim joint. I still need to drill the holes for each of the shaft couplers, get a stock rubber replacement boot for the Rack and Pinion joint, and paint some of the parts, but otherwise the steering is ready to go. Once I get the stock seat installed, I’ll revisit the height of the steering wheel; I may need to shorten the steering column and shaft by a couple inches. But, that’s an easily done thing after everything is together.

2024-04-07-steering1

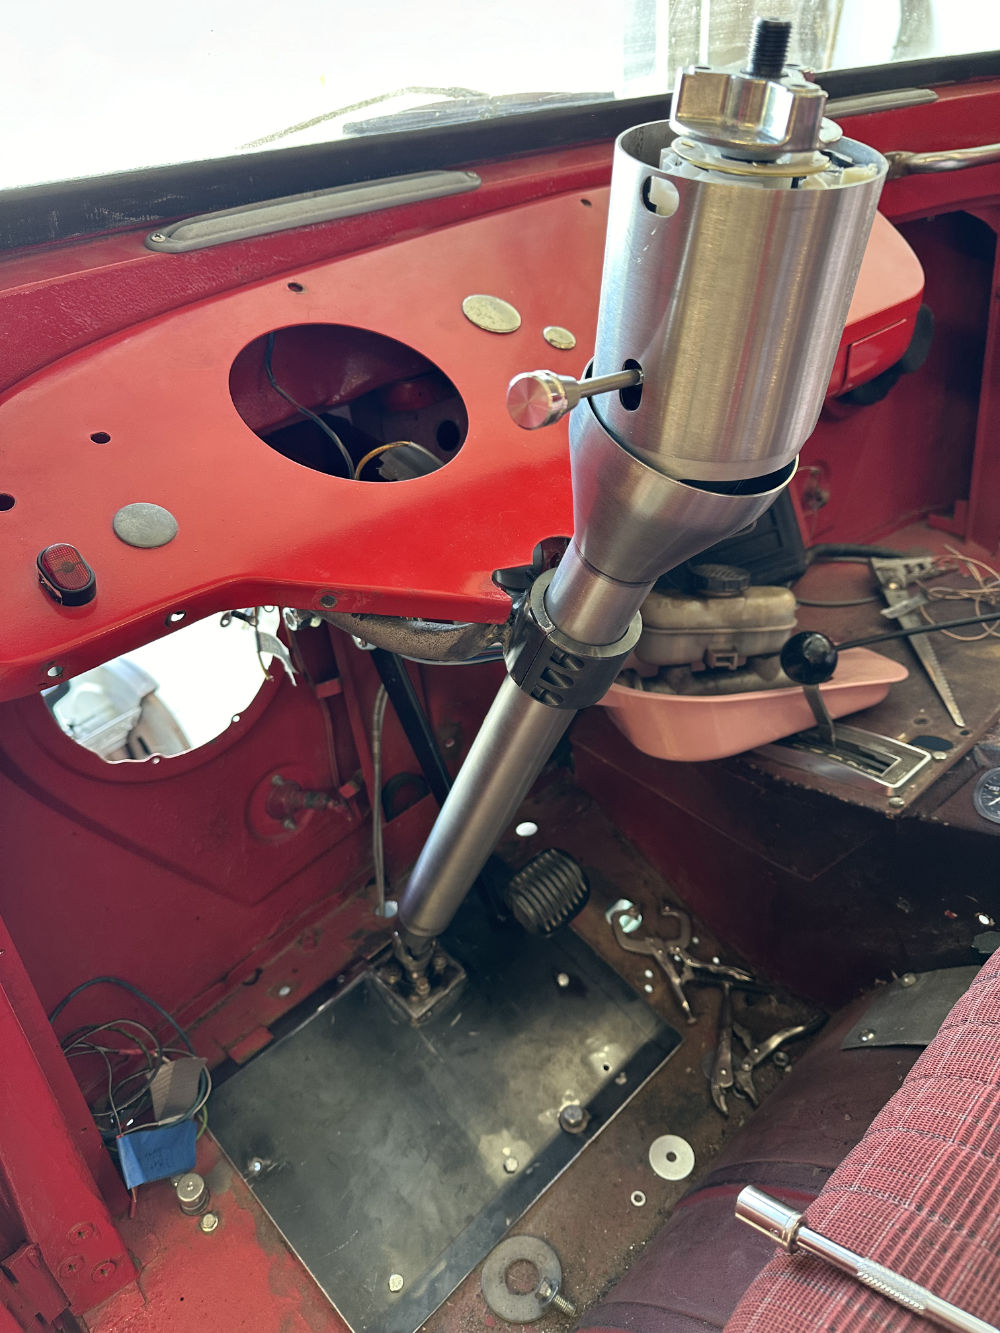
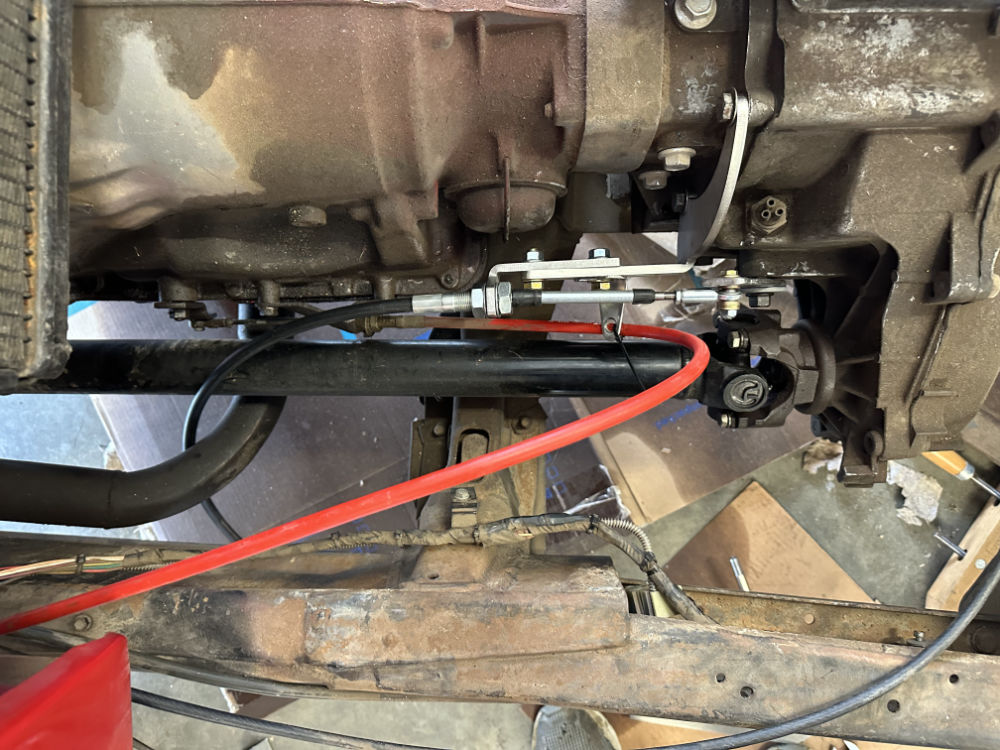
I have a plan for running these brake lines along the interior of the frame (not inside the frame), but I will likely wait to redo them until after I pull the cab. So, these lines will be clamped and more neatly run once the steering is in place.

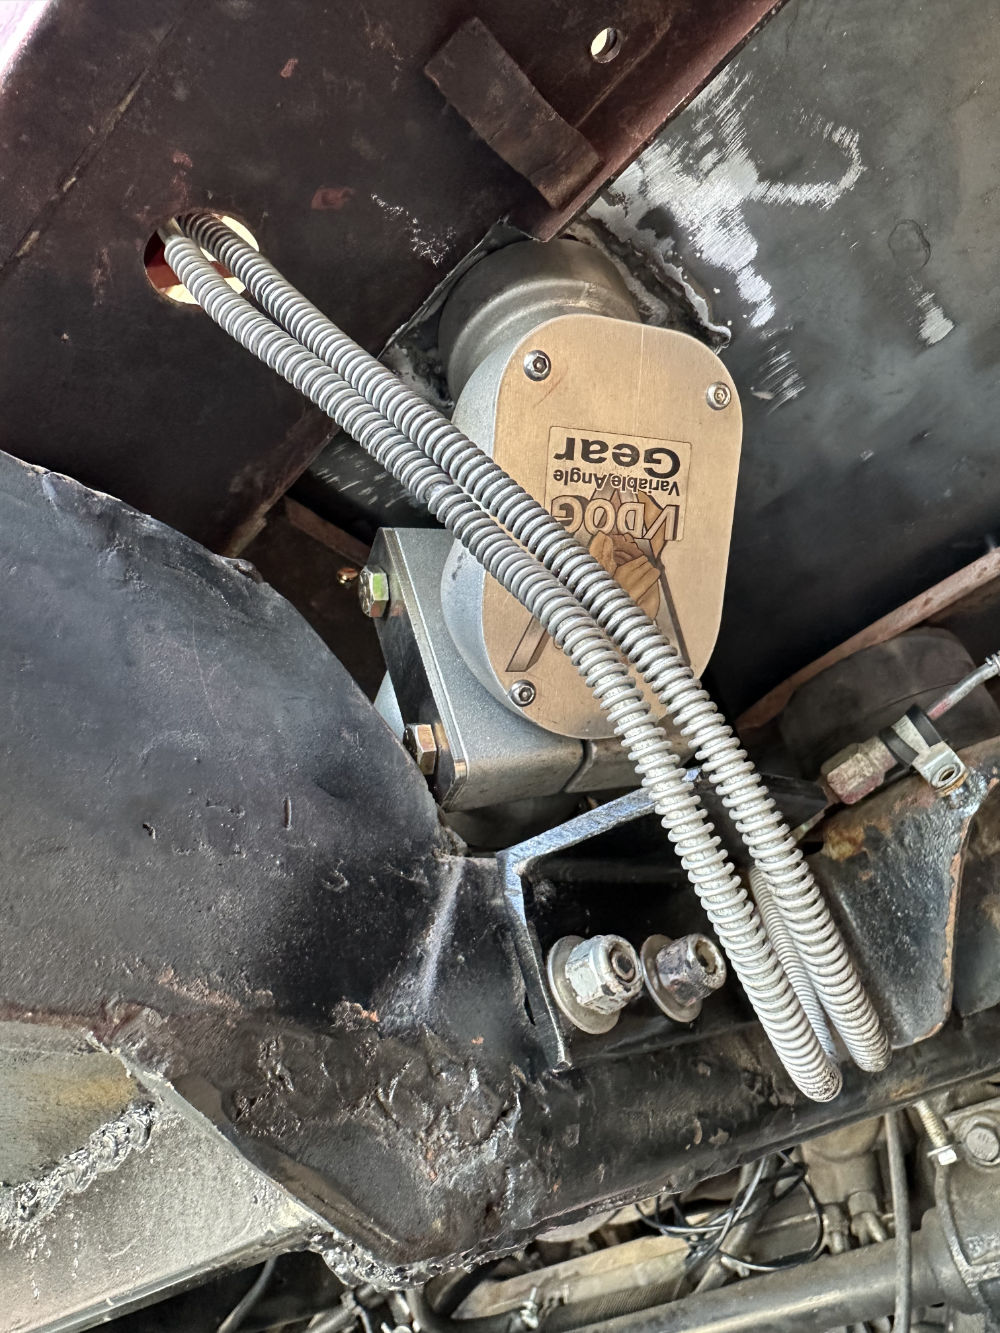
What you see for the bracket holding the V-dog is a 3/8″ angle piece welded vertically to a 3/8″ thick horizontal angle piece held to the frame by three bolts that were already there. It’s a snug fit, but there’s just enough room to make it work.

2024-04-07-steering2

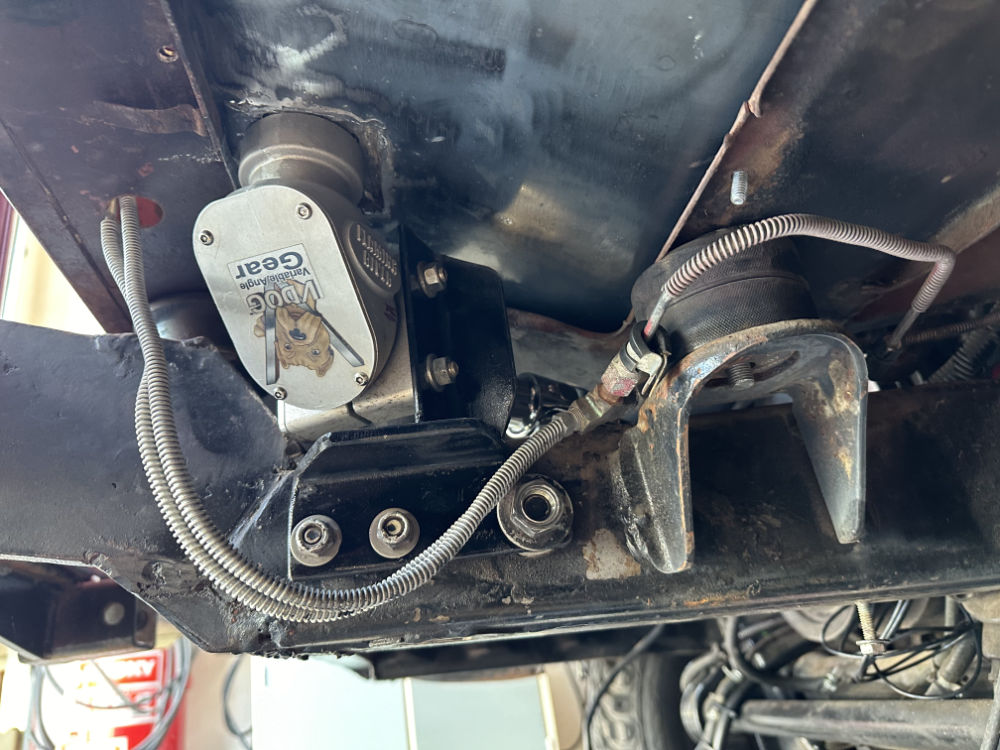
You can see some of the welds underneath the frame that need to be cleaned and reworded.

2024-04-07-steering3

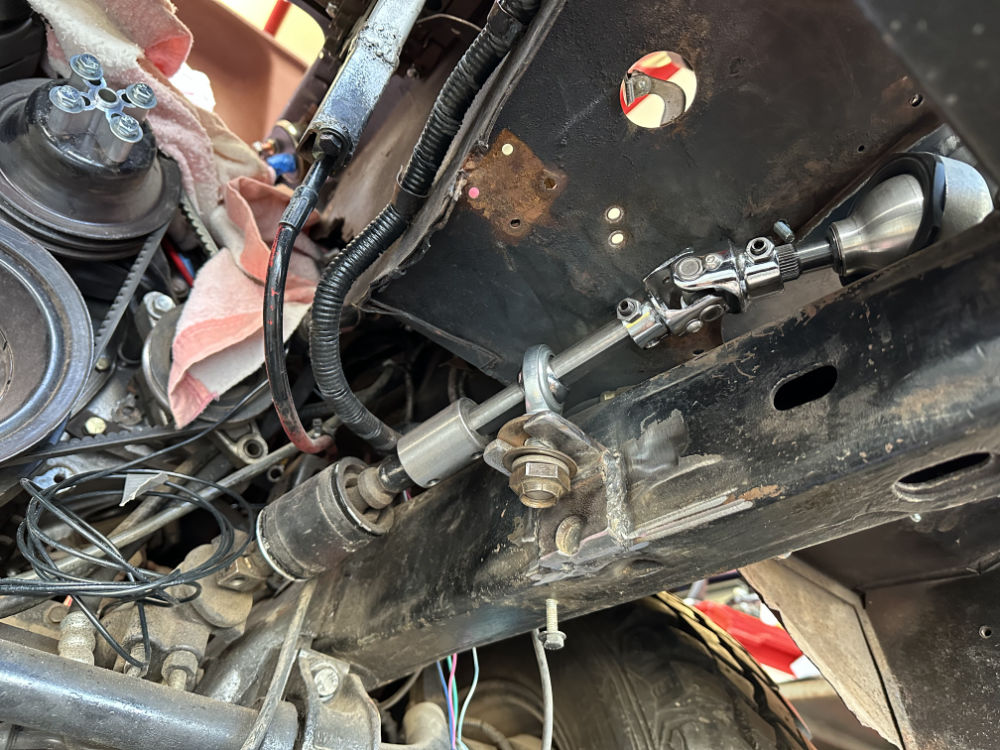
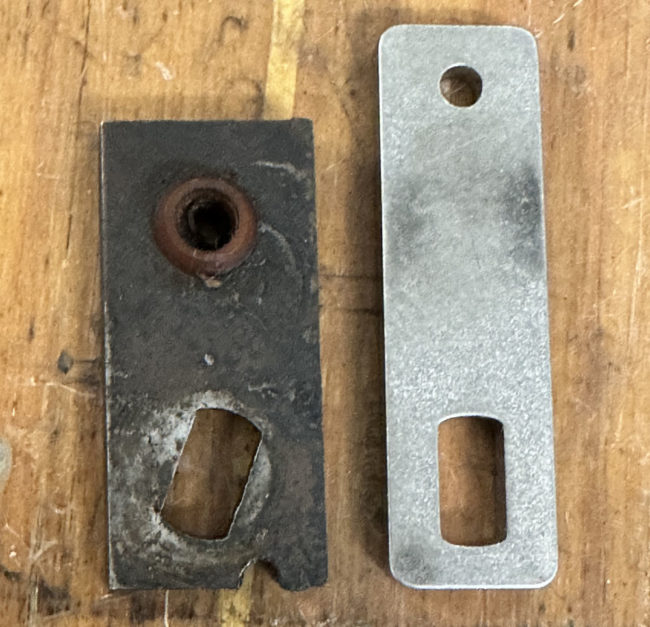
I added a slot to the Heim Joint bracket because without it disassembly would be difficult.

2024-04-07-steering5

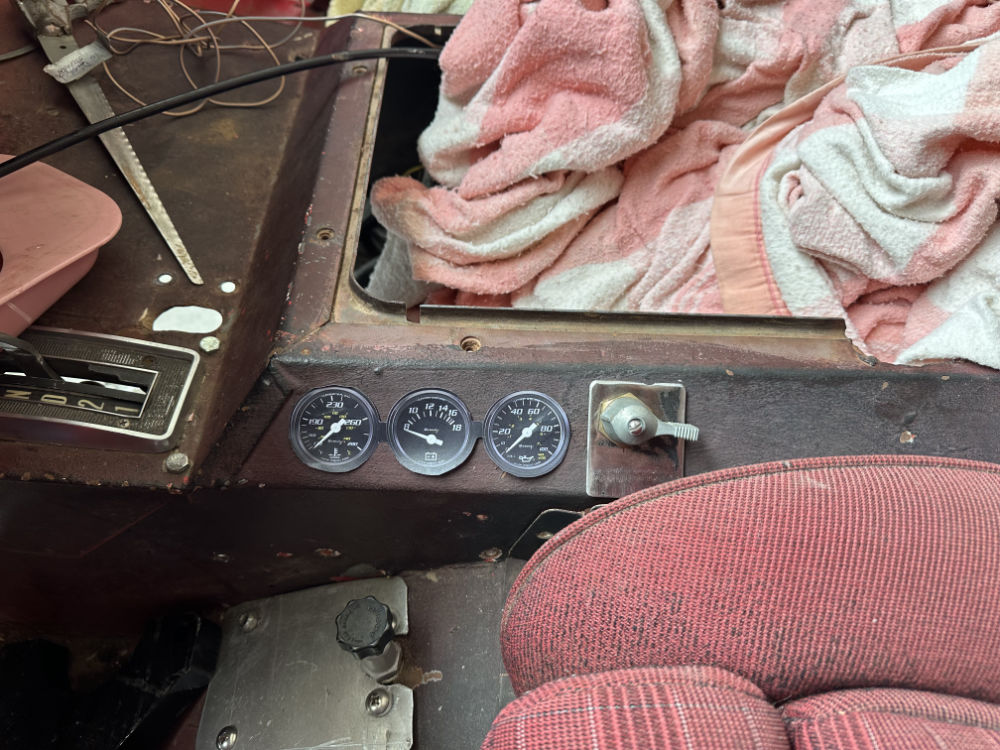
My longer transfercase cable should be here Monday or Tuesday, so the transfercase shifter will be the next install. Once that’s in place, I can install the new gauges and build the new transmission cooler bracket. All that will be followed (or coincide) with the new gas pedal setup based on the late 1960s VW bus. Then comes the e-brake and, finally, the wiring.

 
To Top

FC Tour Jeep Updates: The 4WD Shifter

• CATEGORIES: Features • TAGS: This site contains affiliate links for which I may be compensated.

Spring sprang for a few days this week, necessitating mowing, fertilizing, irrigation-de-wintering, and some other projects. but yesterday I got a chance to get a few more things figured out on the FC.

TRANSFERCASE SHIFTER:  I received the 4WD/Hi-Lo Range shifter from JB Customs, out of Salem, Oregon, which builds a variety of transfercase shifters and other products. I had ordered a setup for a NP231, hoping that I could modify it for the NP207. The quick answer is, yes, I was able to install and shift the transfercase, a big win! But, there were a few things I had to address along the way.

This pic shows the shifter, its cable, and the bracket for installing the cable in front of the shifter. The whole unit seems well built.

2024-04-04-4wd-lo-range-shifter1

This is the cover plate for the shifter. You can see the rough black bead of glue(?) around the top edge. I’m not so impressed with this plate, but, for my needs, I will be making a squared off aluminum cover plate anyway, so this isn’t a big deal to me. My custom cover plate same dimensions as the automatic shifter top-piece. Not shown is the knob with the correct shifting pattern on it. However, I also plan to add some indicators on the custom cover-plate showing where 2WD, Neutral, 4WD and 4WD Lo positions are located (in case Ann or someone else is driving).

2024-04-04-4wd-lo-range-shifter3

The first challenge I ran into was the difference between the shifter arm that is on the NP207 (on the left) and the shifter arm that came with the package (on the right). Obviously, there are several discrepancies. Even the “notch” width-size of the new arm was slightly smaller than the one I had. The fact the NP207 arm slot is angled seems an important aspect of the arm, too. So, I ended up lengthening the original by welding a piece of steel to the top[. It will work just fine (I forgot to take a pic of the finished part).

2024-04-04-4wd-lo-range-shifter2

I ran into a problem with one of the transfercase bolts; it is too short, so I will have to go buy a longer 15mm bolt. I also found that the transmission shifter cable was bumping into the transfercase shifter, so I built a custom piece to hold it in place (just a zip tie for test purposes).

Once I got those problems dealt with, I hooked up the shifter, ran the cable underneath the frame, and tested it. The shifter moved the transfercase through its options with ease. This was an important win!

2024-04-04-4wd-lo-range-shifter5 2024-04-04-4wd-lo-range-shifter4

The final issue I ran into was cable length. I had a choice between a 60″ and 72″ cable. Long story, but I went with the 60″ when I should have ordered the 72″ (which I thought might be way too long). It turns out the 72″, which I ordered today, will work perfectly. 

So, once I get everything in place and tested, I will pull everything apart and add the finishing touches.

STEERING UPDATE: Yesterday, I welded together the bracket to hold the V-Dog steering unit. I also formed a new sheet metal floor cover to span the floor’s access hole and connect with the top of the V-Dog, which will help tie things together.  (I don’t have pics just yet).

MINI-GAUGES:  I mocked up three 1.5″ lift-size mini gauges and also added a test plate for the power switch. Having the gauges in that position helps hid them, but allows me to see them if need be.

IF I got this route, I will make one solid dash plate for the three gauges and the switch, so it looks more like one unit. The gauges would also need to be rotated for easier reading.

The knob below the gauges is a Wildwood brake proportioning valve. I haven’t done anything with that at all yet. I’ll likely replace the aluminum plate, but that’s probably all I will do to it for now (I”m not sure if I really need this or not … I believe it’s this product).

2024-04-04-3-gauges

 
To Top

1973? Welcome Brochure From A.M. General

• CATEGORIES: Advertising & Brochures, Documents, Features This site contains affiliate links for which I may be compensated.

The latest date published in this brochure is April of 1973, so my guess is that this was printed in mid-to-late 1973. It covers the history, mission, facilities, models, executive staff and other details. These aren’t he best scans, but they’d work for recording this bit of history.

1973-am-general-welcome-brochure01 1973-am-general-welcome-brochure02 1973-am-general-welcome-brochure03 1973-am-general-welcome-brochure04 1973-am-general-welcome-brochure05

Continue reading

 
To Top

Powr Matic 10-Spline 4WD Automatic Hubs

• CATEGORIES: Features • TAGS: This site contains affiliate links for which I may be compensated.

Jeff posted photos of these unusual hubs to Facebook. I’ve never seen a set. It appears they are 10 spline, automatic hubs. The name Powr Matic is stamped in three spots on the hub’s cover. Google searches weren’t any help either. There is a PowrMatic company that specializes in HVAC products, but there’s no evidence that they produced any hubs, though the company was around in the 1950s and 1960s.

So, anyone know anything about these?

powrmatic-hubs1 powrmatic-hubs2 powrmatic-hubs3 powrmatic-hubs4


To Top

Wooden WW2 Models Muncie, IN $40

• CATEGORIES: Features, Models This site contains affiliate links for which I may be compensated.

Roger Martin spotted these models for sale. The price seems reasonable.

https://www.facebook.com/marketplace/item/388763990699764

“These WW 2 models were made by Bruce Abbott over 80 years ago. Some damage on the trucks but could be fixed, I think all parts are there, except for a wheel off the strobe light.”

wood-ww2-models-muncie-in8 wood-ww2-models-muncie-in

 
To Top

1958 Yakima Ridgerunners Jeep Roadeo Program

• CATEGORIES: Documents, Features, Racing • TAGS: This site contains affiliate links for which I may be compensated.

Adam posted this rare 1958 Yakima Ridgerunners World Championship Jeep Roadeo Program to Facebook. You can view the Facebook post here.

1958-yakima-ridge-runners-race7 1958-yakima-ridge-runners-race8 1958-yakima-ridge-runners-race9

 
To Top

1946 Berkey Aux Fire Dept Testimonial

• CATEGORIES: Features, Fire/Police/Industry Vehicles, Old Images • TAGS: This site contains affiliate links for which I may be compensated.

UPDATE: This Fire Department testimonial was initially posted October 28, 2017.

This testimonial included a detailed list of fire jeep specs. 
1946-testimontial-berkey-aux-fire-dept2 1946-testimontial-berkey-aux-fire-dept3 1946-testimontial-berkey-aux-fire-dept4 1946-testimontial-berkey-aux-fire-dept5 1946-testimontial-berkey-aux-fire-dept6

Continue reading

 
To Top

Jeepsters and the Sunkist Lady

• CATEGORIES: Advertising & Brochures, Features, Jeepster, Old Images, Old News Articles This site contains affiliate links for which I may be compensated.

UPDATE: This Jeepster photo is making the rounds on Facebook; this post provides a little more info.

=================================

Posted December 24, 2020: This article provides more information about this stunt Jeepster and plane. It was published in the March 20, 1949, issue of the Fort Worth Star-Telegram:

1949-03-20-fort-worth-star-telegram-jeep-jockey-endurance-jeepster-plane1-lores 1949-03-20-fort-worth-star-telegram-jeep-jockey-endurance-jeepster-plane2-lores

===================

Originally Published Dec 8, 2012:


The Sunkist Lady was an Aeronca 15AC Sedan airplane flown by Dick Riedel and Bill Barris used to set a world-record for endurance flight.  They spent a total of 1008 hours and 2 minutes aboard the airplane, ending their flight in April of 1949. Unfortunately for them, their record was broken six months later.

What makes this relevant for jeep fans was that to keep the plan in the air, the crew used Jeepsters borrowed from local dealers to race down the airport runway so the crew could hand fuel and food to the two pilots.

Thanks to Colin for forwarding the story!

Here is a link to a story and a video about the flight (124 MB): http://www.cityoffullerton.com/depts/airport/the_sunkist_lady.asp

Here is a second article:  http://vintageairphotos.blogspot.com/2012/03/saga-of-sunkist-lady.html. The picture below is from that article.


To Top

Kaiser Jeep Wagonen Tie Clasp & Cuff Links on eBay

• CATEGORIES: Features This site contains affiliate links for which I may be compensated.

For you Gladiator fans out there, here are some fun items! This seller has some gold CJ-5 cuff links and clasp for sale as well.

View all the information on eBay

“Willy’s Overland advertising Jeep pickup truck tie clasp pin & cuff links”

kaiser-jeep-wagoneer-tie-clasp-cuff-links8 kaiser-jeep-wagoneer-tie-clasp-cuff-links7

kaiser-jeep-wagoneer-tie-clasp-cuff-links3

 
To Top

1946 Images of CJ-2A on eBay

• CATEGORIES: Features, Old Images This site contains affiliate links for which I may be compensated.

3 of the 5 images in this small photo collection show a CJ-2A with a canvas top taken in 1946. The CJ-2A was new or near new in them.

View all the information on eBay

“5 Colonel Leck & Willys Jeep CJ Black & White Photos 1943 & 1946”

5-images-3-images-of-cj2a