Features Research Archives

To Top

Good Day

• CATEGORIES: Features • TAGS: This site contains affiliate links for which I may be compensated.

2017-05-29-patterson
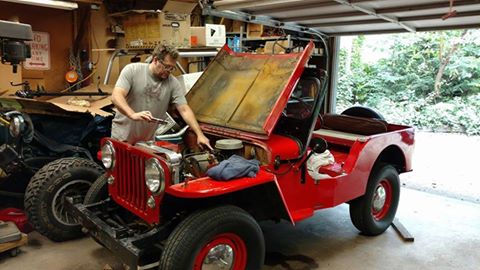
We had a good day of work on Patterson today. First up, we confirmed that all the lights, blinkers, and even the hazards work. The brake lights don’t work yet, but that’s related to the master cylinder. I’ve ordered a dual master cylinder system from R&P, which ought to solve the brake issues.

The last electronic issue to debug is the heater motor. That’s on deck for tomorrow morning.

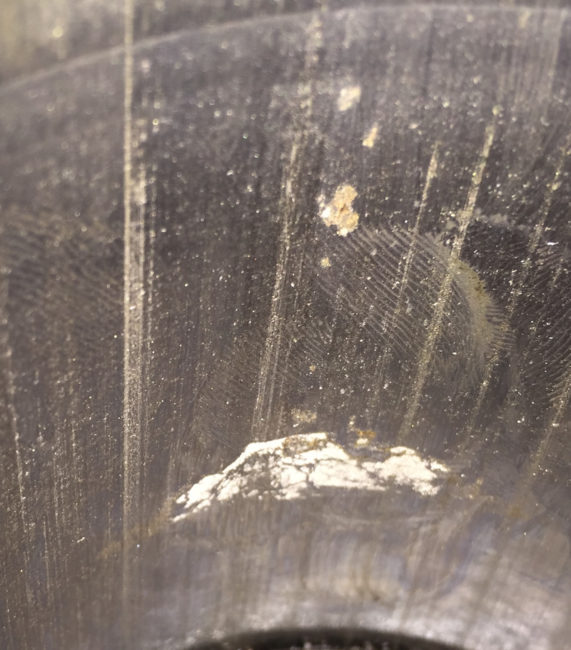
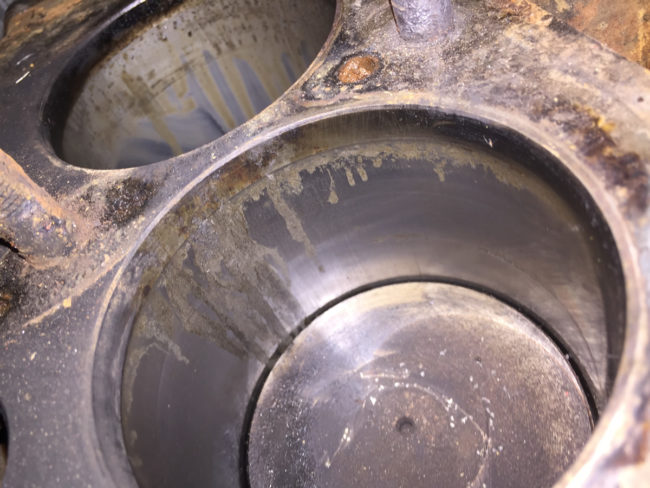
We took a look a closer look at Patterson’s engine and concluded it needs a full rebuild. There are multiple areas of pitting on the piston walls. Examples:

2017-05-29-patterson-piston-wall2

Wall of piston #4. Several instances of pitting.

2017-05-29-patterson-piston-wall1

Pitting on #2

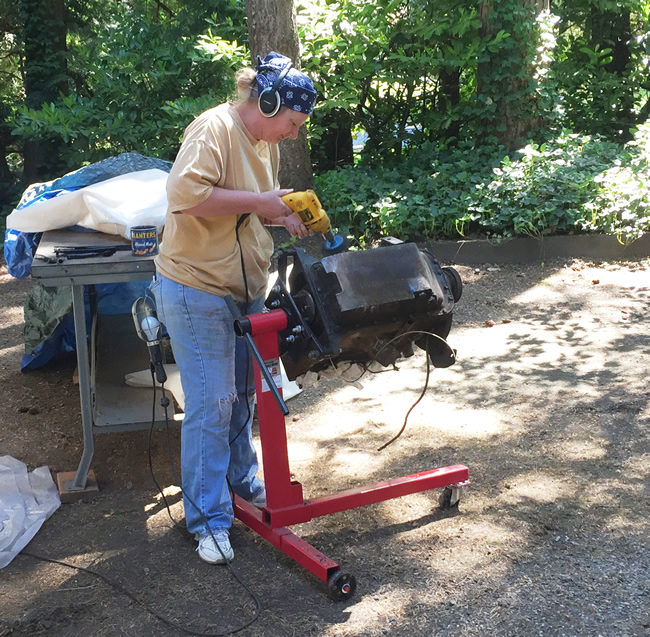
So, we turned our attention to Rusty’s engine, one that is marked as a rebuild. Ann tackled the cleaning of it. It was supposed to be a “good enough” job, which she surpassed.

2017-05-29-ann-cleaning-block Continue reading

 
To Top

2017 Willys Overland Rally Report

• CATEGORIES: Features This site contains affiliate links for which I may be compensated.

2017-moab-rally-report

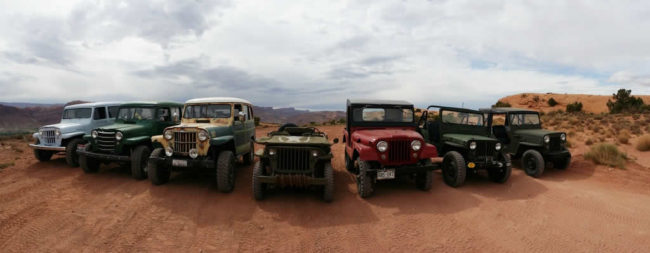
Casey shared a report over email on the 2017 Rally last week. This was the eighth year and, once again, was a big success. There’s even talk of expanding it a few days.

Over fifty people from fourteen states in twenty-three vehicles attended this year’s event . Twenty vehicles hit the trails, with five break downs.

They’ve already scheduled next year’s event for May 18-20, 2018. Once again, it will be held at the Red Cliff Lodge, a beautiful location. Learn more at the Willys Rally site.

2017-moab-rally-report2

 
To Top

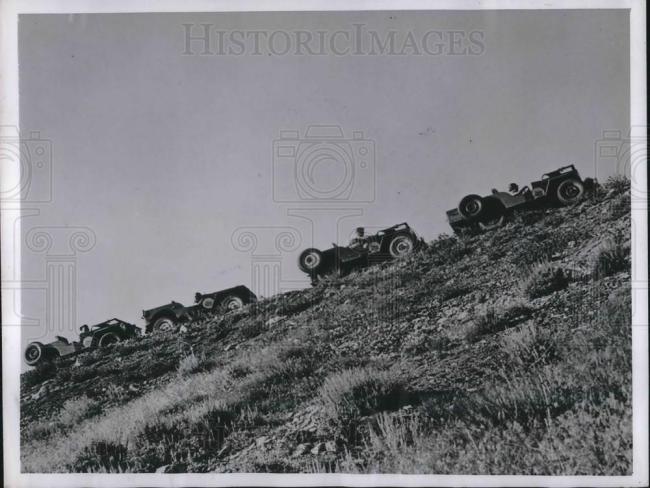
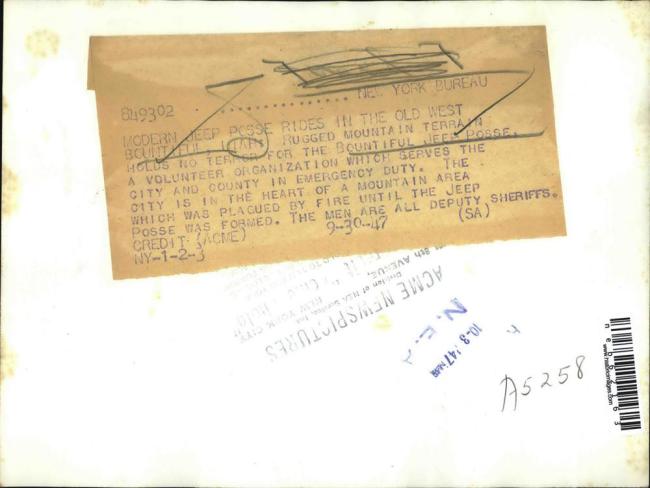
1947 Press Photo of Bountiful Jeep Posse on eBay

• CATEGORIES: Features, Old Images • TAGS: This site contains affiliate links for which I may be compensated.

This is back on eBay.

“1947 Press Photo Bountiful Jeep Posse Volunteer Org. serves the City and County
This is an original press photo. In Emergency Duty. At Bountiful Utah.Photo measures 9.25 x 7inches. Photo is dated 09-30-1947.”

View all the information on eBay

1947-09-30-bountiful-jeep-posse-1 1947-09-30-bountiful-jeep-posse-2

 
To Top

1960 Wagon Rebuild Video

• CATEGORIES: Features, videos This site contains affiliate links for which I may be compensated.

Seth shared this video of a Wagon rebuild/refurb.

 
To Top

1962 Perkins Engine Brochure on eBay

• CATEGORIES: Advertising & Brochures, Features This site contains affiliate links for which I may be compensated.

UPDATE: There’s another Perkins brochure on eBay.

View all the information on eBay

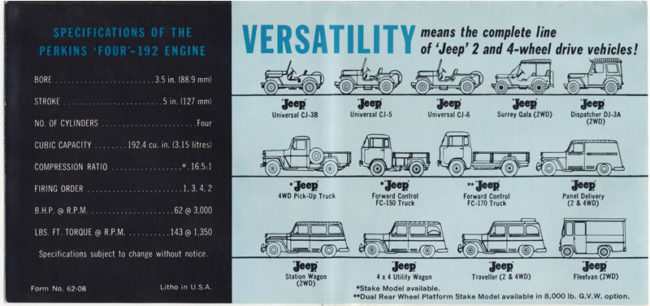
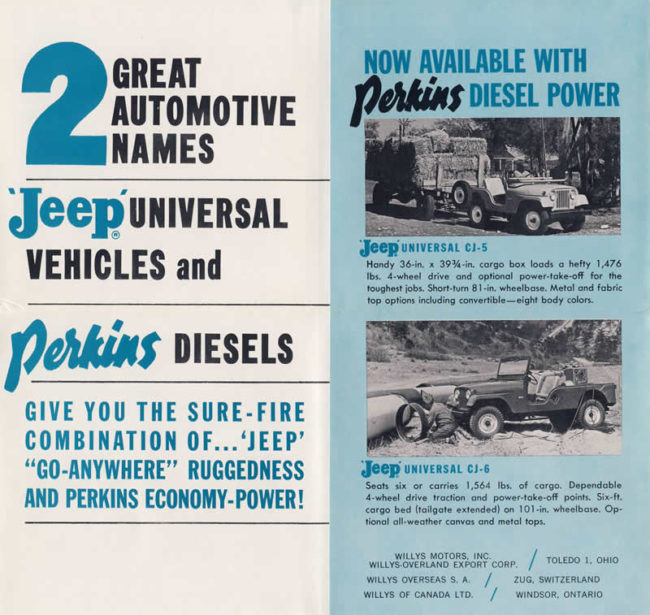
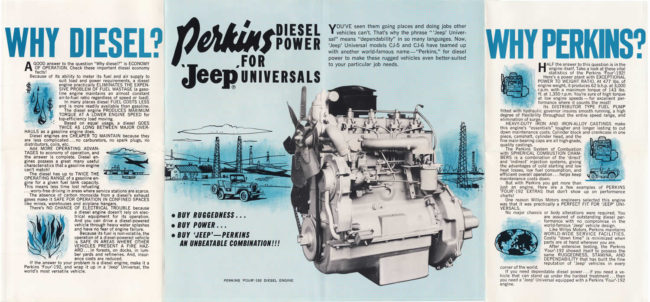
perkins-brochure2 perkins-brochure3 perkins-brochure4 perkins-brochure5


To Top

1952 Photo Of Eisenhower in Korea on eBay

• CATEGORIES: Features, Old Images This site contains affiliate links for which I may be compensated.

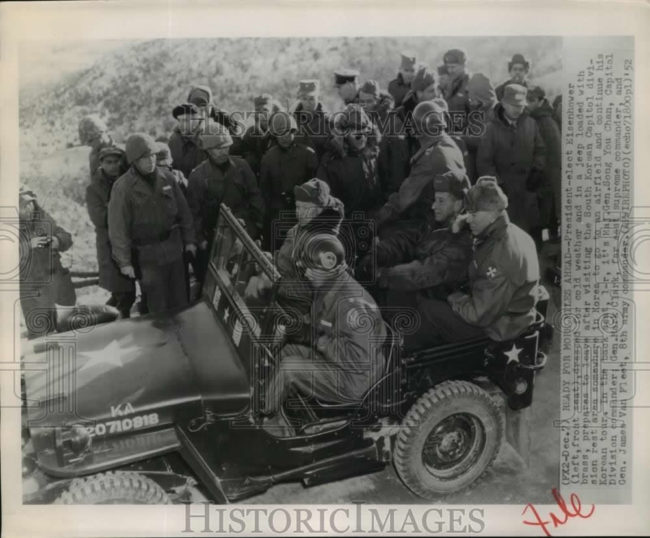
Looks like a cold December visit.

“This is an original press photo. President Elect Eisenhower dressed for cold weather and in a jeep loaded with brass prepares to leave after visiting the South Korean Capitol Division rest area somewhere in Korea to go to an airfield and continue his Korean tour. In the back seat its Maj Gen Song You Chan Capitol Division Commander Gen Mark Clark far east supreme commander an Gen James Van Fleet 8th Army Commander.Photo measures 10 x 8.25 inches. Photo is dated 12-07-1952.”

View all the information on eBay

1952-12-07-korea-eisenhower

1952-12-07-korea-eisenhower2

 
To Top

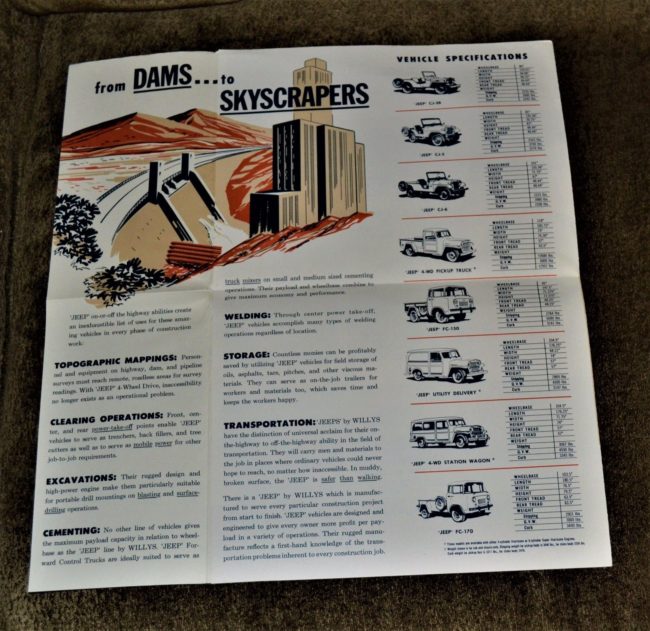
1957 Willys Export Heavy Construction Brochure

• CATEGORIES: Advertising & Brochures, Features This site contains affiliate links for which I may be compensated.

UPDATE: **SOLD** Was on eBay.

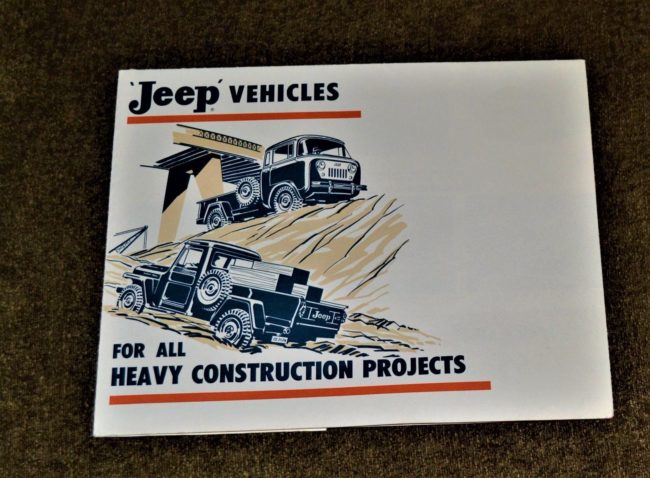
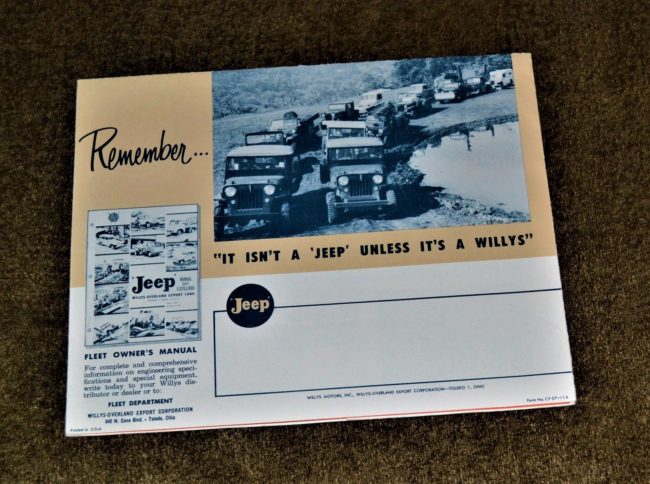
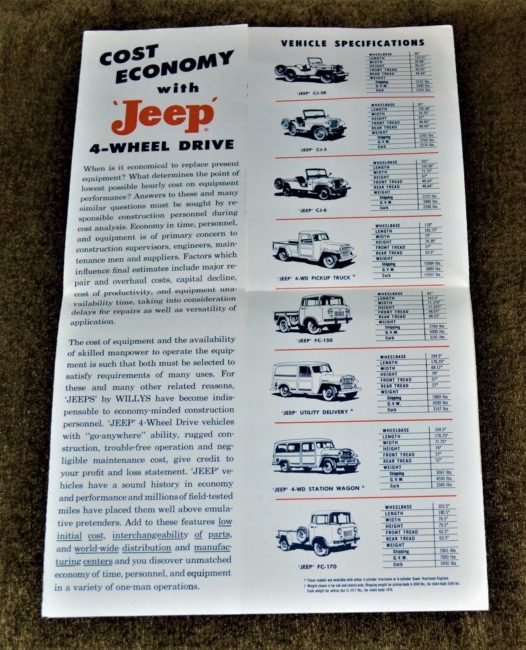
The is a cool brochure. I’d have purchased if it had been cheaper.

“‘Jeep®’ VEHICLES
FOR ALL HEAVY CONSTRUCTION PROJECTS
Measures about 7 ¼ X 9 inches in its folded
position. Opens to about 22 x 14 ½ inches”

1957-11-heavy-construction-willys-export-company-brochure3

1957-11-heavy-construction-willys-export-company-brochure4

1957-11-heavy-construction-willys-export-company-brochure5

1957-11-heavy-construction-willys-export-company-brochure6

Continue reading

 
To Top

1965 Department of Defense Jeep Sales on eBay

• CATEGORIES: Advertising & Brochures, Documents, Features This site contains affiliate links for which I may be compensated.

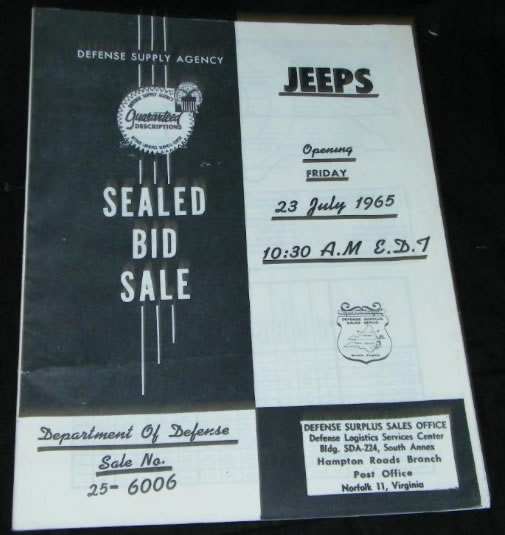
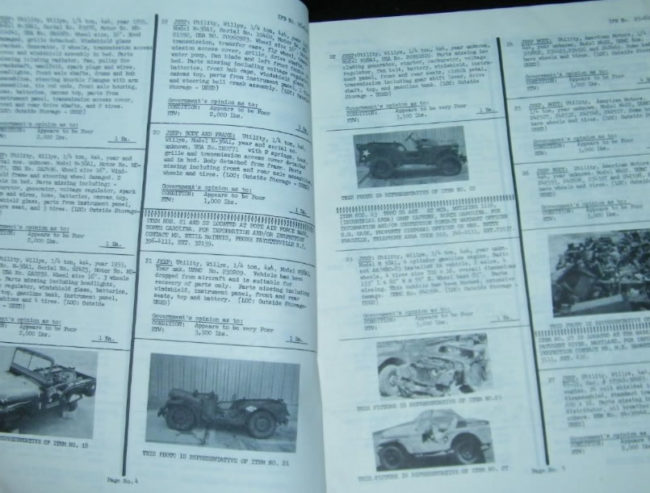
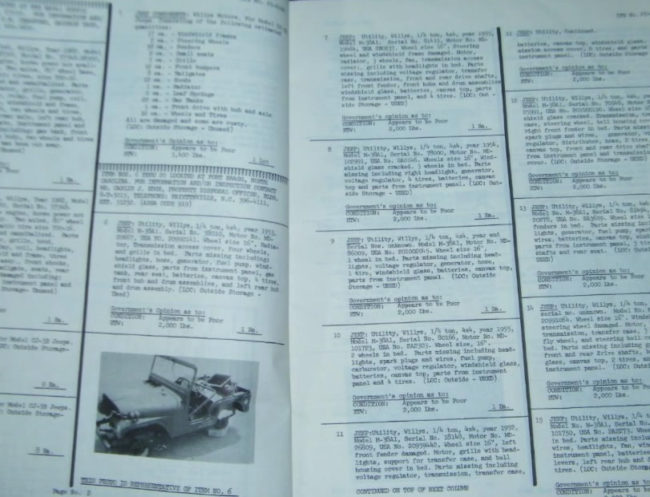
Here’s an unusual document.

“1965 JEEP DEFENSE SUPPLY AGENCY DEPT OF DEFENSE SALE NO 25-6006 CATALOG UNUSUAL”

View all the information on eBay

1965-jeep-sales-document1

1965-jeep-sales-document2

1965-jeep-sales-document3

 
To Top

Convoy of Liberty 2017 From Pilsen

• CATEGORIES: Event, Features This site contains affiliate links for which I may be compensated.

Just a couple updates for Friday.

John forwarded this website and videos from the Convoy of Liberty, 2017, from Pilsen, Czech Republic. Many jeeps were involved in the parade, along with other military vehicles, some not quite of WWII vintage (like at least one M-38A1).

This link is to the event’s website: http://slavnostisvobody.cz/en/

This video looks like it was an ad(?) for the event:

And this was one of several videos showing the parade:


To Top

Patterson’s Vacuum Reservoir System

• CATEGORIES: Builds, Features • TAGS: This site contains affiliate links for which I may be compensated.

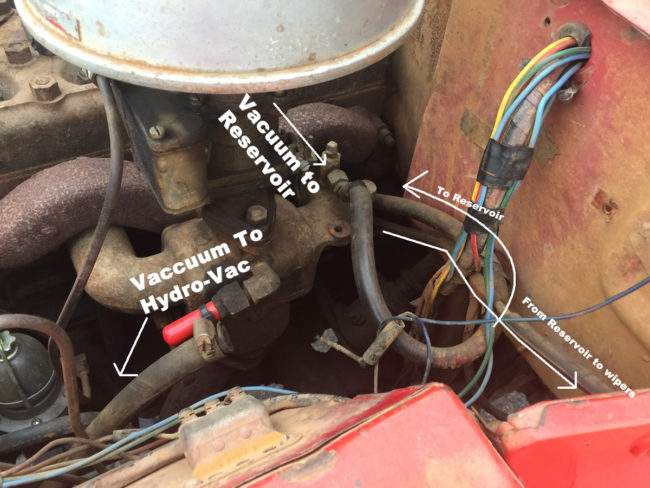
In case anyone’s curious, this is how Patterson’s vacuum reservoir is setup. Based on what I’ve read, a reservoir was important if running dual wipers. The vacuum begins at the manifold, then winds down under the body.

2017-05-16-engine-vacuum

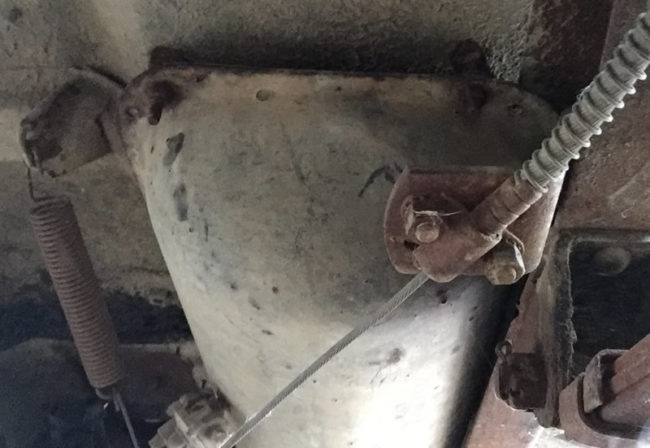
It winds up underneath to a reservoir tucked in between the frame and the spring for the parking brake.

2017-05-16-vacuum-reservoir2

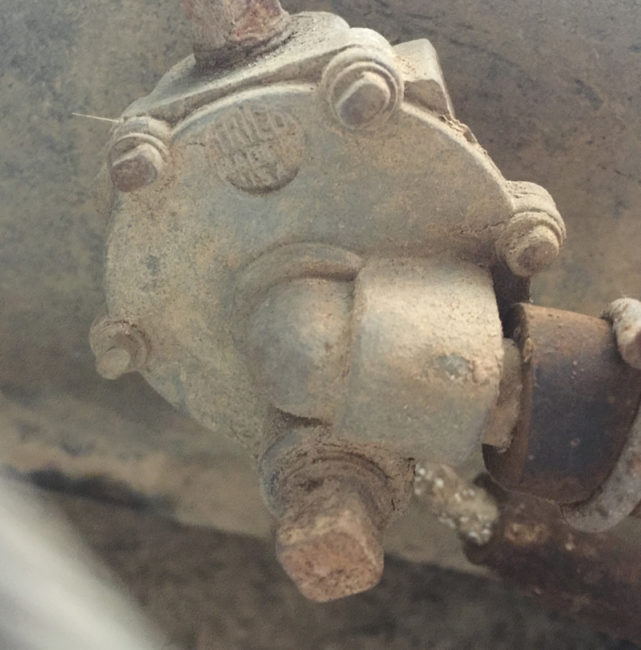
This is a close up look at the TRICO valve on the reservoir.

2017-05-16-vacuum-reservoir1

This is a not so perfect illustration of how it mounts. Because of the support channels on the floor of the body, the reservoir had to be shimmed down about an inch. The solution was a set of three nuts between the body and the reservoir. Continue reading

 
To Top

1947 Ad Featuring the CJ-2A on eBay

• CATEGORIES: Advertising & Brochures, Features This site contains affiliate links for which I may be compensated.

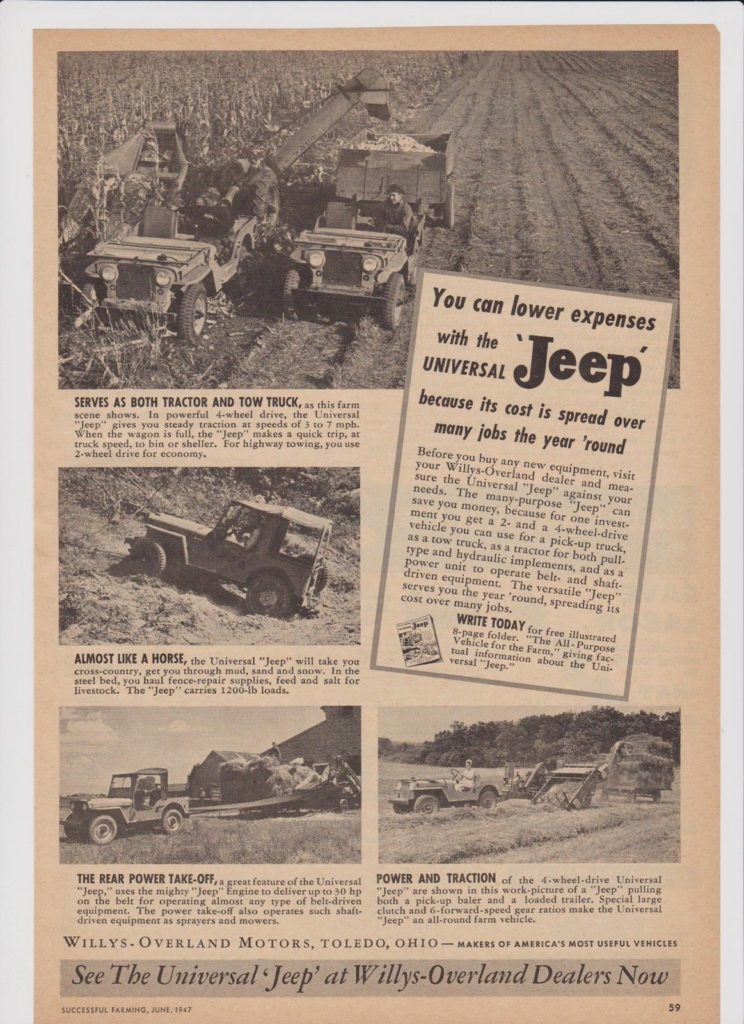
Some photos show VECs, while others show later models.

“DESCRIPTION:….This is an original magazine ad (not a copy or reproduction)…..From 1947–this ad features the Universal Jeep. Scenes show various ways the Jeep can be used on the farm.

SIZE :…. Approx. 7.75 x 11″—it is in good condition except for minor age tones caused by grade of paper used just after the war. Our pictures are enlarged–please pay close attention to listed size.”

View all the information on eBay

1947-06-successful-farming-cj2a

 
To Top

Patterson Losing Its Head

• CATEGORIES: Builds, Features • TAGS: This site contains affiliate links for which I may be compensated.

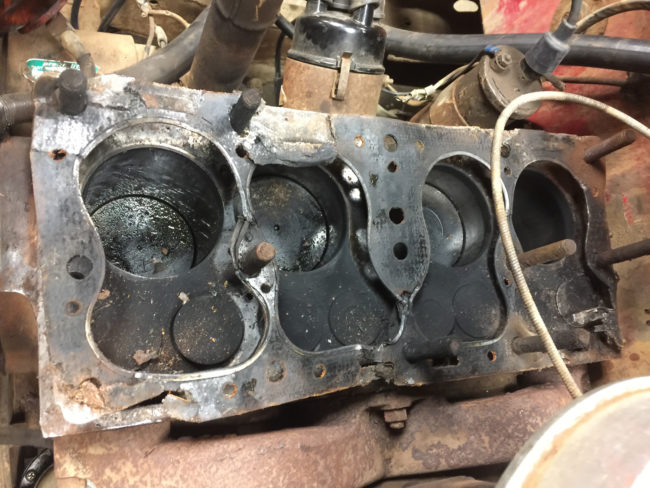
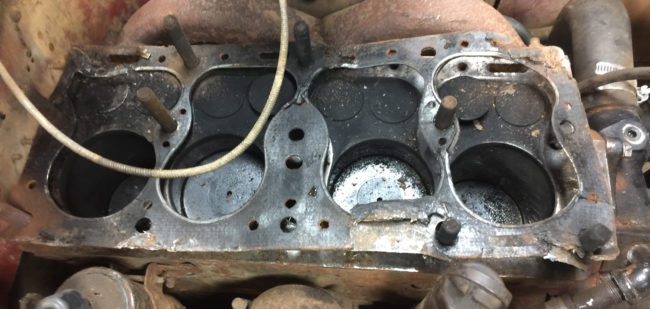
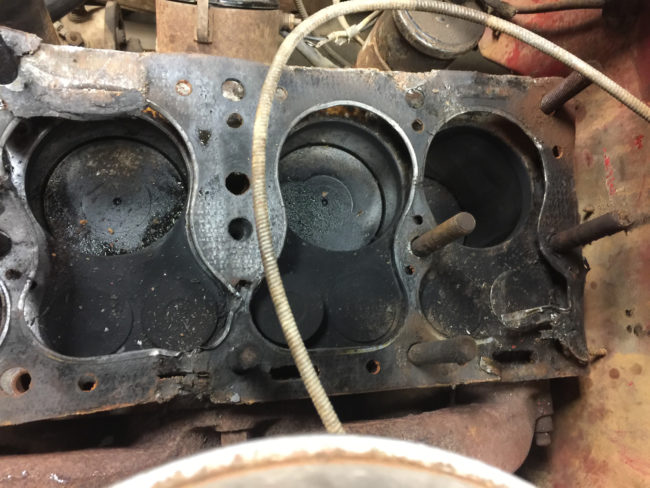
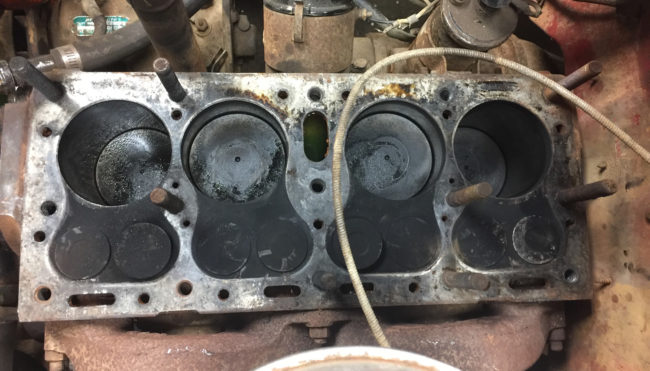
I pulled the head on Patterson last night. I don’t see any cracks in the block nor do I see any obvious signs of coolant, though there might be a tiny bit of residue on the tops of pistons 1 and 2. My initial reaction is that coolant is entering the oil elsewhere. The engine does appear to have a recently replaced water pump. Anyway installing that incorrectly would result in mixing coolant and oil??

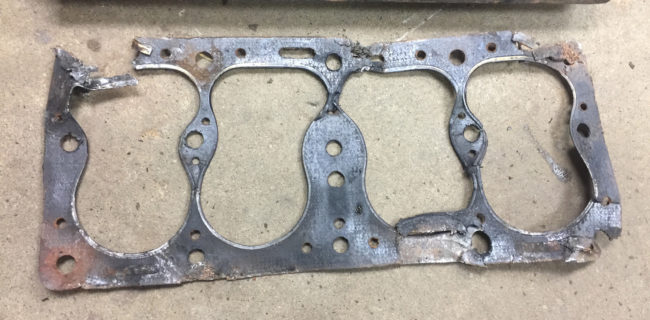
The first two photos show how the pistons and head gasket looked right after pulling it. 
2017-05-23-head-gasket1 2017-05-23-head-gasket2

2017-05-23-head-gasket7

Then after pulling off the gasket and vacuuming up the dirt:
2017-05-23-head-gasket4

The head gasket:2017-05-23-head-gasket5

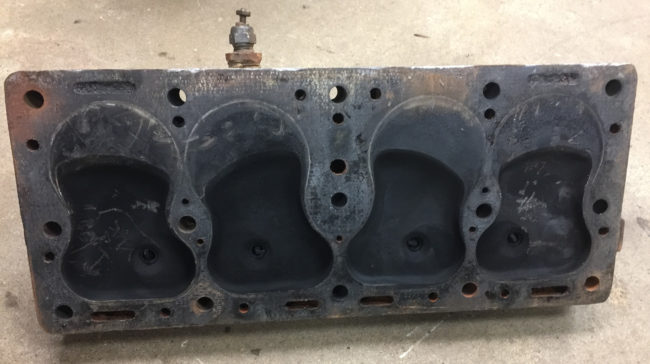
The bottom of the head:

2017-05-23-head-gasket6

 
To Top

2017 Midwest Willys Reunion

• CATEGORIES: Event, Features This site contains affiliate links for which I may be compensated.

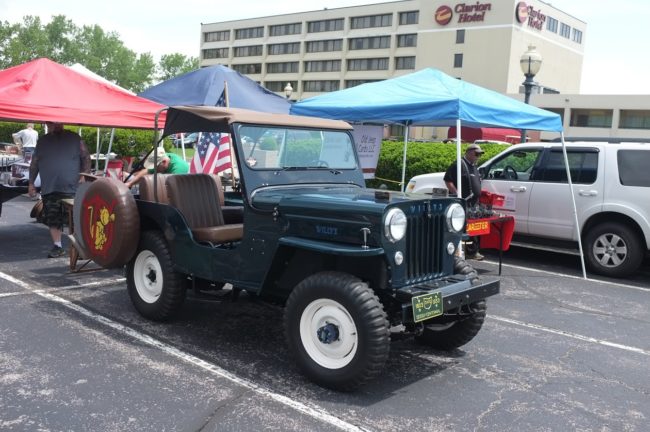
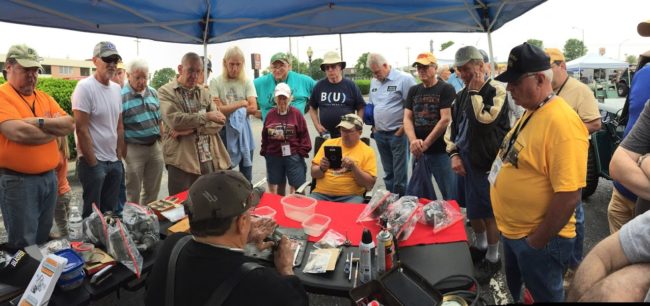
UPDATE: The original photos I posted were from the 2016 event. The new batch of photos are from the 2017 event.

I’m told last week’s Midwest Willys Reunion was a big hit, despite a couple rain storms and some hot weather. Here is a video from the event:

Scott shared this video on Alaska Or Rust’s Facebook page:

Bob Christy contributed these photos from last week’s event:

2017-bob-mwr-pics12

2017-bob-mwr-pics11

2017-bob-mwr-pics10

2017-bob-mwr-pics9

Continue reading

 
To Top

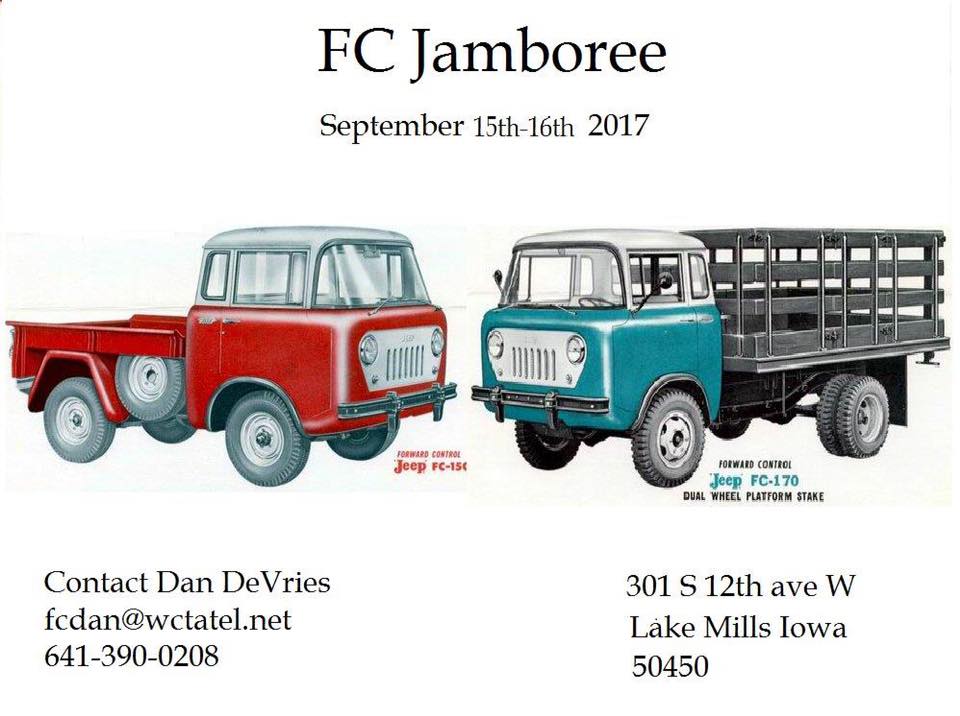
FC Jamboree moved to September 15-16

• CATEGORIES: Event, FC150-FC170-M677, Features This site contains affiliate links for which I may be compensated.

UPDATE: Dan DeVries has moved the FC Jamboree to September 15-16. Contact Dan to learn more. Some hotel info is shown at the bottom.

fc-jamboree

Here are some nearby hotels and motels.
Holiday Inn Express & Suites Northwood 
4712 Wheelerwood Road
Northwood, Iowa 50459
United States
1 641 323-7500
michelle.neeley@kaedingmanagement.com

Country Inn and Suites/Diamond Jo casino
711 Diamond Jo Ln, Northwood, IA 50459
Phone: (641) 323-7000

Lake Mills Motel
400-488 N Lake St, Lake Mills, IA 50450
Phone: (641) 592-3711

 
To Top

1954 Print Ad Showing CJ-3B on eBay

• CATEGORIES: Advertising & Brochures, Features This site contains affiliate links for which I may be compensated.

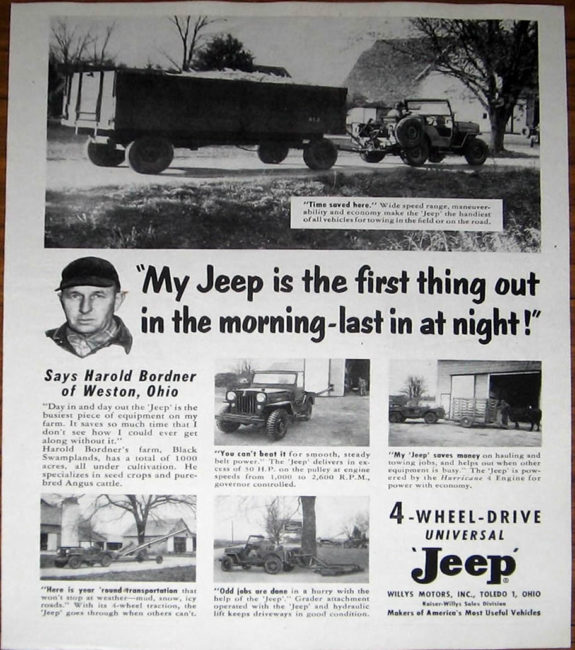
Some good CJ-3B-at-work photos in this ad.

“1954 Print Ad Jeep Farm Vehicle Harold Bordner of Weston,Ohio”

View all the information on eBay

1954-cj3b-ad-harold-bordner

 
To Top

1953 Ad Showing Jeep Swinging on a Gate on eBay

• CATEGORIES: Advertising & Brochures, Features This site contains affiliate links for which I may be compensated.

This ad from Alproduco proves how strong their gates can be. It depicts a jeep hanging from the end of the gate.

“1953 Alprodco Farm Gates Jeep vintage print ad”

View all the information on eBay

jeep-swinging-on-gate-ad

 
To Top

What the Bell Crank?

• CATEGORIES: Builds, Features • TAGS: This site contains affiliate links for which I may be compensated.

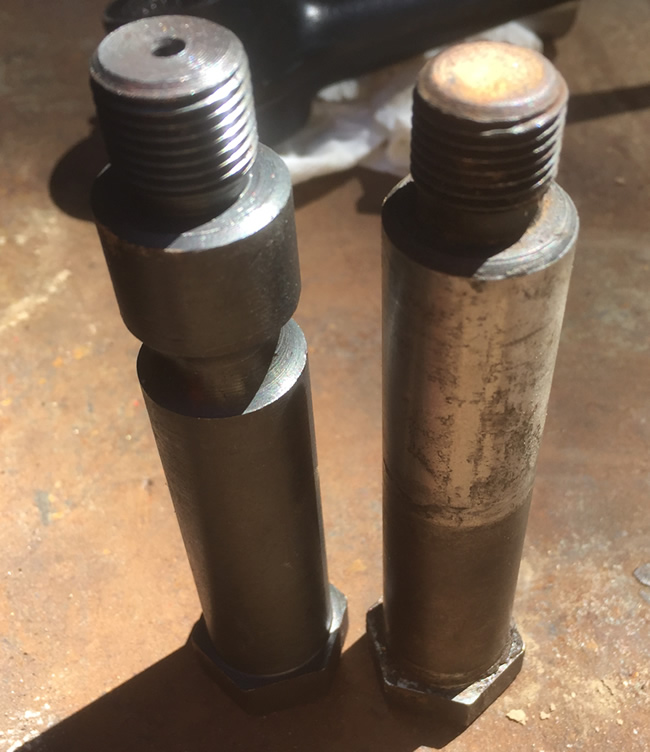
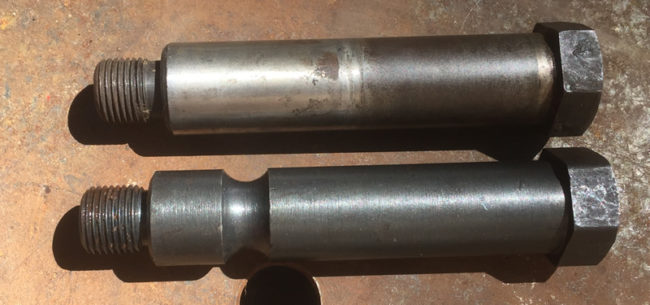
I made an puzzling discovery about bell cranks the other day. I ordered a rebuild kit for Rusty’s bell crank. When I began assembling it, I discovered the original and new bolts were different. So, I had to use my old bolt (which fortunately was in good shape). Going back online, all the bell crank rebuild kits show the left hand bolt below (anyone need a new bolt .. I don’t). Do any other jeeps use the shorter bolt in their bell cranks?

Both of the DJ-3As have the same setup. The bolts they use lack an indent (used to secure the bolt to the bell crank mount). They are slightly shorter and 1/16th larger in diameter than the replacement crank. The DJ bolt lacks the hole at the end.
2017-05-22-bell-crank-bolts2 2017-05-22-bell-crank-bolts1

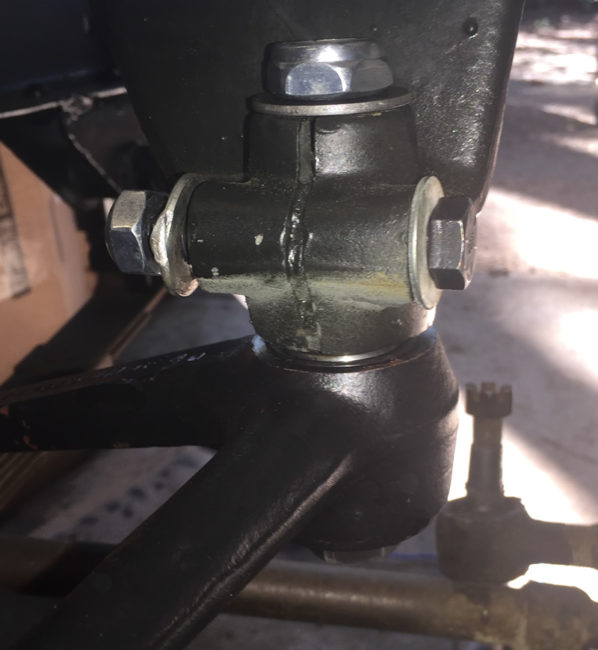
Here it is reassembled. The horizontal bolt clamps the unit together, but does not anchor the bolt.

2017-05-22-bell-crank-bolts3


To Top

Patterson’s Windshield Sprayer

• CATEGORIES: Features • TAGS: This site contains affiliate links for which I may be compensated.

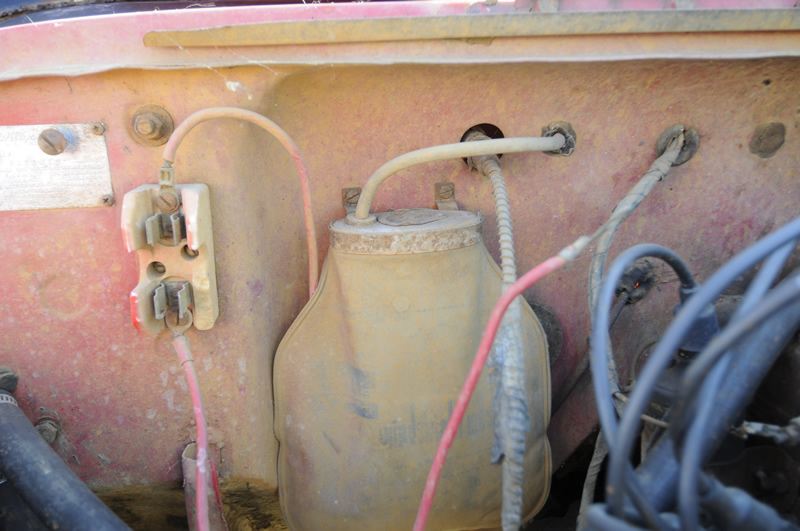
One unique feature that came with Patterson is this foot pump activated windshield sprayer. This is how the bag looked when we bought it. The top was corroded and the bag was empty and dirty.  You can see the hose running from the top to the firewall.

2017-05-22-allstate-windshield-washer-before-cleaning

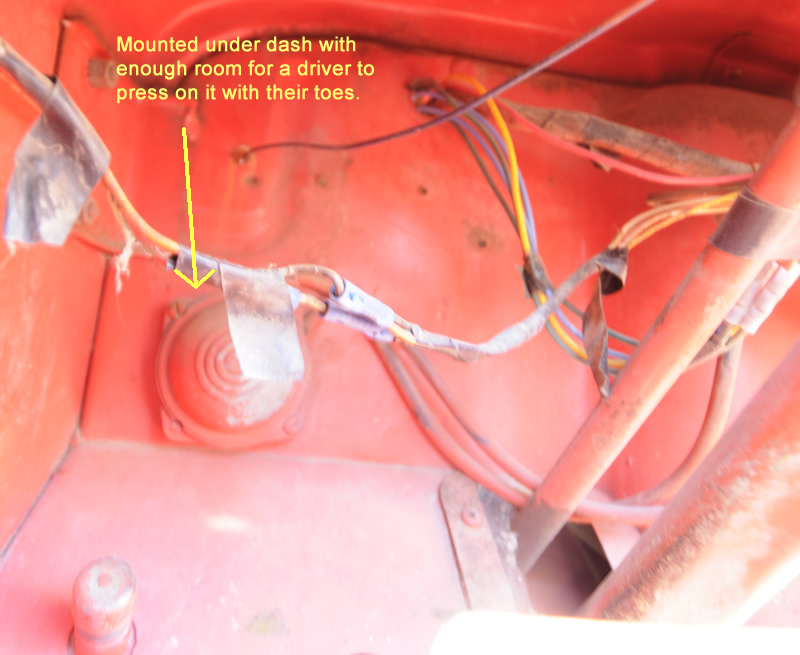
Under the dash, the hose ran to the pump.

2017-05-22-allstate-windshield-washer-pump

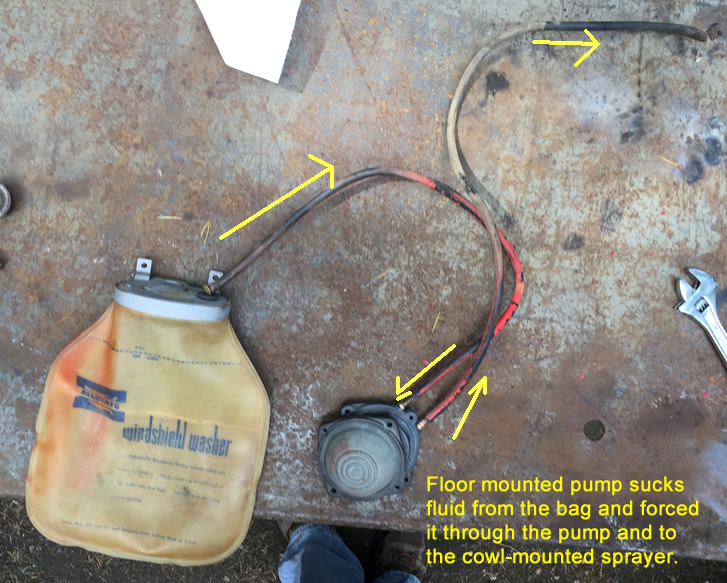
Here’s the whole system after the parts were cleaned up.

2017-05-22-allstate-windshield-washer-system

Unfortunately, the rubber on the pump isn’t any good. I found an NOS food pump on eBay that’s affordable, but would love to find the same pump again. Continue reading

 
To Top

Jeep Story about Jeep & Sheep

• CATEGORIES: Features This site contains affiliate links for which I may be compensated.

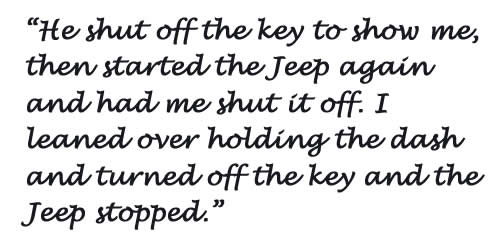
Robin shared this Facebook jeep story about a man’s recollections of helping his father with his sheep when he was a kid.

https://www.facebook.com/calvin.christensen.9/posts/1407709975918449

handwriting

 
To Top

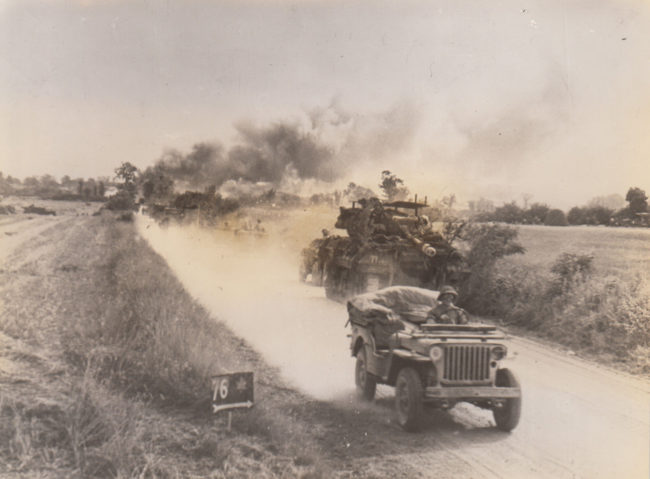
1944 Photo From Falaise, France **SOLD**

• CATEGORIES: Features, Old Images This site contains affiliate links for which I may be compensated.

That jeep driver isn’t wasting time! He’s outta there!

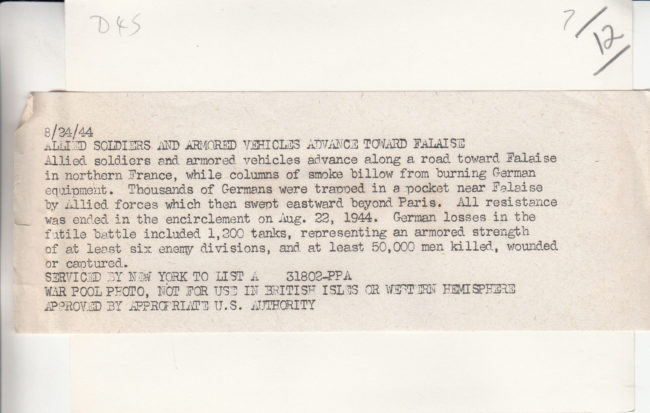
“1944- American tank destroyer and jeeps racing towards Falaise, France, to close the Falaise Pocket. Smoke from burning German equipment rising in background. Photo measures approx. 6 1/2″ x 8 1/2″”

1944-falaise-gap1

1944-falaise-gap2

======================

This version of the photo appeared on eBay in January of 2017:

“ORIGINAL WWII PHOTO – ORIGINAL TO THE TIME – NOT A COPY, SCAN, OR REPRO
QUANTITY: 1 – See the other original WWI & WWII photos that I have listed.

SUBJECT: Original WWII Press Photo of American tank destroyer and jeeps racing towards Falaise, France, to close the Falaise Pocket and trap six German divisions.

DATE: August 24, 1944 – photo does not glow under a black light.
SIZE: 5″ x 7″
CONDITION: Very Good; see scans.
BACK: Has paper tag with typed description and date. See second scan.
SOURCE: From the archives of the World War History & Art Museum (WWHAM) in Alliance, Ohio. WWHAM designs and delivers WWI and WWII exhibits to other rmuseums. Our traveling exhibts include Brushes With War, a world class collection of 325 original paintings and drawings by soldiers of WWI, and Iron Fist, an HO scale model of the German 2nd Panzer Division in 1944 with 4,000 vehicles and 15,000 men.”

1944-08-24-soldiers-falaise-france1

1944-08-24-soldiers-falaise-france2

 
To Top

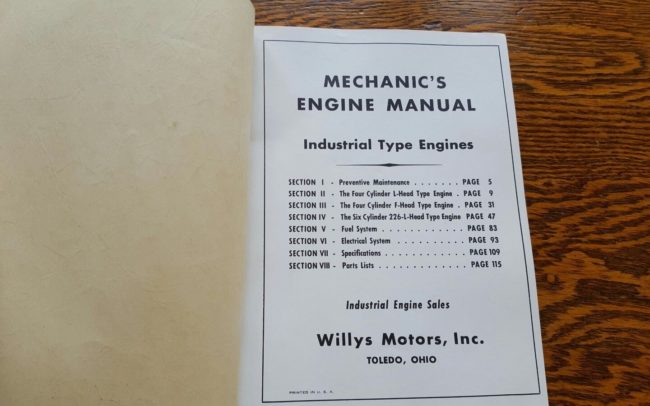
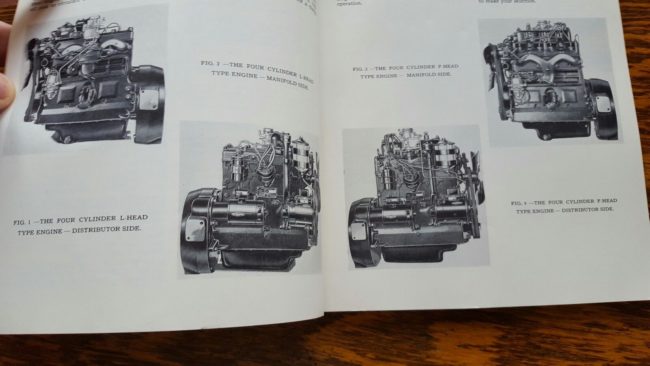
1950s Mechanic’s Industrial Engine Manual on eBay

• CATEGORIES: Books, Features This site contains affiliate links for which I may be compensated.

I can’t remember running across one of these industrial manuals.

“rare Willys Jeep 4 & 6 cylinder industrial engine service manual and parts lists catalog.total 168 pages,front and back cover dirt and little torn at bookbinding.interior very clean.see my other items on my eBay store thank you !!.”

jeep-industrial-parts-list-book1 jeep-industrial-parts-list-book2 jeep-industrial-parts-list-book3

 
To Top

Fixing Patterson’s Seat Mounts And The Extra Channel

• CATEGORIES: Builds, Features • TAGS: This site contains affiliate links for which I may be compensated.

UPDATE II: Add are some instructions (thanks Terry!) for installing DJ-3A seats:
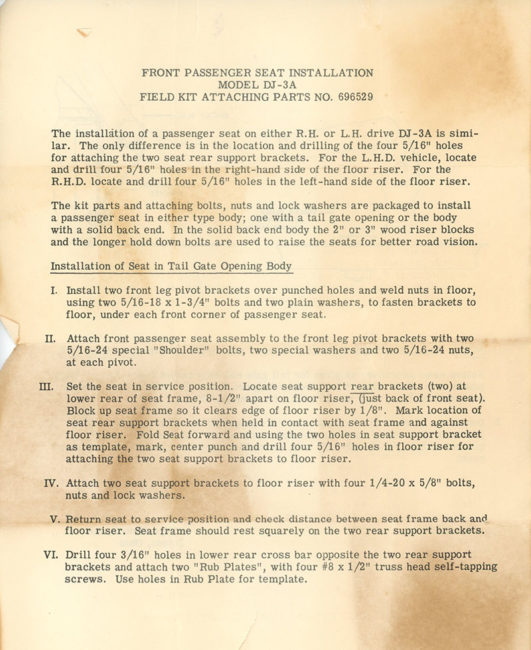
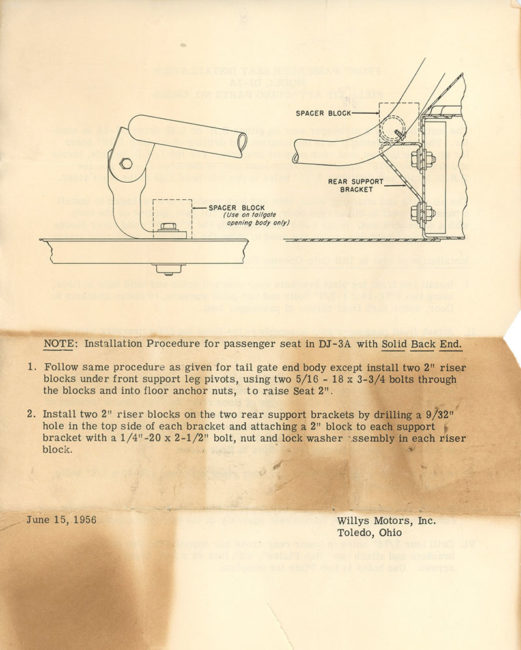
1956-06-15-dj3a-seat-install-directions1-lores 1956-06-15-dj3a-seat-install-directions2-lores

======================

ORIGINAL POST UPDATE MAY 2017: I’ve added a couple pics at the end and included a discussion on the extra channel DJ-3As have.

Last fall, when disassembling Rusty, I thought it was odd that the 2/3 1/3 seats had been mounted on wood blocks. I assumed this had been done by the previous owner to raise the seats.

Yesterday, I discovered that Patterson’s passenger seat was loose. When I examined it more carefully, I learned that it was loose because one of the wood blocks under the seat had broken. I can only conclude that all DJ-3A’s with 2/3 1/3 seats were mounted on wood blocks? Or maybe only the early ones?

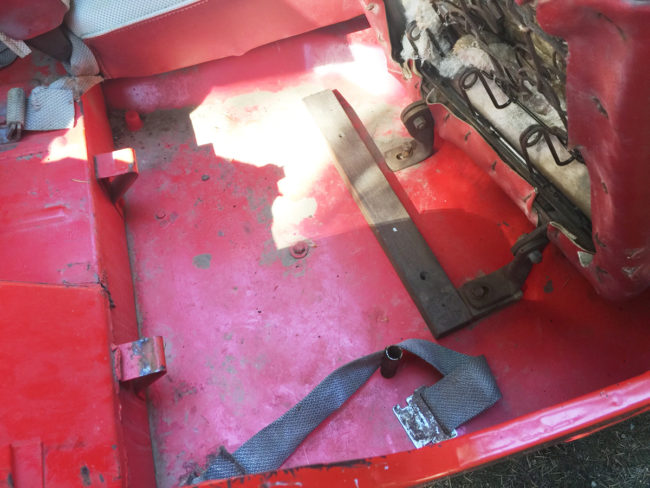
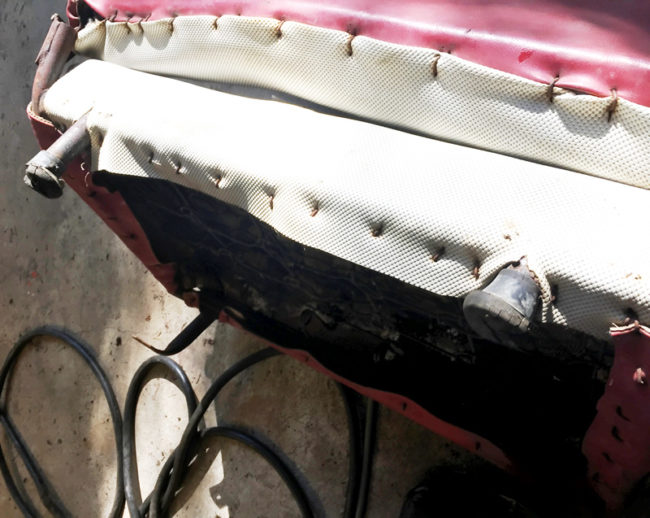
The photo below shows the passenger seat tilted forward. The front of it is mounted in a way that allows it to pivot forward. The mounts are bolted through a piece of wood, then through a piece of cloth, through the body, and into a welded bolt. The rear of the seats rests on the two mounts at the back of the well. The long piece of wood is a well-seasoned (at least 45 years old) and stained piece of oak that will work perfect for replacement blocks.
2017-05-20-seats6

Unlike the passenger seat, the rear of the driver’s seat rests on two posts; slide onto the ends of the posts are rubber feet. Those rubber feat sit on blocks of wood also. 2017-05-20-seats7
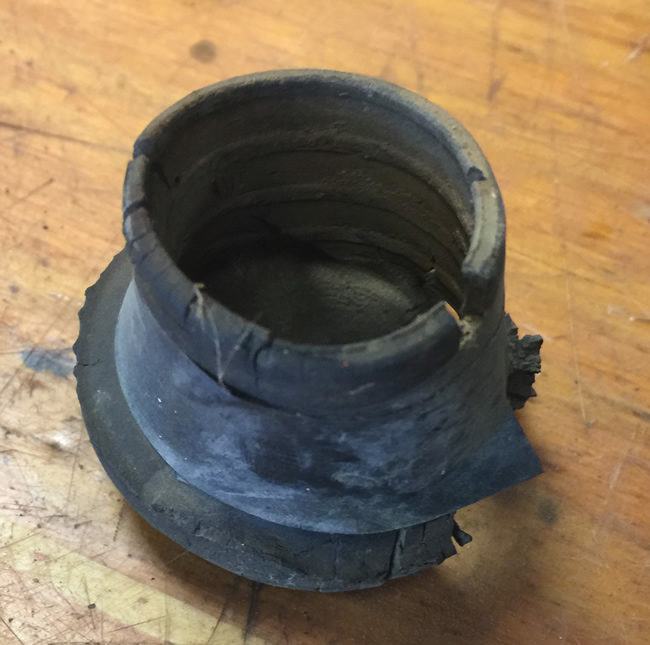
A close up of the rubber foot. The hole is 1 inch in diameter, so I ought to be able to find rubber feet to replace these tired ones.2017-05-20-seats8
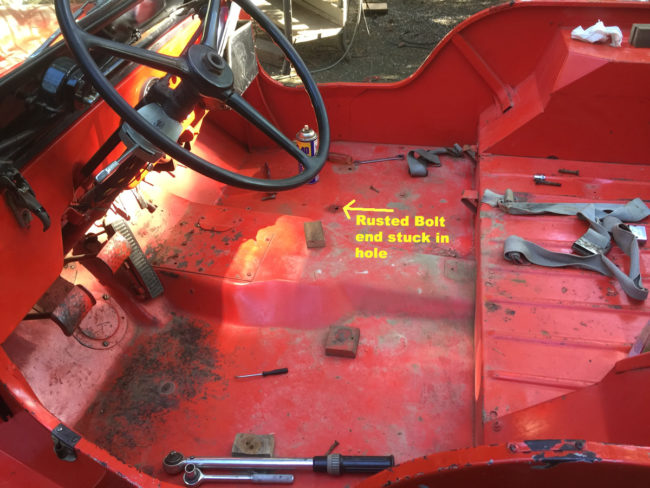
This shows how great the floor on this DJ is.
2017-05-20-seats9

Another angle. Blocks 1, 4, 5, and 6 were the same size. Blocks 2 and 3 were larger and screwed down to the body. The rear 2/3’s seat rested atop those blocks.
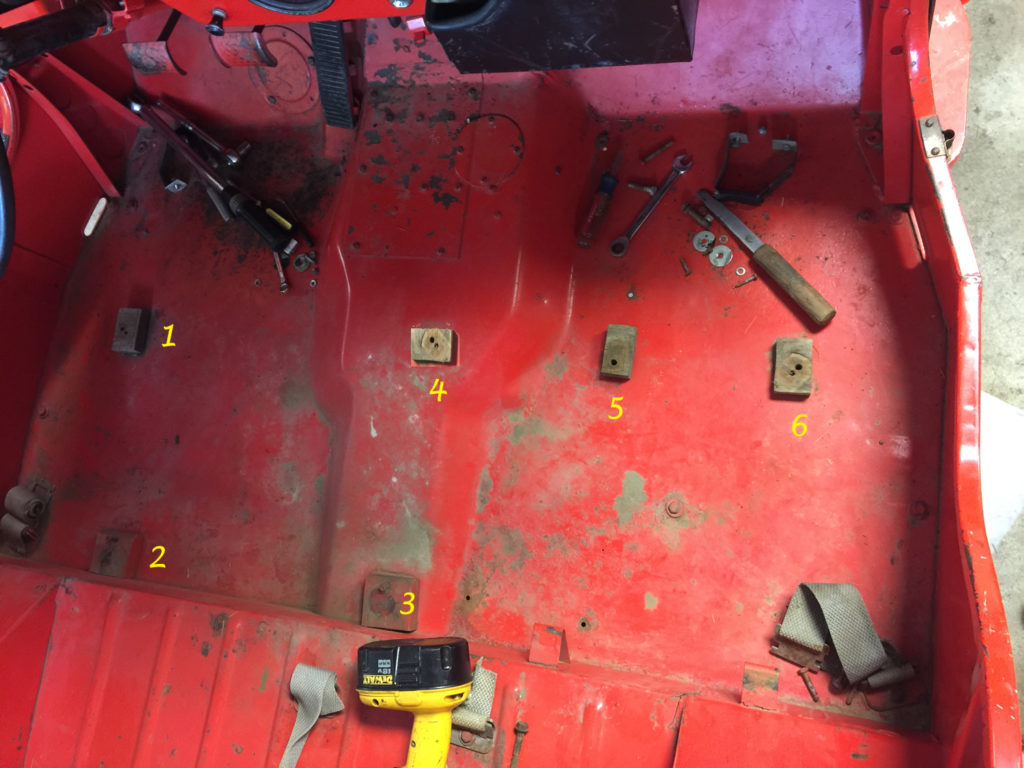
patterson-seat-blocks

I’ve drilled cut and drilled the blocks. They are ready for installation. I plan to add a thin piece of rubber under the blocks. Once I remove the rusted end of one bolt that broke, I’ll be able to reinstall the seats.

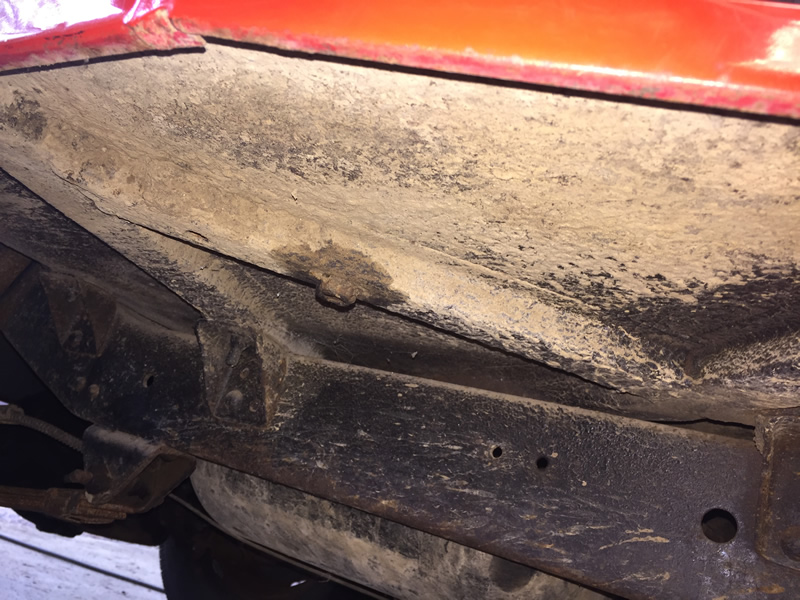
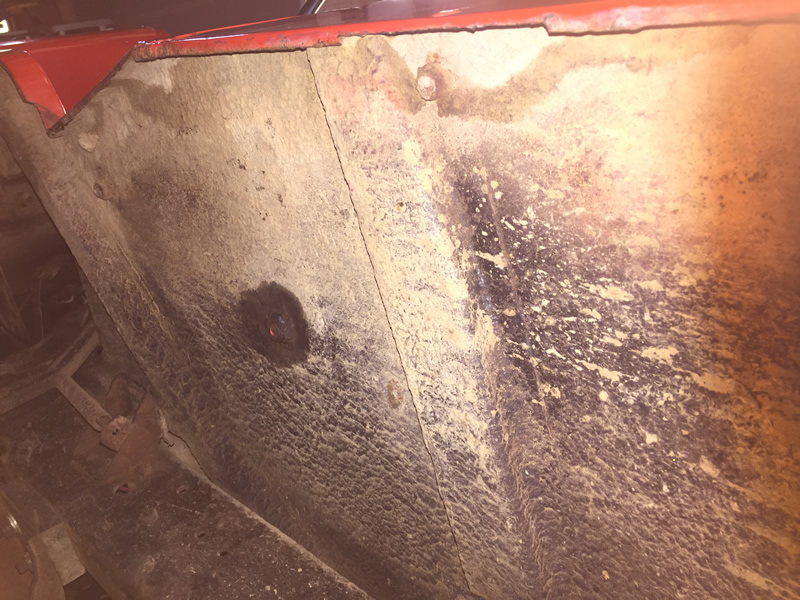
If you take a look at wood block #1 and block #6 there’s something curious. While the body area under wood block is similar to a CJ-3A, the body area under #6 has an additional channel (btw, we’ve yet to document any under DJ-3A body channels with wood in them).

This is the passenger side with the extra channel and a welded bolt.
patterson-dj3a-underside2

No channel on the driver’s side even though there is a bolt welded there. patterson-dj3a-underside3
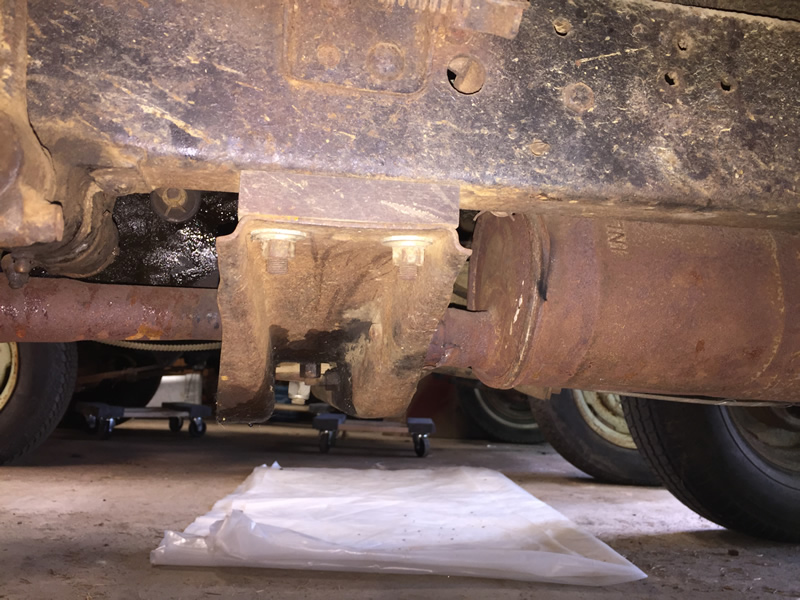
Finally, the DJ-3As used wood blocks between the frame and transmission crossmember.
patterson-dj3a-underside1


To Top

Rusty’s T-96 Transmission Rebuild

• CATEGORIES: Builds, Features • TAGS: This site contains affiliate links for which I may be compensated.

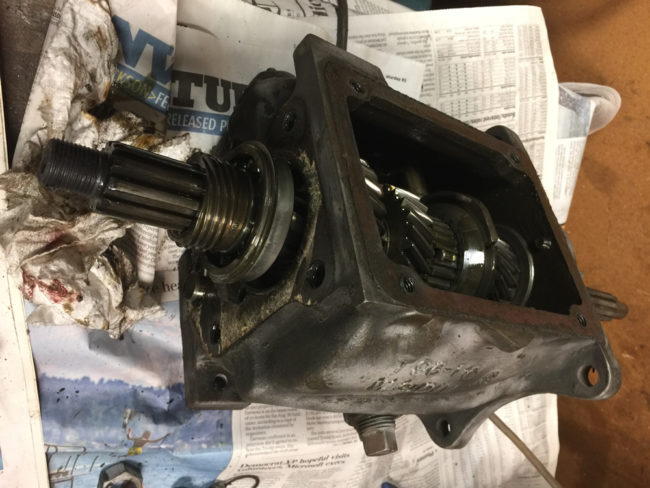
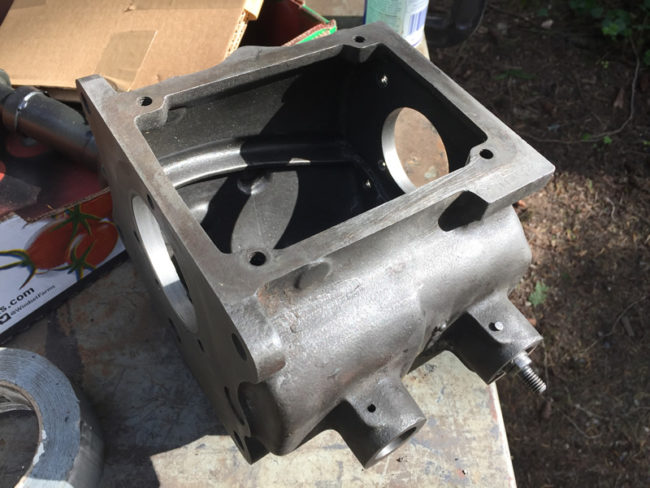
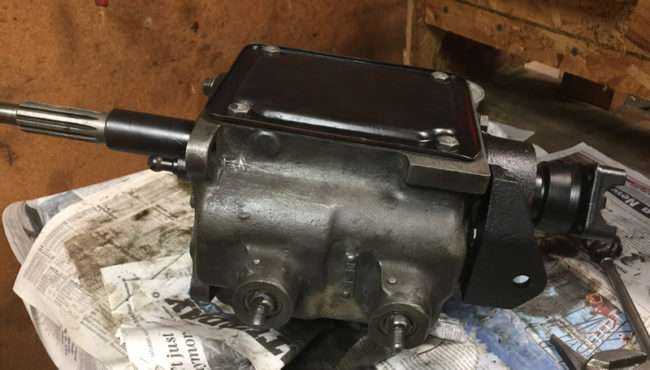
Another thing I got accomplished recently was the rebuilding of Rusty’s T-96 transmission. It’s been a couple decades since I’ve rebuild a T-90, but I think a person could follow a T-90 side shift guide when rebuilding the T-96 (I didn’t think of this until after I was done — instead I used an old rebuild manual from the late 60’s that has rebuilds of 35 different styles of transmissions). Once again, I thought I had more pics, but I didn’t. So, this isn’t a step-by-step overview.

I took this photo at the beginning of the tear-down to remember which way the speedometer gear should face. The lack of a transfercase is part of what makes this rebuild different from most other jeep transmissions. 
2017-05-20-transmission1

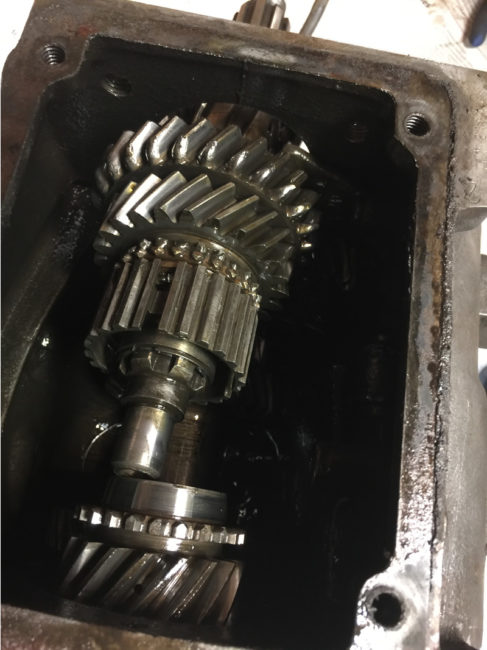
Here’s the transmission with the input shaft pulled forward. My first gear and second gears were a bit worn. 2017-05-20-transmission2

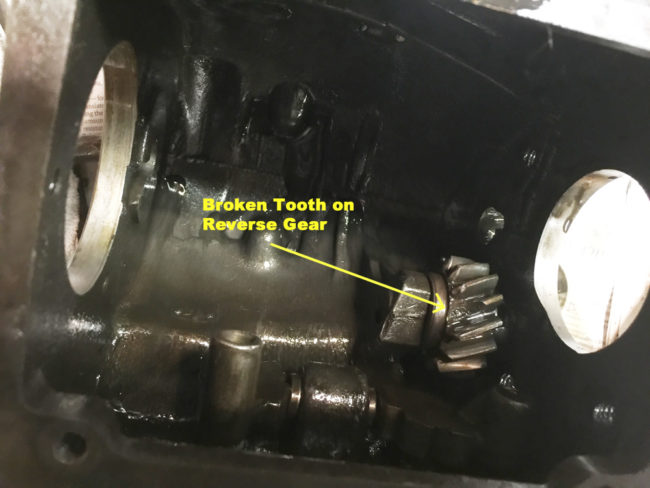
Once I removed all the gears, I discovered the reverse gear had a broken tooth. 2017-05-20-transmission3

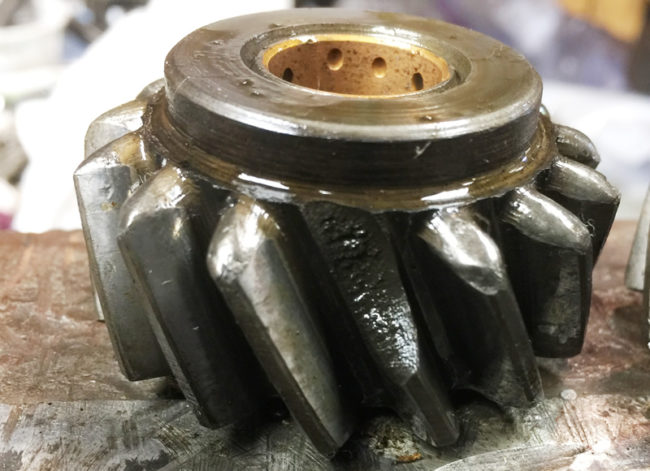
Close up of broken tooth. Thankfully, Charles Tate had sent me a box of T-96 parts that included a reverse gear. I was also able to replace the entire bottom cluster, first gear, and second gear. That saved me some money!

2017-05-20-transmission6

To remove the side shifters, a pin has to be tapped out. I was able to remove the 2/3 gear shifter, but not the first/reverse unit. Since there was no critical reason I could see for removing the first/reverse mechanism, I left it as is and cleaned up the housing.2017-05-20-transmission4

Normally, I’d paint the housing before assembly. However, with time being an issue and lacking enough warmth on the rebuild day to properly paint it, I will paint it at a later date. 2017-05-20-transmission5

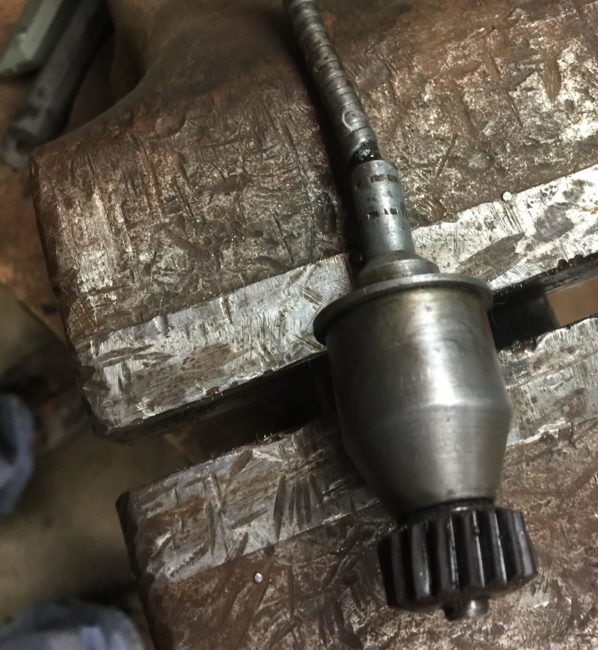
One other unique thing about the T-96: it requires the use of a special speedometer cable that is also used for Jeepsters and wagons.

2017-05-20-transmission0

 
To Top

1943 Photo Showing Maneuvers in Oregon **SOLD**

• CATEGORIES: Features, Old Images This site contains affiliate links for which I may be compensated.

UPDATE: **SOLD** Was on eBay.

That’s an SAS-esque jeep.

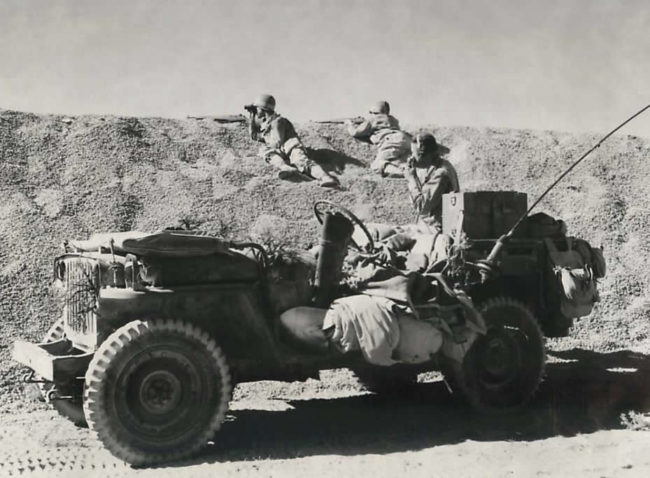
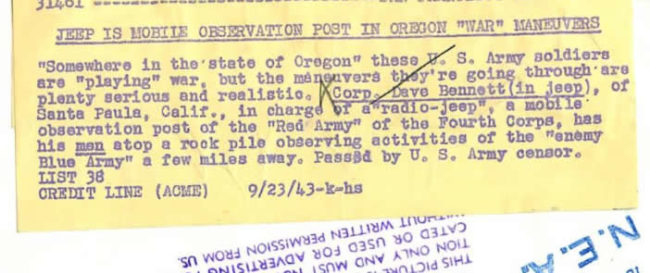
“1943- Willys “radio jeep” during U.S. Army maneuvers “somewhere” in Oregon. Photo measures approx. 7″ x 9″”

1943-09-23-oregon-manuevers1

1943-09-23-oregon-manuevers2

 
To Top

Assembling a DJ-3A Column Shift

• CATEGORIES: Builds, Features • TAGS: , This site contains affiliate links for which I may be compensated.

Yesterday I assembled Rusty’s column shifter. In my head, I took all kinds of photos. One in particular I took (again in my mind) showed the layout of all the parts prior to assembly. Alas, somehow that photo never made it onto my phone!
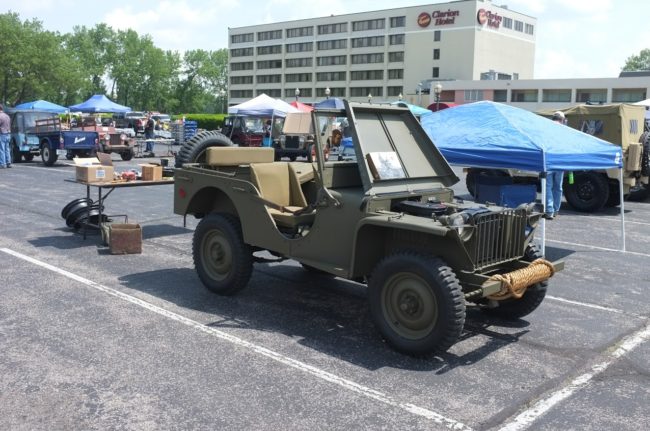
The DJ-3A shifter is slightly different from a VEC CJ-2A shifter. I can’t say how much it differs from a Jeepster or wagon column shifter. But, i can say that following these VEC CJ-2A instructions were very helpful.
After laying out the parts (and not taking a photo) I began the assembly process by learning how to install the horn wiring. After looking up how to do it on a 3B (thanks CJ-3B Page!), it turned out to be quite easy.

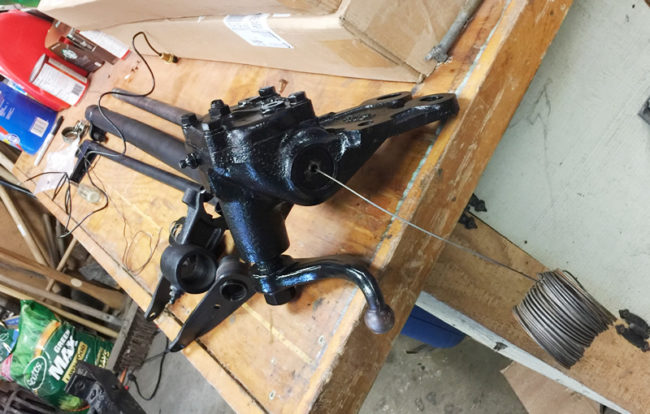
Step 1) Thread some of my grandfather’s wire through steering shaft.

2017-05-20-column-shift-assembly1

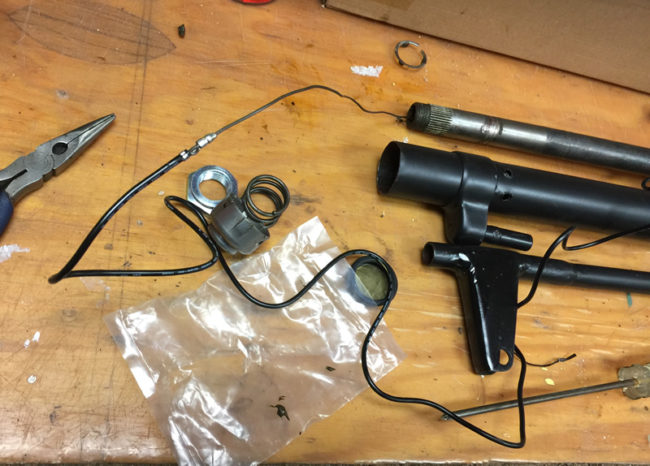
Step 2) Attach the wire to the horn wire end. In this case, I ran it through wire connector and then bent it so that the wire would not pull back out of the connector. 2017-05-20-column-shift-assembly2

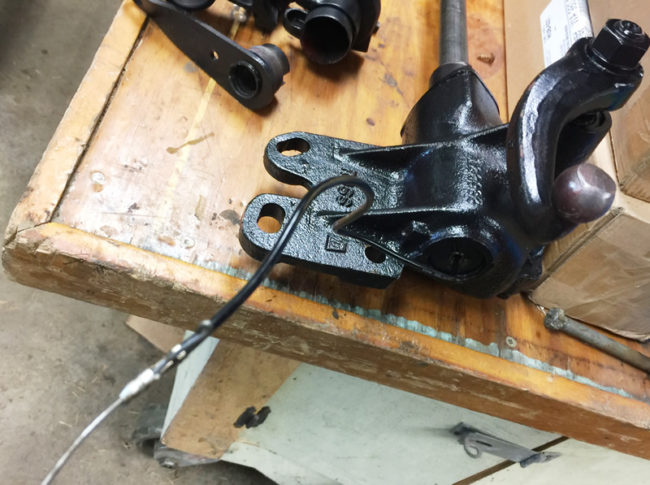
Step 3) Pull the wiring carefully through the end of the shaft.  2017-05-20-column-shift-assembly3

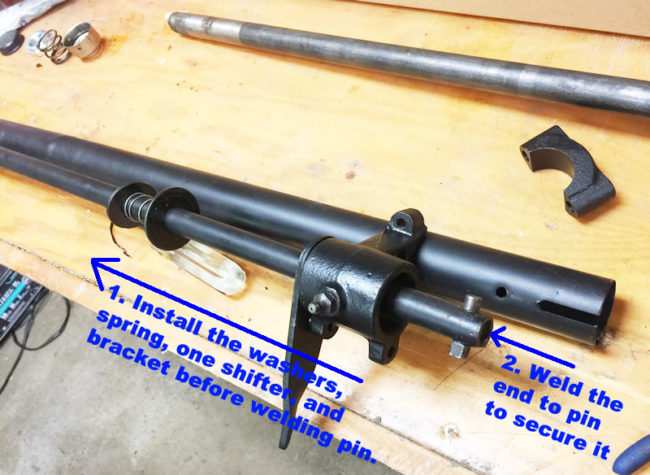
With the wire installed, next on the list was assembling the shifter. The first step involved installing a washer, a spring, and a second washer onto the column shift tube Next, the interior shift lever must be screwed onto the shift housing. Then, slide the shift housing onto the column shift tube, pushing it far enough up so that a special metal pin can be inserted. Once that is done, you have to weld the end of the tube to the pin to secure it.2017-05-20-column-shift-assembly4

Continue reading