emailNeed to contact me and don't have my email? Click on email button.
About eWillys
Welcome to eWillys.com, a website for vintage jeep enthusiasts. I update this website nearly every day with jeep deals, jeep history, interesting reader projects, jeep related info, and more.
These quick searches can help you find things on eBay. People list in the wrong categories all the time, so don't be surprised to see brochures in the parts area for example.
The links to posts below show jeeps grouped by models, condition, and other ways. Some of these jeeps are for sale and others have been sold. If you are unsure whether a vehicle is still for sale or not, email me at d [at] ewillys.com for more info.
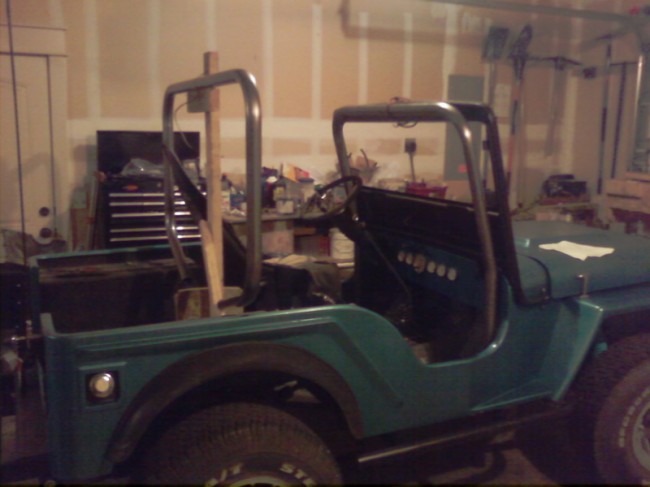
Importantly, the allure of buying a project jeep can be romantic. The reality of restoring a jeep can be quite different, expensive and overwhelming without the right tools and resources. So, tread carefully when purchasing a "project". If you have any concerns about buying a vintage jeep, or run across a scam, feel free to contact me for help, comments or concerns .
I’ve located some fiberglass fenders along with a grille, a body, and a tail gate for $600. While a decade old, these parts never been installed, drilled, or painted. The seller says he bought these parts brand new and that they were designed for a street application, so they are a little heavier duty than the light racing bodies. That sounded fine to me, so sometime next week I’m gonna head to Oregon to check them out. The one thing this package lacks is a hood.
These were actually for sale about a year and a half ago. The craigslist ad had very little info and didn’t list any keywords, so it was a tough ad to find unless you specifically typed ‘flatfender’ into the search field. Also, it was winter time and, at least for me, getting over the snowy passes wasn’t worth the effort. After being frustrated in my fender search (metal or fiberglass), Yesterday I decided to give him a call. Sure enough, he still had everything sitting in his garage.
Because of this, I will continue to list expired Craigslists ads for a while since the sellers may not have been able to get rid of their jeep or parts, but got tired of relisting their stuff. And, if I can get it, I’ll always list the seller’s contact info if they provide it.
While you can purchase a dual shifting unit from Novak for your Dana 20, it's also possible to fashion one from scratch. Note that I've never used the dual shifter on a Dana 20 transfercase without removing the center pins that move between the shift rods in the the shifting tower. To remove the pins, you have to remove the shift levers, drill out the plugs on the sides (note where the red gasket sealant is on the side of the shift tower, and then slip out the oblong pins (they are elongated metal balls). With these removed, you can push and pull the levers all you want (but don't try running high range in the front and low range in the back unless you feel the need to break something).
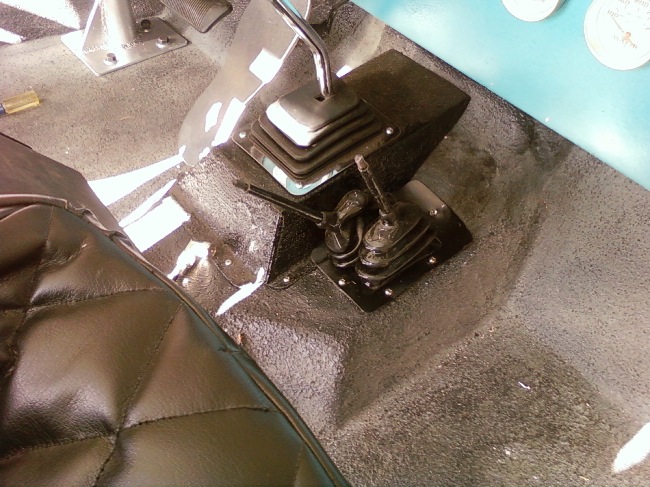
The shifting might seem unusual, but it's not. What's unusual is that I have removed the pins from the shifting tower that slide back and forth between the shift rods. This allows for more shifting options. To take advantage of those options, I installed two rather than one stick. You can see that here in this video I made.
Here's an image the also demonstrates how the shifting works. Please note if it doesn't make sense:-)
Yesterday I made a first pass at a design for the gauges on the dashboard. As a part of that exercise, I tried to find a space for the data plate I have. The data plate is original to the CJ-3A I have and in good shape, except that it is faded, so it is hard to read. In fact, I tried to scan it into my scanner and the scanner couldn't pick up the words or pictures at all. After pondering the situation, I decided to recreate a data plate graphic and take it into a print shop to see if I can make a raise print or sticker of some kind. As part of the customization, I've tried to recreate the fonts as closely as possible, however, much to my surprise, the data plate uses several different fonts, some of which are the same font but stretched or bolded or both. Also, I've updated the data plate to better reflect the drive train I have installed.
Here's the current favorite mockup so far (note the font kerning and arrangement will be more precise on the final high resolution version).
I made excellent progress yesterday completing and installing a variety of parts (including the custom steering column rod and u joints, additional hydraulic lines, electric fuel pump, fuel line to carburetor). Unfortunately, in the midst of all this success, I screwed up.
For reasons that still baffle me, I mistook the rear brake line (which isn't hooked up to the master cylinder yet — note the pathetic attempt at an excuse) for the gas line to the tank (which isn't there at all). Despite the fact that they are different size lines and despite the fact that the brake line has the threaded nut at the end (which somehow I didn't notice), I managed to mistake the brake line for the gas line. Even right after I cut it I didn't realize my mistake (clearly my mind was elsewhere!).
The good news is that I can still take it off relatively easily and get it reflared and it shouldn't cost more than a few dollars — Andy's Supply, here I come. Though it's now shorter, fortunately it's still long enough to use — in fact, it might even work better as a slightly shorter length.
As I noted in my previous power steering post, after realizing that ordering through Summit Racing would cost $161 before shipping I thought I'd go down to a local hydraulics place, Andy's Supply, and see what they could do for me. Since they carried the Earl's products as well, it made comparing prices very easy.
After explaining what i wanted to do (see rough schematic to the right), I quickly discovered they could save me money in a couple ways. First, they were willing to cut my supply side line down for nothing so that it would hook to the inside of the cross member. That saved me 2 90 degree turns, 2 feet of hose (about $50 total). Second, I only had to order 14" of expensive tubing rather than the minimum 3ft from Summit. Finally, they saved me money by making sure I had the right parts the first time, so i didn't have to return anything. While their parts prices were slightly higher than Summit's, because they saved me money in other places, the bill was only $116.
Putting the pieces together was relatively easy. Below the pieces are laid out (with a piece of metal acting as the cross member).
I found a very helpful article from a toyota landcruiser owner at offroad.com about building custom power hoses. In the article he provides pictures and a list of parts he used from Summit Racing. Unfortunately, his part numbers don't correspond exactly to the numbers from the Summit Racing catalogue I have, but they are close enough to guide me correctly.
To do my build the way I want (which is routing the power steering through the cross member) based on this article and the new summit racing catalogue, I believe I would need:
5 -6AN EAR-309106ERL 90 degree bend tube $16 2 -6AN EAR-300106ERL straight $7 each 2 -6AN EAR-983206ERL Straight Bulkhead $4 each 1 –6AN to 11/16-18 Not sure on part number yet approx $7 1 –6an to 5/8-18 Not sure on part number yet approx $7 -6an power steering 6ft perform-o-flex hose EAR-406006ERL $45
That's a grand total of $161. If I only do the power side, I can cut this amount in half. I'm gonna talk to the folks at my local hydraulic store and see what they can do for me.
With my kids help, I finished rebuilding the engine. Once done, I dropped the engine into the jeep and attached the new headers — only to find out the new headers don't fit. On the left is the old header that fit perfectly. On the right is the new Headman headers that apparently have a shallower drop, which directs them straight into the roll cage mount. l'm pretty sure I can heat and bend them enough to make them work, but it's less than ideal.
UPDATE June 21: My second trip for bearings to the NAPA store was a failure. They shipped me bearings that were wrong AGAIN! I got my money back and went online to find bearings. That was a failure as well as I couldn't get anything to ship sooner than July 7. Desperate to do the build while the kids are here, I turned to autozone. Amazingly, not only did they have the bearings in the store and in stock, but they were only $26 (for the same Clevite77 bearings NAPA was charging me $42). Even better, I had earned $10 on my Autozone store card and so the final cost for the bearings was only $17. —–
June 20th .. I was all ready to assemble the engine when I discovered the Main bearings didn't fit correctly. After examining them more carefully, I discovered they didn't work at all. The 'tang' was in the wrong location as was the oil hole.
This morning, I took the bearings back to the NAPA store. After a discovery process of about 20 minutes we finally concluded I got the correct bearing box, but the box had tractor bearings rather than buick v-6 bearings. So, my new bearings should be here tomorrow morning. Because of this, the engine build has been delayed until monday (when the kids are back).
I picked up the last of the buick v6 engine parts yesterday and they are all home. Lyle and Bob at Bob's Mechanical were great to deal with and very reasonably priced. The last of the new bearings (crankshaft and rod bearings) and rings should arrive on Friday. All the parts are clean and the cam bearings are in place, so it should be a pretty straight forward build (famous last words).
Since I'll be gone most of next week in Seattle, I've decided to put the engine together the week after next and invite my children (ages 14, 12 & 10) to participate. That should make the process more interesting!
June 1, 2008 • CATEGORIES: BiscuitThis site contains affiliate links for which I may be compensated.
This is a detailed list of the products, purchases, and decisions I’ve made. I’ve added links to posts which contain pictures or more information regarding the part. It will continue to be updated over time.
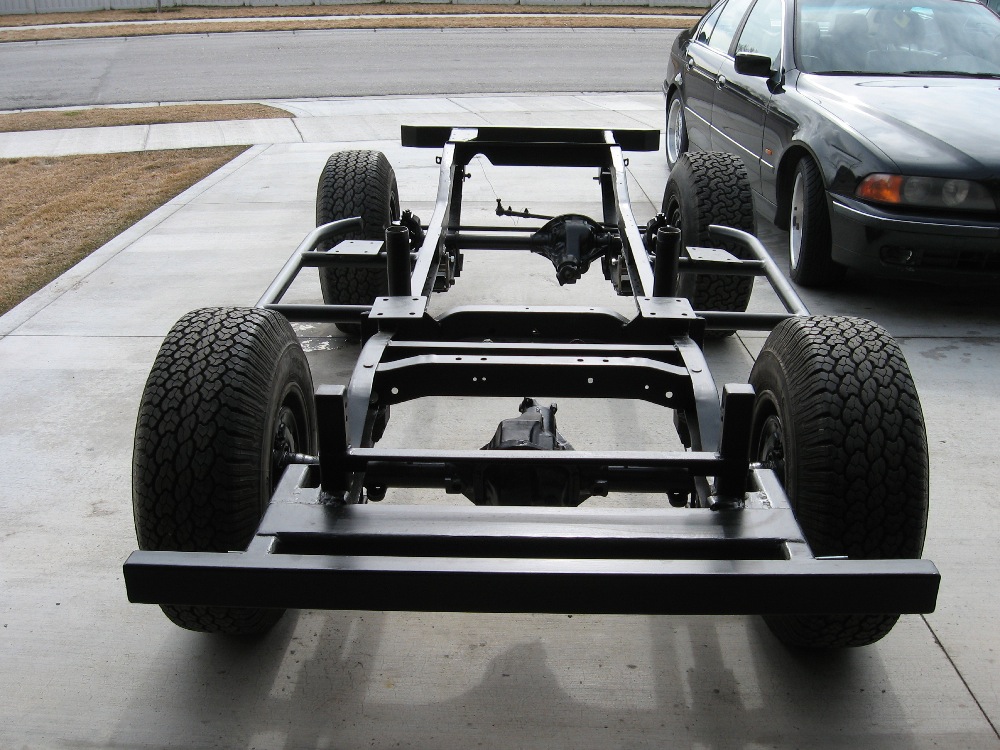
Frame: I’m using a 1973 CJ-5 Frame that was part of a running CJ-5 I purchased. I stripped and sold most of the parts, retaining mostly just the axles, frame, gas tank, and misc pieces. I stripped the frame of everything, including the shackles, cleaned it, then painted it. During the process I added permanent front and rear bumpers, a new front cross member, and a new engine mount system. The frame is plenty beefy for the V6, so I didn’t do any additional boxing in except for the area from the new cross member to the new front bumper. Here’s an overview of the changes to the front of the frame as well as images of the backend. Here’s the painted frame.
Front Axle: This is a stock Dana 30 from a 1973 CJ-5. Except for changing the spring pads, this is a stock Dana 30. I chose this because I had it. It is stronger than the Dana 27 and 25 and was easier for me to obtain than the Dana 44 for the front. The gears and seals were in good enough condition that I did not rebuild the pumpkin. I have not installed a locker or posi because I did not have one installed in my last jeep and never felt like I missed having it. So, for the time being it will remain open.
Front Brakes: I’m using the standard 1973 drum brakes, which are rebuilt.
Rear Brakes: I’m using the 11″ drum brakes from the ’73 CJ-5 I dismembered.
Power Brakes: I’m using the Power Brakes from a early 1990ish Cherokee. Along with that, I’m using the combonation valve from the same cherokee. Thus far, between the drums and the power braking system, the brakes have rocked.
Swing Pedal (brake): These swinging pedals came from a junked 1990ish cherokee. The nice thing about this setup is that I have both the clutch/brake setup and a wide brake (automatic tranny) setup. Therefore, swapping to a clutch, if necessary, will be simplified.
Rear Axle: This is a stock Dana 44 from a 1973 CJ-5. I purchased a locker off of craigslist. While installing the locker, I discovered the R&P was bad (broken teeth), so I found another R&P for cheap off of Craigslist and installed it and the locker. The rebuild kit for the rear-end was purchased off of Craigslist. Here’s a post discussing disassembly. Here I put it back together.
Front Springs: The front springs are 2 1/2 inch springs from the rear of a Wrangler that I purchased as part of another jeep. I Added an additional leaf from another left over spring set to beef them up slightly. I also redrilled the center hole on the main spring leaf, repositioning forward about 3 inches. I used stock wrangler springs so that I could easily update them with aftermarket wrangler springs in the future. The shackles are reversed. The front spring holder is homemade. The rear spring holder was purchased and welded to the bottom of the frame. The shackles are aftermarket that modified MB I purchased. I’ve used stock cherokee u-bolts and u-bolt plates. Here’s some pics. And, more pics.
Front Shocks and Shock Mounts: The shocks came from Bucks, a local 4 wheel drive store. The mounts I made myself. They ended up bigger than I would like, but they’ll do for now.
Rear Springs: The rear springs are 2 1/2 inch springs from a late 80s cherokee out of a junk yard. I redrilled the center hole of these springs. Again, I chose these as they’d be easy and inexpensive to replace. I purchased the rear shackles from summit, but they were too long (I misunderstood the description) and had to cut them down (the good news was that I could cute them to the exact length I wanted them). Here’s some pics.And, more pics.
Engine: The engine core is a 1980 buick V6 231. The block has not been bored. It has 9.1 Compression, Hypereutectic Pistons, 288 Duration Cam, unported heads, Aluminum Edelbrock Performer Intake 4 Barrel, Holley Aluminum Valve Covers, High Volume Oil Pump with an additional hardened steel plate and .015″ of extra gasket spacing, dual external oil filter, and chrome headers (well the top part is still chrome). The former engine owner believe this engine would likely put out 250hp given the updates, however I can’t verify that. Here are the engine mounts. I take apart the engine and discover a bad crankshaft. I found a good deal on a V6 that has a good crankshaft. Here, I find Cracks in the heads.
Remote Dual Oil Filters: I’ve got a dual remote oil filter system that came with the engine I purchased, so I decided to give it a try. I figured it would also act as a cooling system.
Oil Pump: I read enough information that I was strongly encouraged NOT to use a high volume pressure oil spring with my 1980 Buick V6. Here’s a little about the oil pump. The oil pressure runs about 60 PSI with the normal spring.
Carburetor: This is an old Carter Competition Series 500 CFM that I got as part of a engine trade. I tried bidding on a rebuild kit off of ebay, but after an unsuccessful bid offer, I turned to Summit (CRT-902317A) for the kit.
Transmission: I decided to go with a TH-350 transmission. It’s one of the shorter auto trannys, it’s cheap to maintain, parts are plentiful and it’s a strong tranny. I struggled mightly with the tranny decision, as I’ve always preferred a clutch. However, after extensive reading, I decided I’d give the automatic a try, as it would give me an excuse to learn more about them, as well as compare and contrast the differences. While TH-350s are pretty common in junkyards and on craigslist, finding a short shaft with the TH-350 adapter for a Dana 18/20 transfercase is much more difficult (the adapter alone is $500 new). After much searching and waiting, I finally located a tranny that had been rebuilt several years ago and only used a few times before the owner wrecked his jeep. I chose not to rebuild the tranny at this time; I’m gonna see how it runs and then make a decision on whether I can tolerate the auto in the jeep before I dump any money into a rebuild of it. I’m using a B&M shift assembly I obtained as part of my engine purchase. Here’s a discussion of the changes to the transmission shifting unit.
Tranny Cooler: I pulled one from the local junkyard.
Transfer Case: Because of the center pumpkin of the ’73 Dana 44 rear end, I went with a Dana 20 transfercase. As I’ve chronicled in the video below, I improved the Dana 20 gearing by using Dana 18 gears and obtaining a Rear sliding gear originally used in the early Bronco Dana 20 transfercases that I purchased from the Bronco Graveyard. Here’s a transfercase post, an overview of how the gears work, and a look out how I set up the dual shifte
Paint: I purchased the paint from an ebay power seller. I was supposed to receive the color Aqua Pearl, unfortunately, though I received a can labelled aqua pearl, it was actually a darker color (likely Teal Green). I didn’t realize how much darker until I started spraying it onto the body. This is one product I won’t purchase over the net anymore.
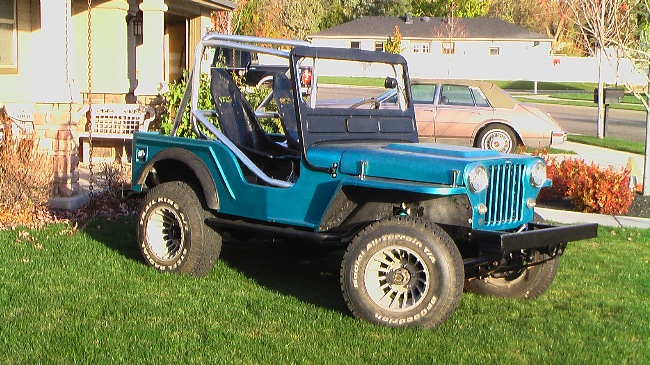
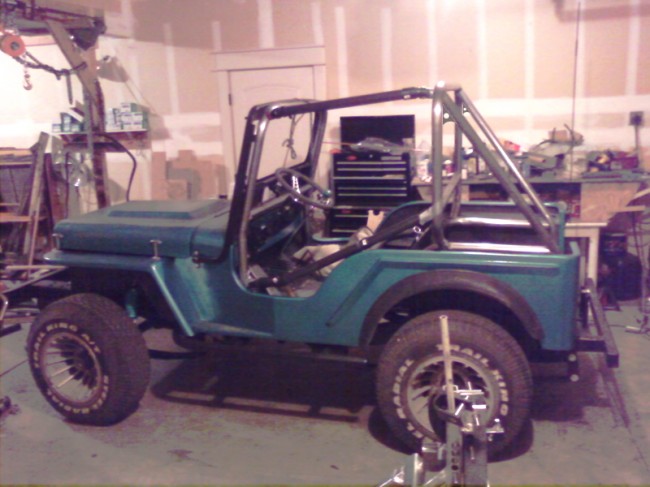
Body: I obtained a fiberglass body that was in horrible shape. I’ve nursed it back to health through a steady diet of fiberglass and resin. I believe I’ve got an older bobcat body, but I couldn’t say for sure. I prefer the body style with the look of its wider lip that encircles the interior of the body. While fiberglass bodies can be a little or a lot lighter (depending on the body style), they aren’t quite as tough as a metal body. Fiberglass bodies can still be found from time to time on craigslist. I will do my best to build a description of as many of them as I can. Here’s a number of pics of rebuilding the body. Here, I’m painting the body and part 2 of painting.
Fenders: Through craigslist I found a never used bobcat racing body that included fenders and a grille. I bought the entire package then resold everything but the fenders. I chose these fenders over new fenders because 1) they were cheaper and 2) the newer fiberglass fenders from places like JC-Whitney’s came with an extra lip in the front that I didn’t like. Once purchased, I had to cut and extend them, and then create the sections that wrapped around the headers. Here I start the extension process. Here I complete the process.
Grille: The grille is the only original part of the jeep left. My experience was that the fiberglass grilles just weren’t strong enough to hold up to daily wear and tear. So, I took the original 1949 grille and stripped it down pretty bare. Then, because I wanted to use the 5 1/2 inch rather than 7 inch headlights, I had to fiberglass down the headlight holes. I chronicle the grille here.
Headlights: I got my headlight housings from a local junkyard that has a huge inventory of cars from the 40s, 50s and 60s. The housings allow the use of a 5 1/2 inch rather than the standard 7 inch headlights, creating a different look. The housings are from an Oldsmobile Dynamic 88, which actually used two sets of these on each side. I discuss them here.
Hood: I created the hood out of fiberglass using a homemade mold. Due to the height of the intake manifold, I was later forced to add a scoop. I hope to redo the hood and make some minor improvements next time.
Radiator: The radiator was purchased through Doug Herbert High Performance Parts. Aluminum Radiator (GRI1-25241-X) was $179.99, the best price I found anywhere. The fit was perfect, 27 1/2″ x 15 3/8″ x 3″.
Fan: I found the fan through ebay seller North Coast Performance, a ProComp Dual 10″ combo with a thermostat switch. It was $60 plus shipping. It covers nearly all the radiator without sticking below the radiator. I chose to fiberglass the two fans together and then create an external mount to more firmly hold the fans in place. Between the two fans, each rated at 1250 CFM, and the aluminum radiator, I except to have no overheating problems. Here’s a little about my decision process regarding fans.
Wiring: I used a product called KICKZ, a product I won through an ebay bid of $143, which was one of the best prices I’ve come across. I was pleased with the ease of installation and organization of the wiring. The wire gauge was heavy and the wiring had some thick insulation. Nothing about the harness felt cheap to me. Here’s some posts about the wiring.. getting the wiring, installing it 1, installing it 2, installing it 3, installing it 4.
Gauges: I purchased brand new Equus gauges from schucks. Here’s what I did to install a transmission temp gauge (actually just an engine temp gauge) into the tranny line.
Tires: I’ve got 7 old desert dogs which I will use for racing. I haven’t decided on what type of new tires I’ll purchase.
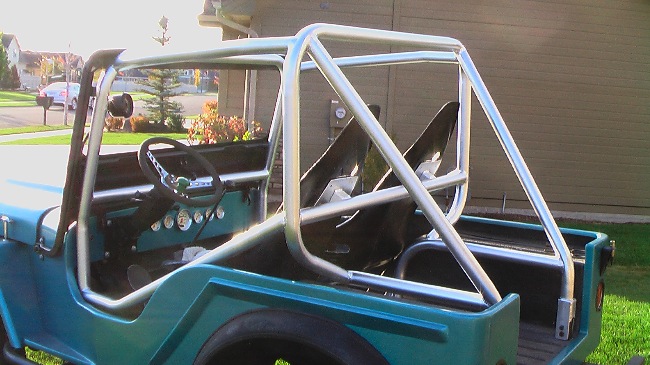
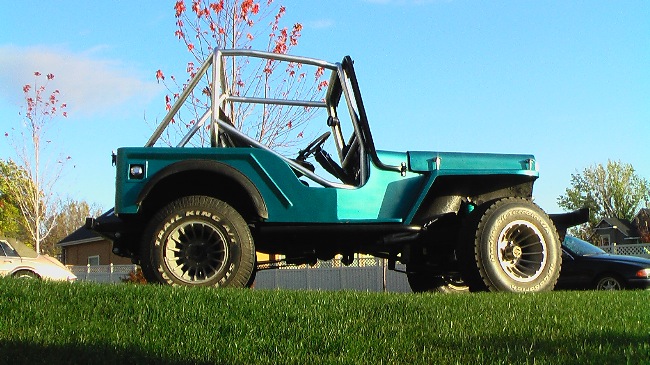
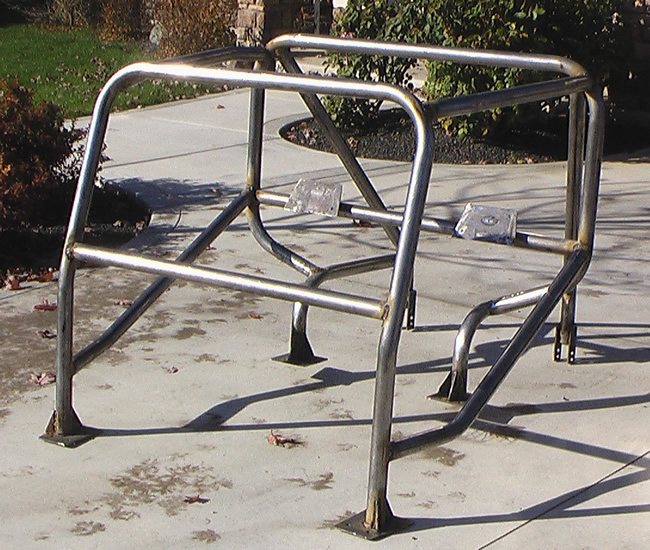
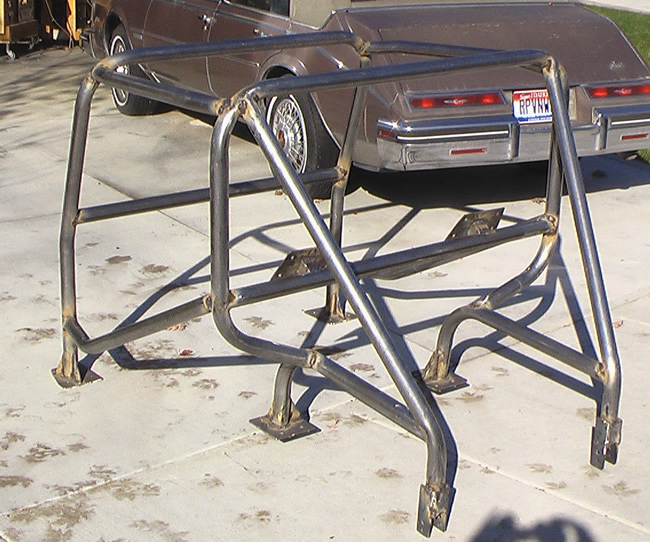
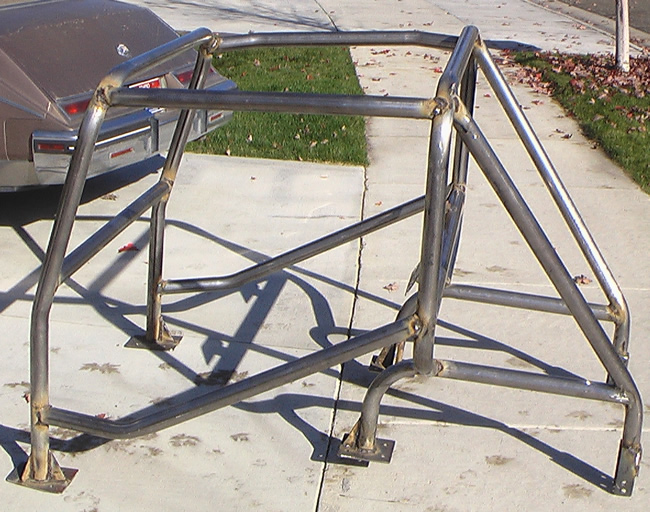
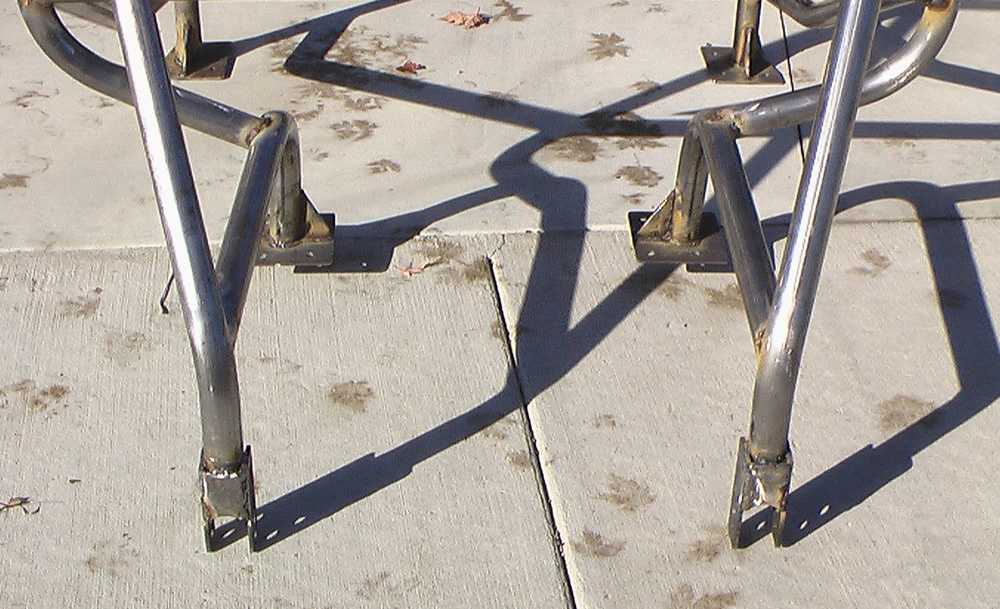
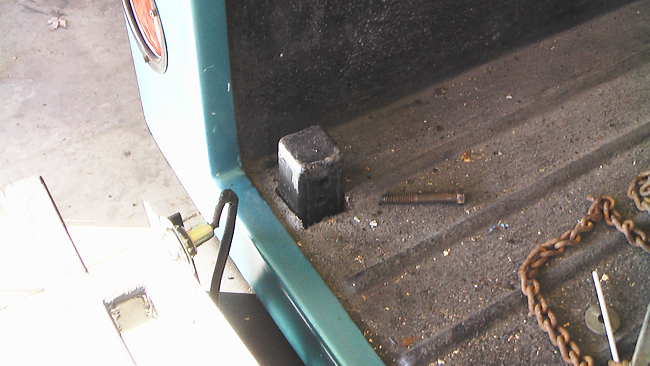
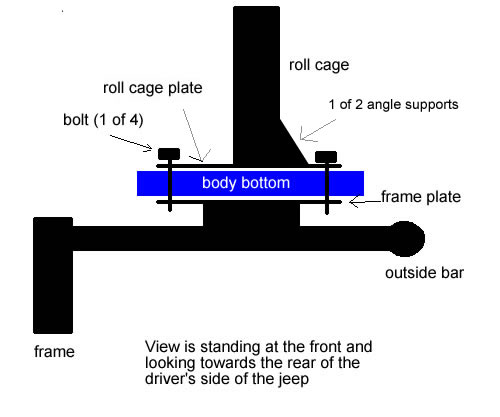
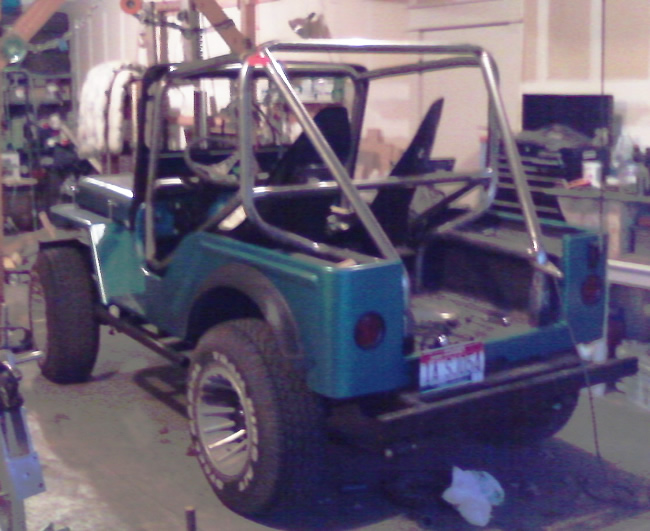
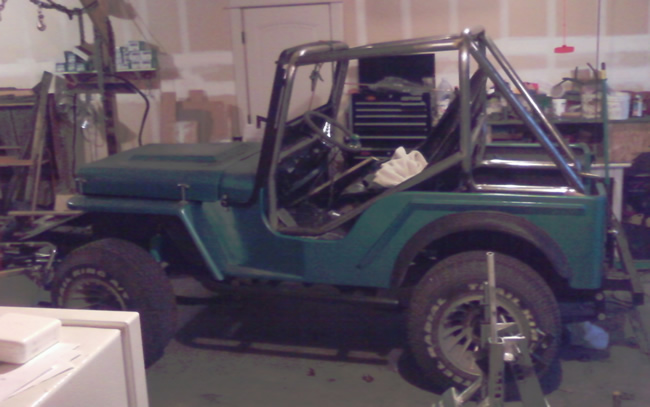
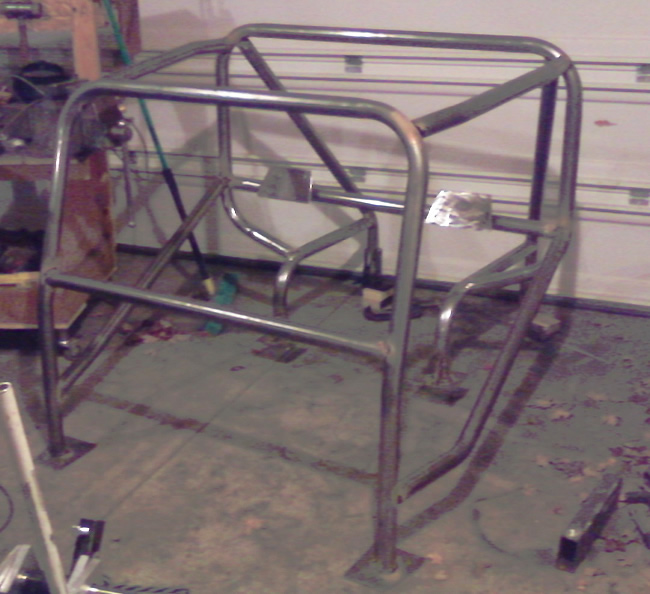
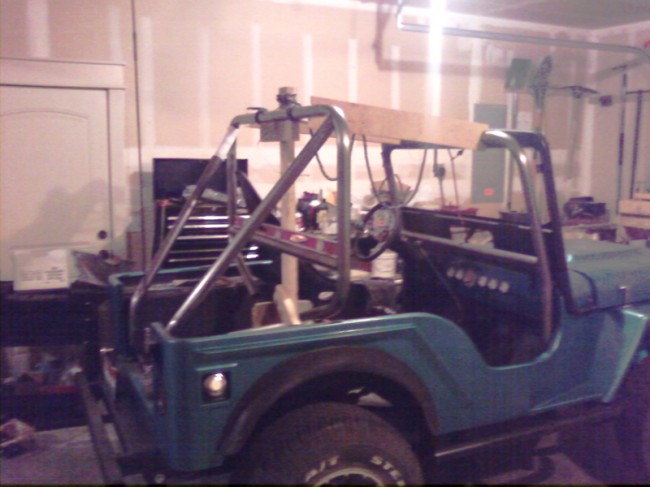
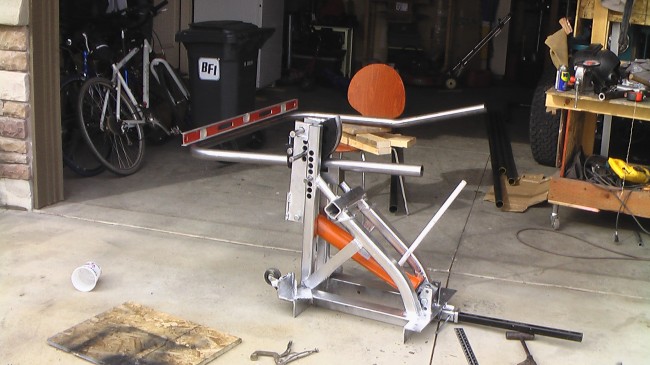
Roll Cage: The roll cage is 2″ diameter .12 thick CREW Tubing that is connected to the frame in six places. The tubing is mounted in 6 places. The front plates use 4 3/8″ grade 8 bolts at each plate. The middle plates use 4 1/2″ grade 5 bolts at each plate. The rear bolts use 2 3/8″ grade 8 bolts at each connection. The plates are 1/4″ thick plate. Here’s an overview of the final build and research related to my cage.
Gas Tank: This is a stock CJ-5 gas tank from the 1973 CJ-5.
Gas Pedal: This is a custom pedal made out of a piece of aluminum and covered with some skateboard sand-paper-like covering. On the back, I’ve used a couple rollers so that the pedal rolls down gas pedal lever. I found this worked exceptionally well while racing and jeeping, as it kept the pedal from moving due to bumps.
Power Steering: I used a common saginaw hydraulic steering mechanism. I borrowed an idea from a friend to neatly connect the tubing from the pump to the steering unit. You can view what I’ve done to develop the idea and then what it looks like when it’s finished. Here’s a video on fixing a shaft leak on the powersteering housing.
Steering Column: The steering column came out of a late 80s cherokee. It seems to be a GM-type column to me, as all the wiring matches the GM columns. At first, I cut the steering housing down a couple inches, but then discovered I needed to the extra length (oops), so I welded back the extra length. I created a custom attachment to bold the column onto the fiberglass dashboard, connecting it to the brake housing to improve the strength.
Lyle from Bob's Mechanical called me today. He left a message on my phone asking me to call back in a tone that made me wonder whether a relative of mine had died! Turns out, the news was worse; Both of my heads had one crack each between two valves. You can see one of these cracks in the picture to the right.
Fortunately, my $50 engine had 2 good heads, though these heads weren't ported nor did they have their valve guides machined, they did have better seats. Best $50 I've spent so far!
Yesterday I drove out to Caldwell to meet Terry Zabel and checkout a $50 buick v6. This craigslist find was my least expensive crankshaft option, so I had low expectations, but high hopes. The engine came without an intake, rocker arms and a few misc pieces, but one useful item they did include for me (thanks to his brother Tony) was an even-fired flywheel, which I had been seeking (but couldn't find) in case I wanted to move back to a manual tranny. As soon as I saw the flywheel, I figured the crankshaft was gravy, so I told them I would take it.
Back home, I quickly pulled it apart (which wasn't too difficult as most of the timing chain bolts and oil pan bolts were missing anyway). When I finally got to the crankshaft and pulled off the first rod, I was relieved to see virtually no wear. It didn't take long to pull out the crankshaft and see that it had been turned .010 and was in excellent shape … whew! So, I took it to Bob's today and Lyle mic'd it, confirming my assumptions and telling me the same thing, "much better than the other one". Also, the block itself looks to be in great shape, though it's been bored .030 already. So, I'll save this block and use it as the base for a backup v6 for future use.
Last October, I bought a 1980 buick v6 with approx 50k miles that had been built to put out approx 250hp. The engine details included: "9.1 Compression, Hypereutectic Pistons, Balanced, 288 Duration Cam, Head is Ported with 174-150 Stainless Valves, Aluminum Edelbrock Performer Intake 4 Barrel, Holley Aluminum Valve Covers,High Volume Oil Pump". Those are the kind of v6 specs I wanted, so it sounded ideal.
The guy I purchased it from (off craigslist of course) said it would likely need new rings and cam bearings, but everything else should be good to go. So, I've been looking forward to the engine rebuild as I figured it would be pretty straight forward.
So, yesterday I started taking apart the engine. Everything looked as expected until I pulled off the heads. Inside number 1 & 2 chambers were some rust, thick carbon deposits and dust (see upper right pick — it's not horrible, but dirtier than I expected). At that point, I decided the entire engine needed an inspection, so I pulled everything out. When I got to the crankshaft, I could see there was definitely some wear — I would need to take it to a machine shop and have them review it.
This morning, I did just that. First we discovered it had already been turned 010 and, after pulling out his micrometer, he determined that we'd have to go at least to 030, but he wasn't sure there was enough metal left to make that work.
So, I'm on the hunt for a cheap v6 with a good crank, or find a crank by itself (perhaps at a junkyard?), or buy a new one — approx $500 that I didn't intend to spend.
One of the minor fixes on my list of things to repair (a never ending list it seems) was to replace the seals on the input shaft of my power steering unit to stop a small fluid leak. At $15 (from my local NAPA dealer) for replacement seals this is an inexpensive fix. So, to make the fix more interesting, I taped my efforts for your viewing amusement and edification.
A couple weeks ago, after finally ordering and receiving my Bronco Dana 20 rear sliding gear, I got my Dana 20 with 2:46 ratio Dana 18 gears put together. I decided to videotape the build and despite a few setbacks (such as trying to install the wrong dana 18 intermediate gear) I got everything together.
The video is hardly a complete document on how to rebuild a transfercase properly. Clearly, I won’t be quitting my day job to go into TV! However, I hope it’s educational and a little amusing.
I drove up to Seattle yesterday via Vancouver, Wa, so I could stop at Matt's house to pick up some rims he posted on craigslist. I've been looking for a spare for the four I've had, but have had little luck finding any. Now I have four spares! After close inspection, these are exactly like the ones I have, except they have some black coloring in between the ribs. I'm not sure whether the black color was an option or whether someone removed the black from mine (the black looks original – I'm gonna attempt to remove the black). Either way, these should be perfect. Thanks again Matt!
Another item I felt comfortable installing with the engine in place is the grille. I was already pretty confident where it would go, but I wanted to be sure. As a reminder, because I'm using the post '72 Cj-5 frame, I have to extend the fenders and hood approximately 3" as you can see here in this test setup below. So, there was no default location for the grille anymore.
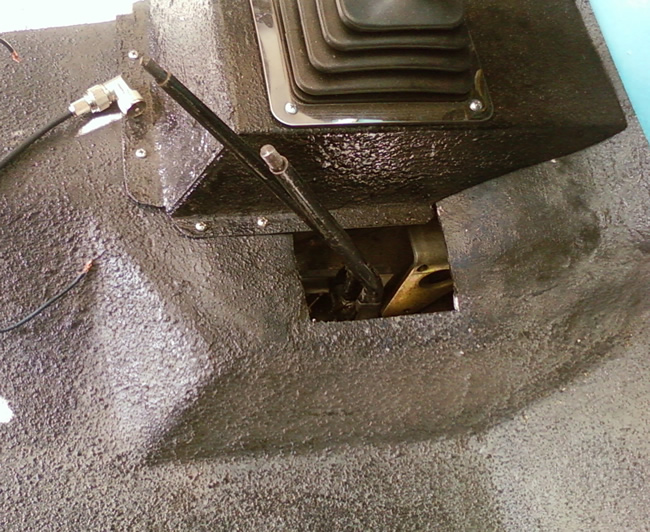
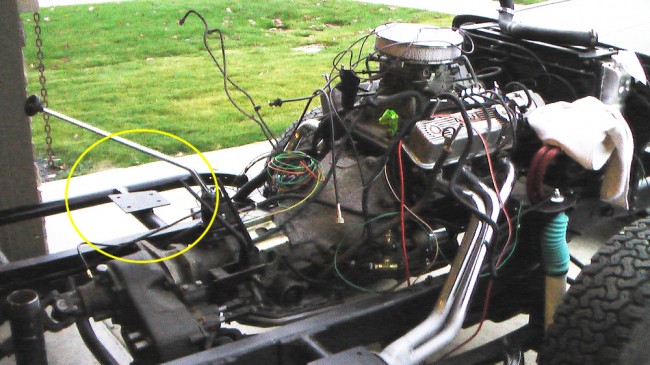
After installing the engine, tranny and tc, I thought I'd better test to make sure the body fit over all three. The good news was that it did. The bad news was that the shifter was hitting the dashboard when I shifted into park.
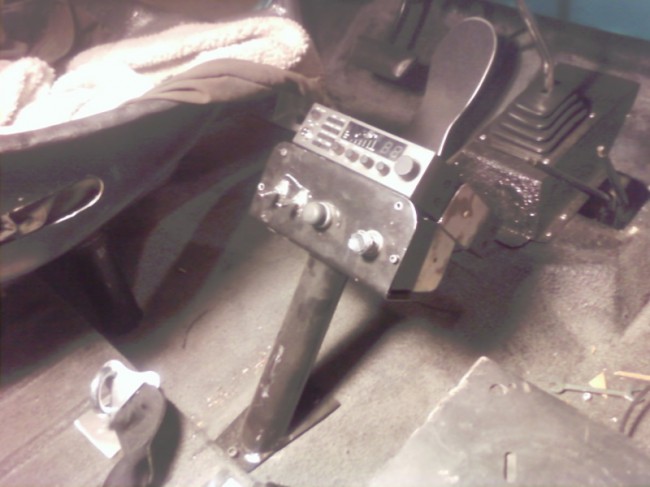
So, I took the bracket and extended it with a piece of halved 2×2 square tubing. Then, I used a convenient hole bracket in the tranny (I have no idea what it is for) to add a back mount to the bracket. The results are below:
I put the body on and placed the seats on their mounts. The body slopes backward a bit, but that will be fixed when I put the correct suspension brackets on the back.
The CJ-5 I bought last year had been modified to accept a GM 350. I really liked the way they put together the engine mounts, so I chose to reuse the mounts and then modified my frame to accept the mounts.
To make the mounts, I took the standard buick v6 mounts and removed the rubber blocks, leaving only the steel. Then, I cut and welded some 3×3 square tubing to the mounts.
To make the holders that are welded to the frame, I used some recycled angle iron and added side braces to create the triangular look. I look this setup much better than what I did in my first jeep.
The tricky part of putting the engine, transmission and TC into position was making sure the TC was in the right location. If I got it back into the right place, I would not have to change the lengths of the drivelines. Fortunately, I had plenty of room for the engine, so I had lots of flexibility upfront.
Once Transfercase was in place, then I could position and weld the engine mounts.
With my Dana 44 all taken apart (See article below), it was time to put everything back together. One aspect I have left out of the rebuild process is the importance I placed on using the appropriate language to assemble and disassemble the R&P properly; lets just say I'm glad my children weren't about. Gathering tools and parts
In terms of parts, I needed to gather a rebuild kit, a locker, and axle kits. Using Craigslist, I found a locker for 3:73 gearing locally for $325. The rebuild kit I got at half price from a jeeper in Bend, Oregon. The axle bearings, cones, and outer seals were purchased online through Tellico4x4.com. The inner axle seals I purchased at Schucks. At first, when I realized I had forgotten to order these (oops), I went to tellico's website. The seals themselves were around $5 a piece, but the cost for shipping was going to more than double the price. I thought that was ridiculous. So, I dropped by the local Schucks to see what it would cost to get the seals (I figured they would have to order them). Well, to my surprise, they had them in stock! $10 later, I was out the door with them.
The Goal .. take apart my Dana 44 housing and install a Detroit Locker along with new bearings and seals. Sounds easy enough, right?
When building my last jeep, I did not have to rebuild either of the axle housings. In the rear I had a Dana 44 from a mail jeep. Mail jeeps come with detroit lockers: note that the housing is a little narrower than a standard jeep by approx 2". To fix this, you can have some shims machined that will allow you to use standard flanged jeep axles.
Fast forward to the new jeep. I had a Dana 44 I knew nothing about and a detroit locker I wanted to install inside it. I figured this would be a good opportunity to learn about ring and pinions; and, learn a thing or two I did! The First Issue – Broken teeth
Naturally, the first step was to pull off the housing cover and examine the condition of the gears. Unfortunately, the news was not good. I quickly discovered that I had a very broken tooth on the ring gear.
Interestingly, there was no evidence of broken pieces in the oil. This lead me to suspect that the previous owner may have discovered the damage while changing the gear oil and 'forgotten' to mention it to me. Also, once I pulled everything apart, I would also find the pinion gear broken as well.