Biscuit Research Archives

My Rebuild

To Top

My Build: Turn signals / Parking lights

• CATEGORIES: Biscuit This site contains affiliate links for which I may be compensated.

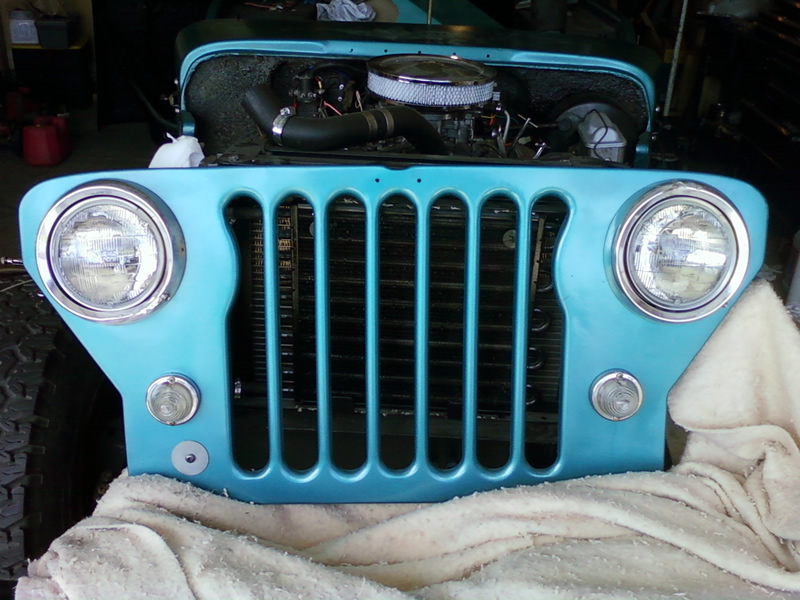
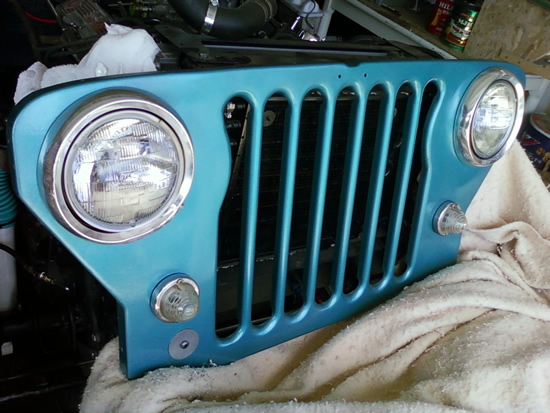
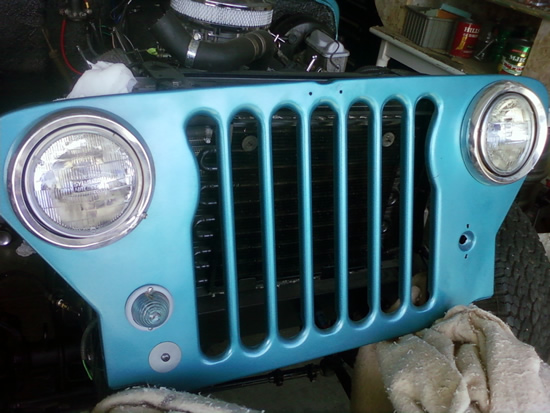
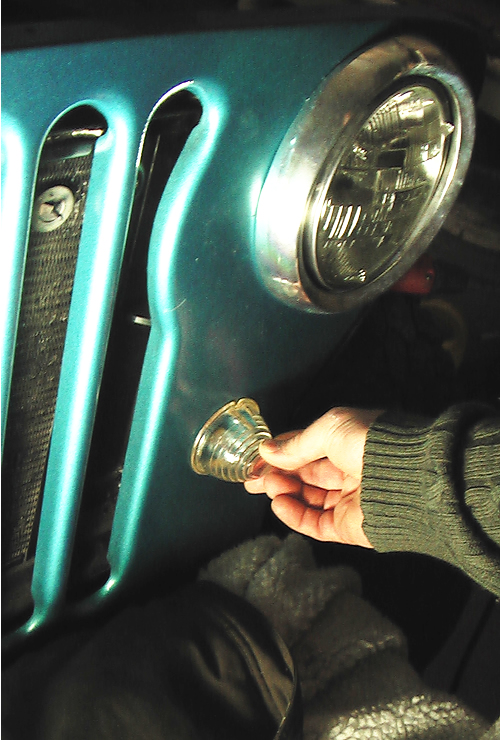
Hurray!  Thanks to both John and Joshua (who gave me the original glass covers).  Now, I’ve got glass, honeycombed light covers with some real chrome covers (as opposed to my painted ones).  This has been one of those lingering projects that it’s nice to have completed.

More updates later (after I eat some dinner).

final_grille1

final_grille2

 
To Top

Shortening a Steering Shaft

• CATEGORIES: Biscuit This site contains affiliate links for which I may be compensated.

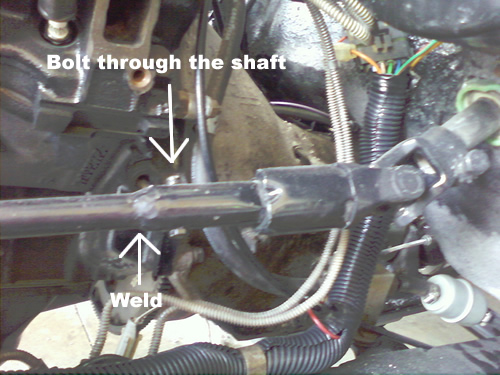
A reader asked me about shortening a steering shaft.  Here’s one place I shortened a shaft I took out of a late 80s cherokee to put in my jeep.

Frankly, I don’t remember exactly what I started with, but I took a solid steel driving shaft and slipped it inside the cherokee shaft.  Then I welded the two together.  As a safety measure, I also drilled a hole and added a bolt with a self locking plastic ended nut to insure the nut doesn’t come off.

I used the same technique on the other end to get the correct fit for the steering column.

steering_shaft_sizing

 
To Top

Crap! … I Shattered my Light Cover

• CATEGORIES: Biscuit This site contains affiliate links for which I may be compensated.

broken_lightHorrors!

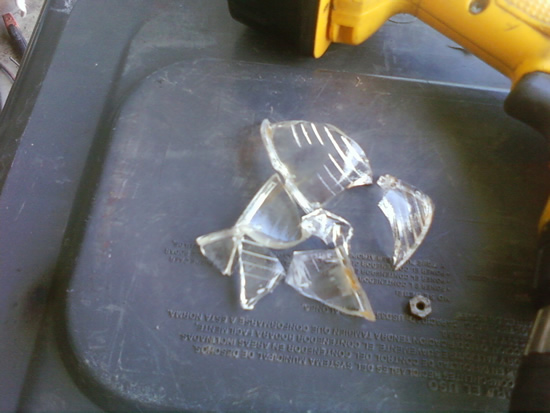
I had carefully rebuilt a rusted bezel to fit over the clear, glass, honey-comb light covers.  I got everything ready.  Then, while putting it together, the glass slipped from my hand, hit the concrete and shattered (hence the pic to the right).

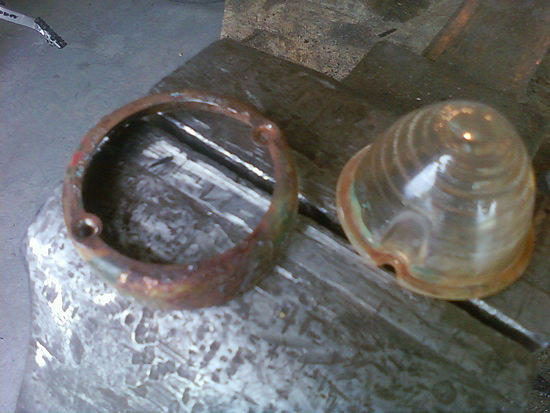
Below, you can see a picture of the rusted bezel.  Both bezels were in about the same condition (eg.  Bad Condition, with small holes in some places).

To rebuild them, I used some JB Weld that I applied to the inner side of the bezels in a couple layers.  Then, I sanded down the outsides (the chrome was toast), applied some primer, sanded with 220 grit, repeated a couple times and will try spraying on some spray-on chrome, which will work until I can find some original chrome bezels.

Fortunately, it appears the Tail Light King might have the covers I need.

Before:

front_turn_light3

After (bezels are still gray primer):

front_turn_light2

 
To Top

Roll Cage Tubing in Northwest

• CATEGORIES: Biscuit This site contains affiliate links for which I may be compensated.

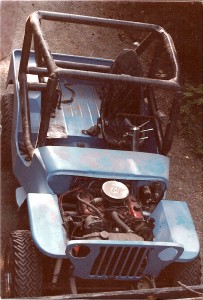
bluejeep_inprogress_cageAnyone know any deals on roll cage tubing in the northwest (washington, oregon, idaho)?  I need to get cracking on my cage.  I’ll be up in Seattle for a week over the 4th for sure, though I could be up as soon this weekend if someone has a line on tubing.  Somewhere I’ve got the measurements for what I need, but I need enough for a cage similar to what I had for my last cage, shown to the right.

Thanks, Dave

 
To Top

My Build — More progress

• CATEGORIES: Biscuit This site contains affiliate links for which I may be compensated.

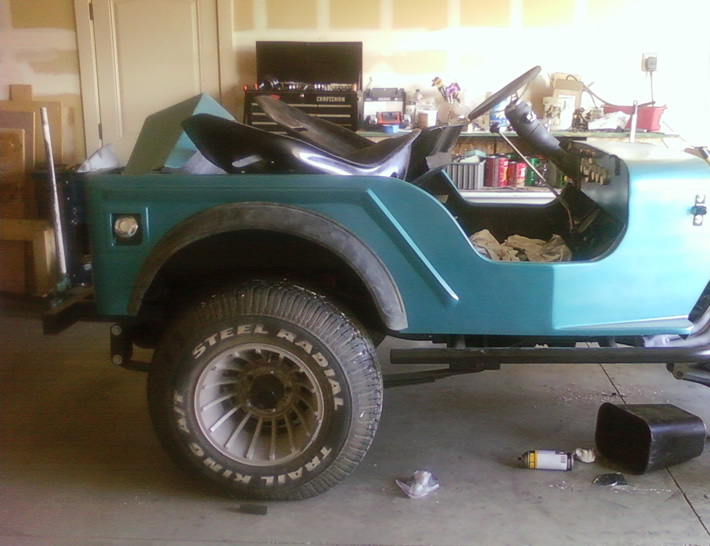
I made some more progress today, including hooking up the gas filler, attaching the rubber wheel well thingys, installing the choke and some other minor additions.  I’m just about ready to fire up the engine.

passengerside

 
To Top

My Build – Front brake brackets

• CATEGORIES: Biscuit This site contains affiliate links for which I may be compensated.

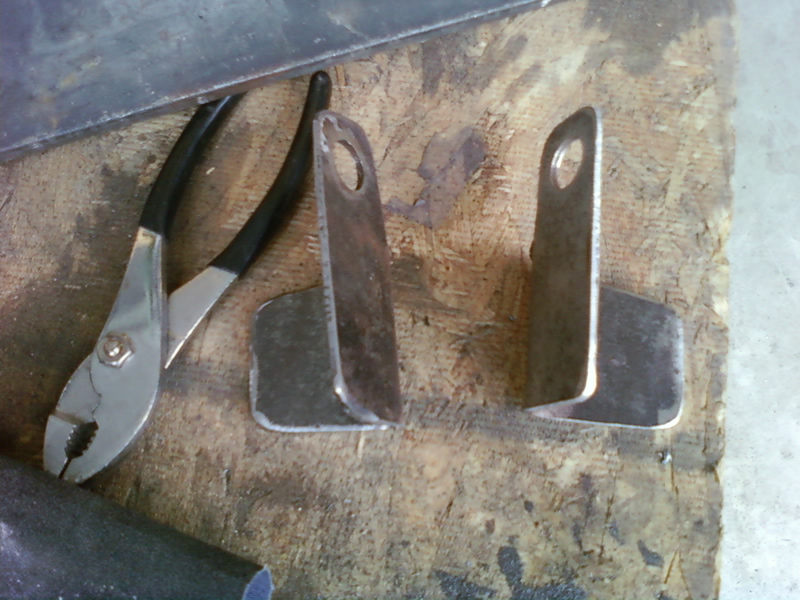
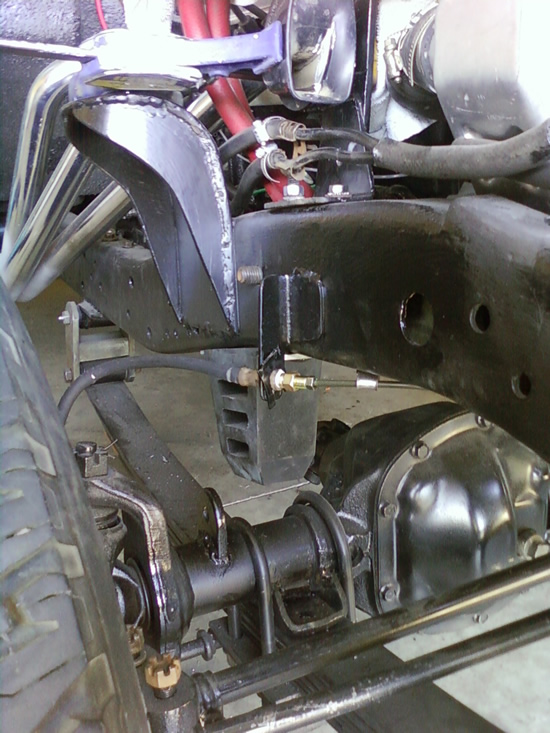
Because the frame is about 8″ higher than stock and due to the frame changes, I had to reroute the brake lines underneath the frame rather than through the middle of the frame.  Another advantage of this system is that I can use standard CJ-5 flexible brake lines, which reduces my costs. I considered a variety of bracket ideas, but finally developed the following:

These two brackets were cut from flat steel,  drilled and then bent.

brakes_2

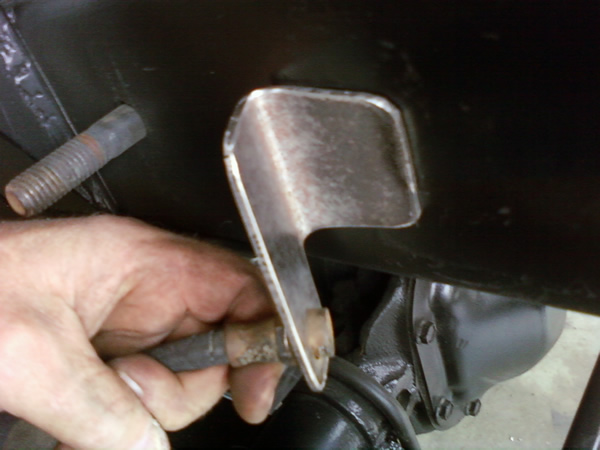
Next, I put it against the frame to figure out the exact position.

brake_2_5

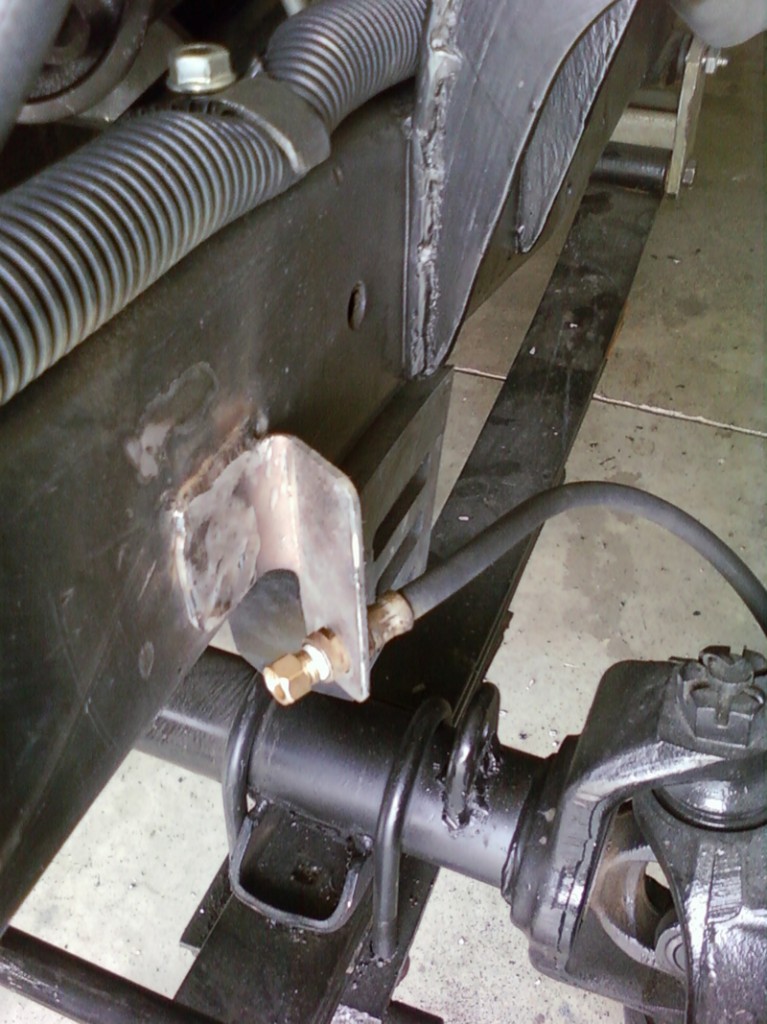
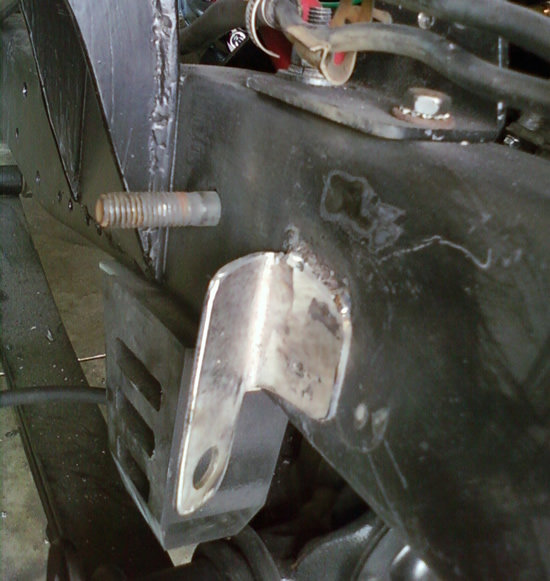
Next, I welded them to each side of the frame. You can’t see it from the pic, but I drilled a hole near the bottom of the bracket so I could fill in the hole and weld the bracket to the frame. I also welded the top of the bracket to the frame.

brake_3

brake_4

And here’s the passenger side with paint and everything tightened.

brake_final

 
To Top

No Updates Tonight – Squashed Finger

• CATEGORIES: Biscuit This site contains affiliate links for which I may be compensated.

UPDATE:  Well, my finger is better, though swollen and purple, but for some reason the internet is crawling very slowly tonight.  So, I’ve made a couple updates and will try again in the AM (5/25).  I’ll also include an update on finishing up my brakes today (yeah) and a cool video of how to re-seat a tire using WD-40 and a flame.

No updates tonight (5/23), except for the brief info below.  I was pulling off one of my shocks when it suddenly slipped off, catching my finger between the shock end and the brake backing plates.  It’s a nice rosy purple 🙂

The good news is that I got my custom front brake hose brackets cut and bent (pics tomorrow).  I also welded the brackets on to my front housing so that I can attach limit straps for racing.

Tomorrow I’ll weld on the brake hose brackets, reattach my proportioning valve, and hook up my brake lines.

 
To Top

My Build: My windshield frame painted

• CATEGORIES: Biscuit This site contains affiliate links for which I may be compensated.

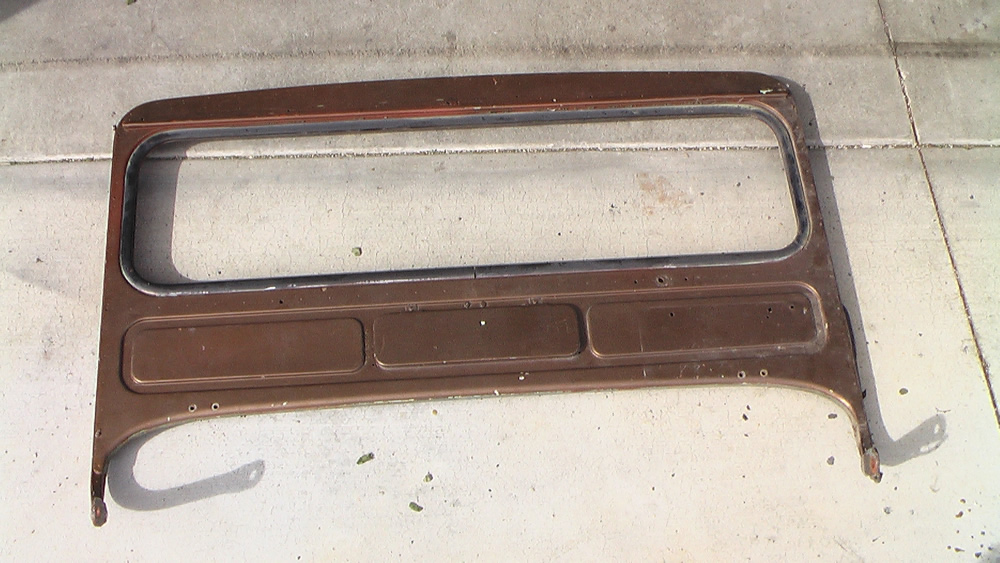
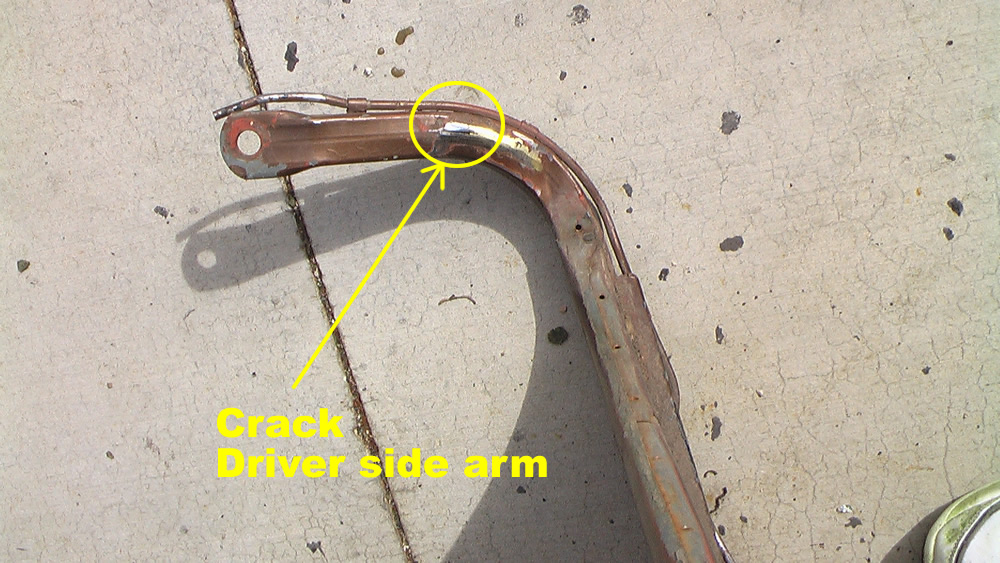
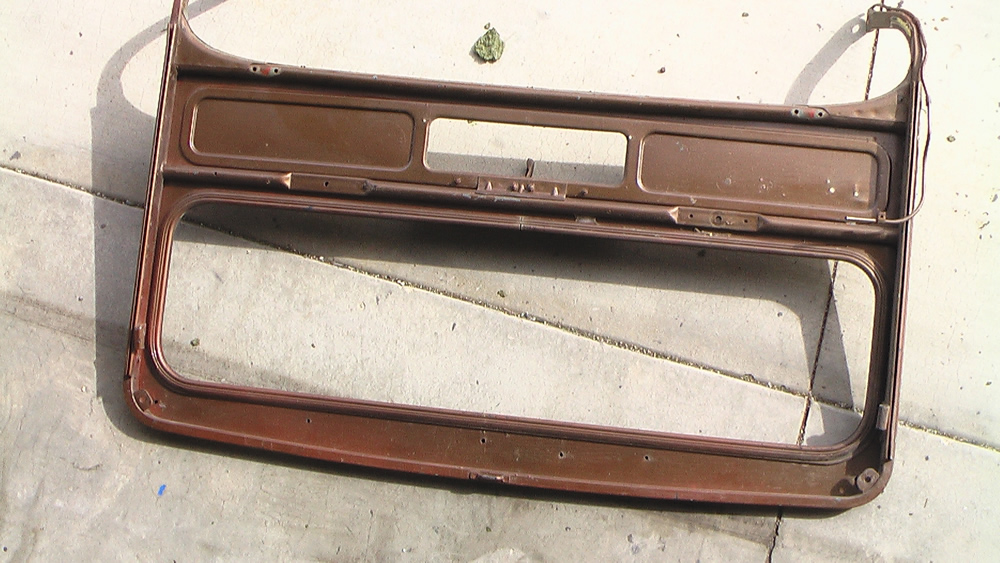
Here’s some before, during and after shots of my CJ-3A windshield rebuild.  Special thanks to John for the vent bracket.  Mine broke off and John created a new one for me.  It works beautifully.  I was able to de-paint and can reuse the windshield gasket, so now all I need is the glass and the cowl rubber and it’s completed.  Necessary repairs included welding up 8 holes and welding the crack in the frame.  Next, finishing the brakes.

BEFORE PAINT REMOVAL:

windshield_front

driver_side_crack

windshield_back

Continue reading

 
To Top

Ya win some and ya lose some …

• CATEGORIES: Biscuit This site contains affiliate links for which I may be compensated.

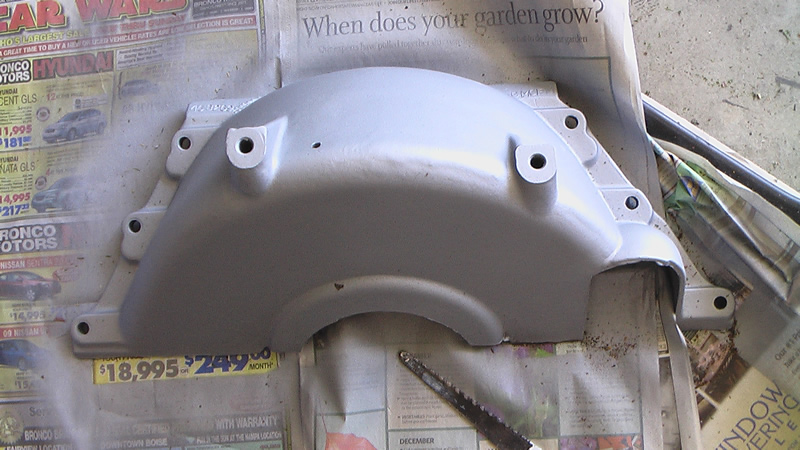
At the 4wd swap meet  in March, my only purchase was a bottom cover for my TH-350 housing.  I was assured it would fit a TH-350.  I figured, for $10, it was worth a try.

I got it home, cleaned it up, even painting it.  It looked like it should fit.  But alas, no matter how many ways I tried to make it work, the holes didn’t line up.  That will teach me to try something new (as in trying an automatic).  So, my search continues ….. here’s a picture, for what it’s worth 🙂

th350_bottom_not

 
To Top

My Build — Disc Brake Anchor Plate issue?

• CATEGORIES: Biscuit This site contains affiliate links for which I may be compensated.

caliper2Winter has a funny way of blowing all kind of things into and around the garage. Last November I took a break from projects in the garage, but when I went out there a couple of weeks ago, it was a bigger mess than I remembered it.  So, I spent last weekend cleaning (including cleaning out the parts washer — uggh), organizing and getting ready to attack my first project of the year, getting the disc brake parts cleaned up and painted.

caliper_correct1So, when I went out today to start with the brake parts, naturally I ran into problems.

PROBLEM 1: My parts washer repaid my efforts at cleaning by developing a leak at the base of the pump.  Not cool.  Since this parts washer is older than some of the wagon wheel trails around here, I’m not entirely sure if I can find parts for it.  It’s entirely possible it’s a custom tank.  So, I get to spend this upcoming weekend removing the washing liquid and attempting to patch the leak.

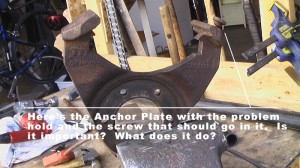
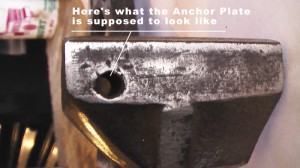
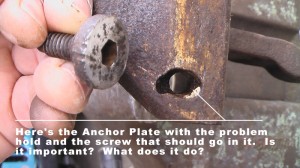
caliper_problemholePROBLEM 2: Since the parts washer wasn’t going to work, I decided to use a wire brush and a sander to clean up the parts.  So, I cleaned up one of the anchor plates, no problem.  I got to the second anchor plate and noticed that what’s supposed to look like a hole with threads had chunks missing and the threads are gone.  Having not worked with these brakes before, I decided it was time to close up the garage for the day and hop on the internet to see if I could learn more about the problem.  Unfortunately, I couldn’t find anything about the problem.

So dear readers, what’s the bolt for?  Is it important?  I’ve got two images to the right.  The image at the top shows the entire anchor plate.  The second pic highlights a correct hole and the bottom image highlights the problem and shows the bolt that should go there?  Do I need the bolt (of course, I’m sure I do)?

 
To Top

Mods – Steering upgrade options for Early Jeeps

• CATEGORIES: Biscuit This site contains affiliate links for which I may be compensated.

UPDATE: 08/12/2010: I’ve added a link and section regarding the rack and pinion mod implemented by Sam.

UPDATE 01/19/2010: Here is a link to the post about Lawrence Elliot’s nice little mod of the bell crank to eliminate sloppiness.  This is a simple way to improve steering sloppiness while keeping everything else stock.

UPDATE:  The picture below is how NOT to update your the steering in your jeep! I found a picture of this crazily creative solution for updating the steering mechanism on an early jeep at JP Magazine, so I’ve added it to a post I made about steering upgrades last April.  I’ve also updated this post with images from two different jeeps that installed a saginaw non-power unit within the engine compartment and can be found under section 3B.

scary_steering

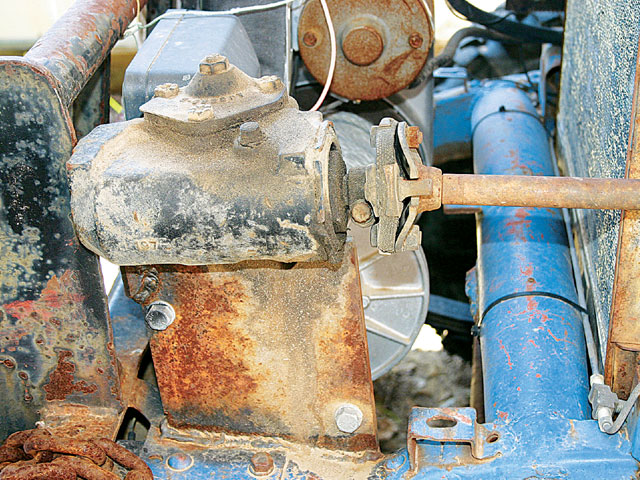
Modifiying the steering system of early jeeps might be one of the most common upgrades around.  It often follows the upgrade of the engine to a V6 or V8, right after the jeep owner discovers how much work it is to turn the wheel while jeeping.  So, here’s my list of steering options:

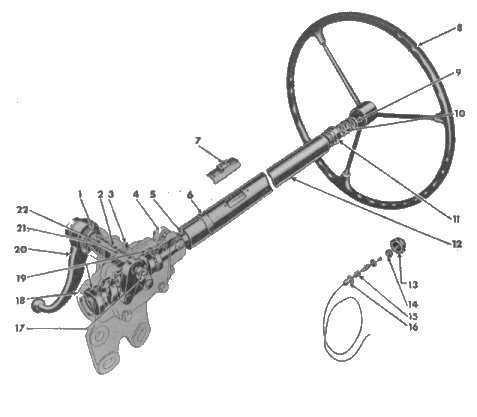
1)  Keep the stock setup (but this is often impractical when upgrading to a v6 or v8).  This is a Ross worm/sector manual steering box and a drag link that connected to a frame-mounted bellcrank.

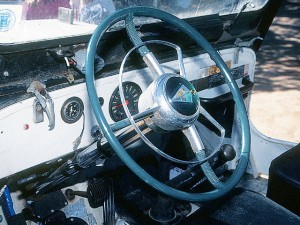
hudson_steering_wheel2)  Swap in a Hudson steering unit.  I exchanged emails with with a reader named Larry who had one of these in a CJ3B and loved it (calling it the sweetest driving jeep he’d ever owned — he planned to put one in a  1949 CJ-2A he just bought).  I’ve never tried the swap nor tried driving a jeep with the setup in place. I doubt these would work on a MB/GPW setup. (To the right is an image of a Hudson steering wheel in a jeep from Jp Magazine.)

These can still be found using craigslist and junkyards. Here’s a quote from the CJ-3B site.

“Forget the power steering and get a 1949-1954 Hudson steering set up. You can swap out the whole steering column or just machine the steering box to fit your original steering column. They both used Ross steering boxes, but the Hudson used a tapered roller bearing with a different gear ratio, making it feel just like power steering and gives you the tighter turning radius.”    http://cj3b.info/Tech/Upgrades.html

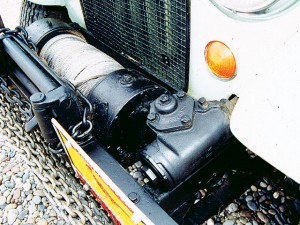
saginaw_steering Continue reading

 
To Top

My Build — Playing With the Roll Cage Design

• CATEGORIES: Biscuit This site contains affiliate links for which I may be compensated.

I thought I’d reassemble my mockup roll cage to see how everything is coming together.  After making a few small changes, I’ve decided the front hoop will need to go up about an 1″ or so and the back hoop will need to drop about 2″, which should provide a more balanced look to the cage and allow a top to fit more easily.

Continue reading

 
To Top

Attaching The Front of the Roll Cage

• CATEGORIES: Biscuit This site contains affiliate links for which I may be compensated.

Last week, Siva asked about my strategy for attaching the roll cage to the front area of the jeep. So, I put my mockup cage back into the jeep to demonstrate this.  The two pics below show the PVC tube landing squarely on the 1/4″ thick plate of steel.  There will be four bolts that go through the plate connected to the cage to a plate underneath the body connected to the frame (see drawing at the bottom).  This sandwiches the body between the roll cage plate and the frame plate, keeping everything together.  There will also be one or two triangle plates from the tube to the plate (as demonstrated by the piece show in the pic).  This will help provide some additional lateral strength.

Continue reading

 
To Top

My Build — Frame Cage Mockup

• CATEGORIES: Biscuit This site contains affiliate links for which I may be compensated.

I spent some time this evening cleaning up some older posts that didn’t have working links. While doing this, I’ve discovered that I didn’t have any posts regarding my ‘rough draft’ of the roll cage. I put this together early this year using some PVC. Here are some images from different angles.

Continue reading

 
To Top

My Build — The Seats

• CATEGORIES: Biscuit, Features This site contains affiliate links for which I may be compensated.

A reader just received a 1951 CJ-3A. Since the seats in it weren’t something he wanted, he asked what I had done for seats. I realized I hadn’t really covered the topic, so here’s what I did and why I did it.

As you probably know, my first jeep was built from an ex fiberglass racing jeep (oh where oh where did those pictures go). From that jeep I used the body, frame, roll cage and seats as the foundation for what became my first jeep (which I called the ‘great escape’). The fiberglass seats were mounted on a 2 1/2″ pipe that was welded to the frame. A hole was cut through the bottom of the body and the pipe stuck through the body (not only did the thickness of the body help keep the pipes from moving, but the pipes held the body in place — a nice synergistic effect). On the upper end of the pipe were threads. Onto those threads a square platform was screwed onto the pipe. The seats were screwed onto the platform. It’s a one size fit’s me approach that works for me and people of similar size. The back of the seats were then bolted to a plate that connected to a bar that was part of the rollcage. So, those seats did not move. They were solid, despite their thin profile.

Because the seats were already there and they seemed to fit me fine, I went ahead and used them as is. As I raced, drove it every day, and used it in the trails, the positioning of the seats was perfect. I felt secure and tight when I raced, I never got uncomfortable during long drives, my back never got sore, and there was enough padding for enduring the trails. For me, those were some of the most perfect driving seats I have ever used.

Continue reading

 
To Top

My Build — The Body is on the Frame

• CATEGORIES: Biscuit This site contains affiliate links for which I may be compensated.

I dropped the body on the frame last night.  Today, I spent the day building plugs to join the wiring together between the engine/frame and the body.  I also installed the light switch and turn signals (made out of m-38 dash lights), which means the lighting is completed except for getting the bezels for the front turn signals.

Though not shown in the above images, all the gauges are now connected, as are the alternator, distributor, and starter wiring.  The flex-plastic has been run around nearly all the wires (I have to pic up a little more at the junk yard).

My next step is to build the center consol that will have the ingition switch, acc switch, button starter, cigarette outlet (aka cell phone charger) a storage compartment, and 2 drink holders.  I still don’t have a final design for this, but am working through it.  I went back and forth about whether to install this, but I remember that not having a secure place to throw a wallet or other minor items was an issue.  Also, with the advent of cell phones, I’ll need to have a place that can hold it and where it can be charged.

 
To Top

My Rebuild — The turn signals

• CATEGORIES: Biscuit This site contains affiliate links for which I may be compensated.

As I mentioned in another post, I chose to use some left over M-38 lights as my turn signals indicators.  I primarily used these lights because I had them. Also, I didn’t the choice in turn signal indicators I used last time, cheap plastic circular lights from Schucks.

To install them, I ground down the ridges on the lights, drilled holes into the dash, and slid them into it.  I also had to ground the lights, so I took the light holders normall used to hold the lights in place and turned them into grounding washers.

Continue reading

 
To Top

My Build — Front Turn Signals, an Update

• CATEGORIES: Biscuit This site contains affiliate links for which I may be compensated.

A local reader named Joshua responded to my question about front turn signals, writing that he had a pair of lights I might find interesting.  I ran over yesterday to take a look at them.  Apparently, someone had mounted them onto a GPW grille, clearly a place they didn’t belong. Since Joshua didn’t have any use for them, he kindly offered them to me for free (Thanks!).

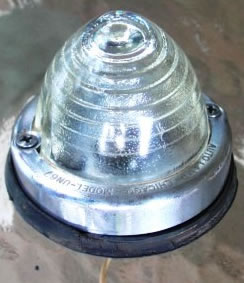
I took the lights home and took them apart.  The beehive cones are glass, are in perfect shape, and cleaned up nicely.  Unfortunately, the bezels are just rough enough that I don’t think I can use them; however, the bezels did have an autolamp UN67 stamp on them.  Here’s an example of the glass on the grille, though I didn’t have the bezel in this example.  The look is exactly what I wanted 🙂

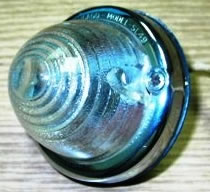
I plugged the Autolamp model number into google and found the Taillightking website, a detailed older light website run by A. J. Phillips. Using the website, I not only found an example of a UN67 bezel, but also discovered a SL49 bezel that’s more like what I’m looking for (it appears a little shorter than the other).  Unfortunately, both of these have been sold.  According to what I can glean from the taillightking website, they were used either as rear lights or interior lights for Chevelles (year unknown). I suspect they were used on other vehicles as well.

Autolamp UN67 in Excellent Shape

Autolamp SL49 in Excellent Shape

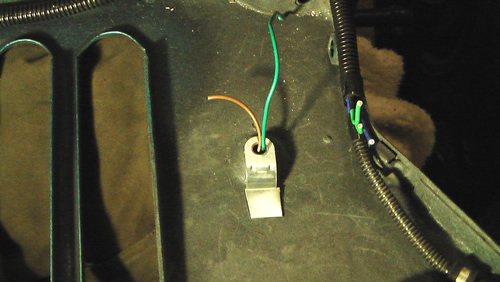
While I might not have the bezels I need yet, I do have the lights and light assembly (the old wiring assembly was a single filament, rather than the dual filament for parking and turn lights).  I took apart some extra towing lights I have and clipped out the wiring and bulb holder.  I had to enlarge the grille hole slightly to fit the bulb assembly, but that was easy to do.  The below image shows the roughed out assembly in the back of the grille.  I’ll need to add a hole to the metal tab that will hold the assembly in place.

Now, all I have to do is find two bezels and I’m set.

 
To Top

My Build — Additional Wiring

• CATEGORIES: Biscuit This site contains affiliate links for which I may be compensated.

Over the weekend I completed the wiring along the engine.  I wanted to hide the wires as much as possible, keep them as organized as possible, and not connect them to the fenders.  Below are pictures of the lines run from the alternator, from the fan assembly (the wiring runs from the fan, over the radiator, and down along the grille to meet with the front light wiring) and then the wiring from the grille along the frame to the cowl.

This is the dual fan setup I purchased from North Coast Peformance, an eBay Power Seller.  I fiberglassed the two fans together and built a metal frame to surround them and attach them to the radiator framework.  This setup included a thermostat that slides snuggly inbetween the radiator fins.  These two 10″ fans cover almost the entire radiator, making it a tight fit.  However, between the aluminum radiator and the fans, I should have no overheating problems.

Continue reading

 
To Top

My Build — Vacuum Hoses

• CATEGORIES: Biscuit This site contains affiliate links for which I may be compensated.

Because the engine I had wasn’t entirely complete, I was unsure how I should run the vacuum lines.  Last time I ran my vacuum lines, I’m pretty sure I guessed — Or, maybe I asked dad.  This time, I consulted google and learned a little bit more about vacuum lines.

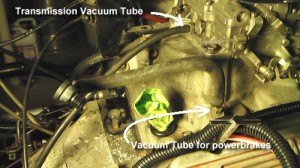
First, there seems to be plenty of confusion about whether vacuum lines should run from the intake manifold or from the ports below the carb.  As I understand it, the vacuum from the intake manifold is a little more consistent at or near idle.  However, most stock applications will operate fine from the ports below the carb. Here’s some information about vacuum that I used.  I found some additional explanations, but I seem to have misplaced the links.

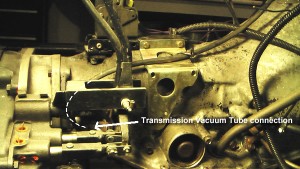
The high rise manifold I am using only has one vacuum outlet, so I chose to use that for my powerbrake hose (which I will obviously need to lengthen).  I used the port behind the carb to hook to the th350 governor on the back of the transmission.  I blocked the large port on the front of the carb.  Finally, I hooked the small port on the carb to the distributor.  I figured these were low risk decisions, as all of these are easy to change if I need to make a change.

I didn’t invest a ton of time doing research on this, so if anyone has any other suggestions or info, please add a comment.

Continue reading

 
To Top

My Build — The Front Driveline Clearance

• CATEGORIES: Biscuit This site contains affiliate links for which I may be compensated.

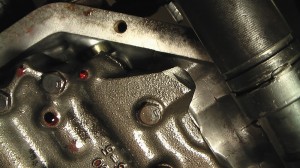
One issue I’ve put off for a while is the close clearance between the front driveline and the transmission.  Because the TH-350 is so much wider than the standard tranny, the driveline runs very close to the transmission pan. Unfortunately, some of the pics didn’t turn out great, but here’s a few of them.

To improve the clearance, I used a torch to heat up the pan and dent it.  That went well, until I tried to put the pan back onto the tranny.  It turns that a casted piece was now bumping against the pan slightly, keeping the pan from going on correctly.

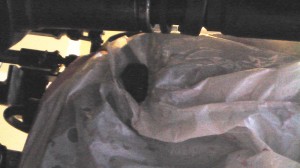
To fix that problem, I wrapped the transmission in plastic and cut a little hole so the cast piece was sticking out.  The plastic would keep any grinding pieces out of the tranny.  Then I grabbed my grinder and ground down the part.

This worked surprisingly well (meaning nothing went horribly wrong).  The piece ground easily.  The pan fit nicely.  My clearance improved. So,  I sanded and painted the pan and put it back together.  I’ll add an additional pic showing the clearance once I improve the light so it shows up better.

Continue reading

 
To Top

My Build — Wiring the Grille

• CATEGORIES: Biscuit This site contains affiliate links for which I may be compensated.

Today I enjoyed a productive day hunting around the local junkyard.  I collected a powerbrake setup, wire plugs, vacuum tubes, manifold connections for the vacuum tubes, gas tank rubber piping, the plastic harness that envelopes the wiring, various knobs, and much more.

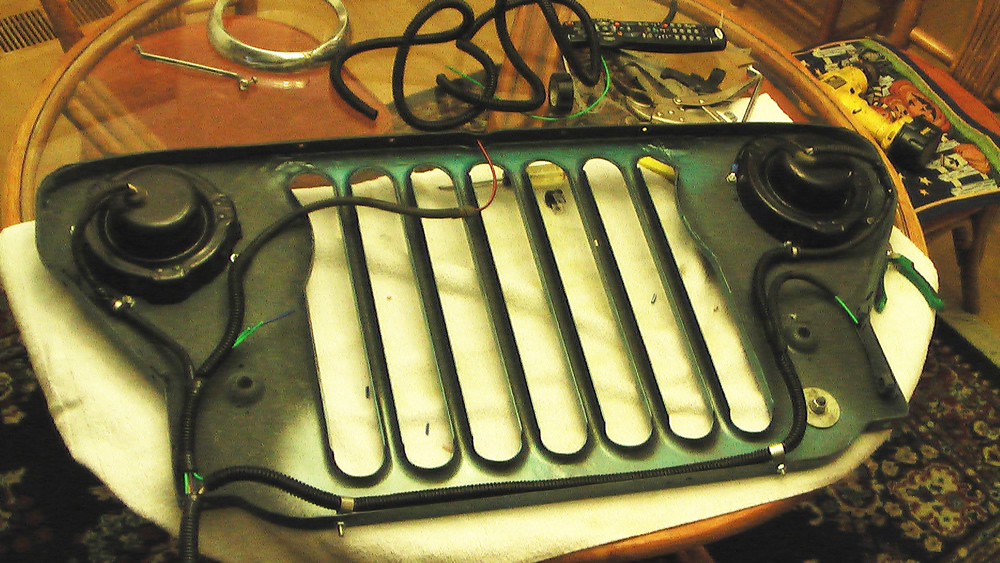
One of the things I never liked about my first jeep was the rather messy way I wired it, including the way I ran the wire around the grille.  This time, I have been able to spend more time thinking about how to organize the wiring.  You can see the results below. (yeah, that’s the kitchen table — it was getting chilly outside)
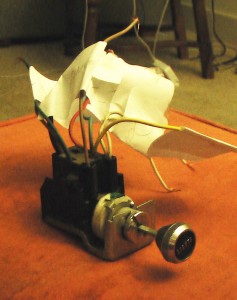
As part of the trip to the junkyard, I wanted to find a headlight switch, and some accompanying switches, that I liked.  Most of the ones I found were cheap plastic or rubber.  After a good deal of searching, I found some real metal knobs on two mid 70s dodge vehicles (truck and a van).

Puzzling through the headlight switch wiring was a bit confusing, because I didn’t have a wiring schematic to follow.  At first I tried hooking up the wires in a few different ways to a battery and a voltage tester, but some of the wires still weren’t working.  After a good deal of searching, I finally found a schematic that was close enough.   I discovered from the schematic that I need to bring in two power sources, one for the headlight power and one for the parking lights/dome light/turn signal power.  Using the schematic,  I was finally able to label the wires for installation.

While searching for a wiring schematic, I came across a design for updating the lighting system using some relays.  As I understand it, for a variety of reasons, the amount of power that finally gets to the lights, especially under idle conditions, is lower than 12 volts, causing the lights to dim.  Using relays and the wiring schematic show should improve the situation.  Here’s a discussion about it.

 
To Top

My Build — Oops, My Alternator Bolt is a Bit Too Long

• CATEGORIES: Biscuit, Features This site contains affiliate links for which I may be compensated.

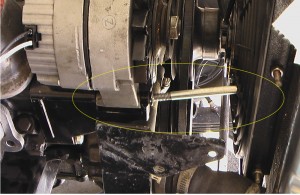
Well, the best laid plans… While puzzling through the charging system, I decided I needed to pull off my alternator so I could determine exactly which kind of alternator I had (Delco 10SI 63 Amp — Determine your GM alternator).  As I pulled out the long bottom bolt upon which the alternator pivots, I discovered a problem: There wasn’t enough room to pull out the bolt.  Even after clipping a hole in my electric radiator framework, I still ran directly into the radiator (see the pic to the right).  Fortunately, I discovered can undo the radiator, shift it somewhat, and then can pull out the bolt far enough to let the alternator slip away.  So, at least I have a method, though elegant it isn’t!

 
To Top

My Build — Altering My Headers

• CATEGORIES: Biscuit This site contains affiliate links for which I may be compensated.

I decided yesterday to redo my headers to give the muffler a better approach angle. After searching online about how to properly do this, I came up empty.  So, I made it up as I went.

The first step required removing the headers’ collectors, because I would have to bend each pipe individually to get the right angles.  Since I had previously sawed off the headers’ triangular connection piece, I was also going to have to reattach it.
Here’s the passenger side header with the collector sawed off.  Note how the pipes angle right into the front roll cage mount.  You can also see the bar I inserted into each pipe to help bend the heated pipe downwards.
Now, with the pipe inserted, I proceeded to heat up the lower pipe with Dad’s oxy/acet setup.  I tried my best to heat up each pipe at the bend and then bending the pipe downward carefully.  Below you can see two of the three pipes bent.

Continue reading

 
To Top

My Build — Progress: Wiring & Lights

• CATEGORIES: Biscuit, Features This site contains affiliate links for which I may be compensated.

Over the past couple of days I’ve continued to make progress.  I’ve got the headlights and taillights installed.  The headlights had an unexpected complication:  It turned out the modern 5 1/2″ bulb wouldn’t sit correctly into the 50 year old mount, so I had to encourage a better fit with my grinder.

NOTE:  One set of items I don’t seem to have are front turn signals.  I’d like to find a set of the cone turn signals that I believe were on a mid 60s Willys truck like these.  If you know of any, please let me know where I can find some.

With the lights attached, I started the wiring process.  My main goal is to make it as easy as possible to unattach the body for painting or repair purposes.  So, for example, after installing the taillights I ran a flexible tube along the body using some sheet metal screws so that all the rear lighting stayed attached to body.  Anytime wiring needs to cross from the body to the frame, engine, etc, I’m trying to bridge it with some kind of plug.  So far so good.

Continue reading